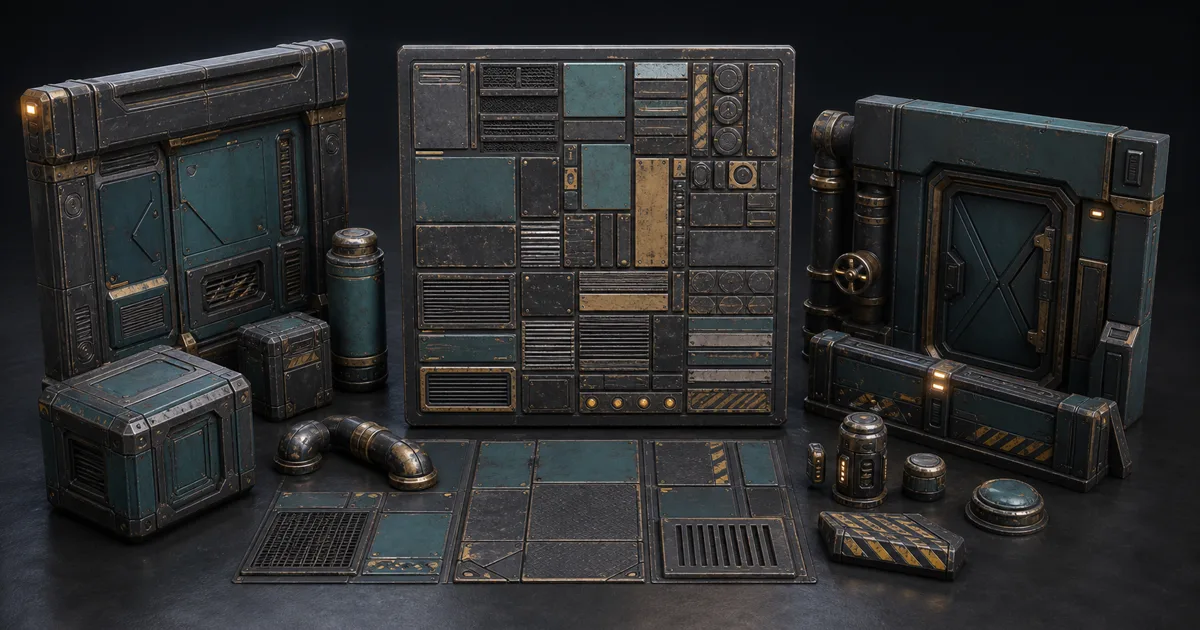
Count the material slots in a modular environment kit. Every crate, pipe, wall panel, switch box, and floor insert may have arrived with its own small texture set. The assets look harmless in isolation; together they create a procession of state changes, files, and memory allocations. A texture atlas replaces many of those separate images with one larger image containing several texture regions.
That is the attractive definition. The production definition includes the conditions: all maps must share one layout, UV islands need room for filtering, texel density must be planned, and the grouped assets must actually be rendered together often enough to repay the coordination. This guide covers the useful version of a texture atlas—not just tight packing, but a map family that stays clean through mipmaps, compression, engine import, and camera distance.
What a texture atlas actually changes
A texture atlas is a single image divided into regions used by multiple mesh parts or multiple meshes. Each UV island points at its assigned region. A complete PBR texture atlas repeats that exact layout across base colour, normal, roughness, metalness, ambient occlusion, and any other required maps.
The main gain is fewer texture bindings and, when meshes are compatible, fewer material changes or draw submissions. An atlas can also simplify delivery: one modular kit carries one named material family instead of fourteen tiny folders whose most descriptive filename is metal_final_3.
An atlas does not automatically reduce the total number of pixels. Four 1024 textures contain the same pixel count as one 2048 texture before compression and mip overhead. The saving comes from consolidation, improved batching opportunities, fewer tiny allocations, and using shared regions efficiently. If the atlas is mostly empty or every object needs a different shader, the larger image may merely centralize the waste.
Treat the material atlas as a rendering and ownership decision. It says which assets share resolution, shader features, update cadence, compression, and lifecycle. The pixels are the easy part.
Decide which assets belong in one texture atlas
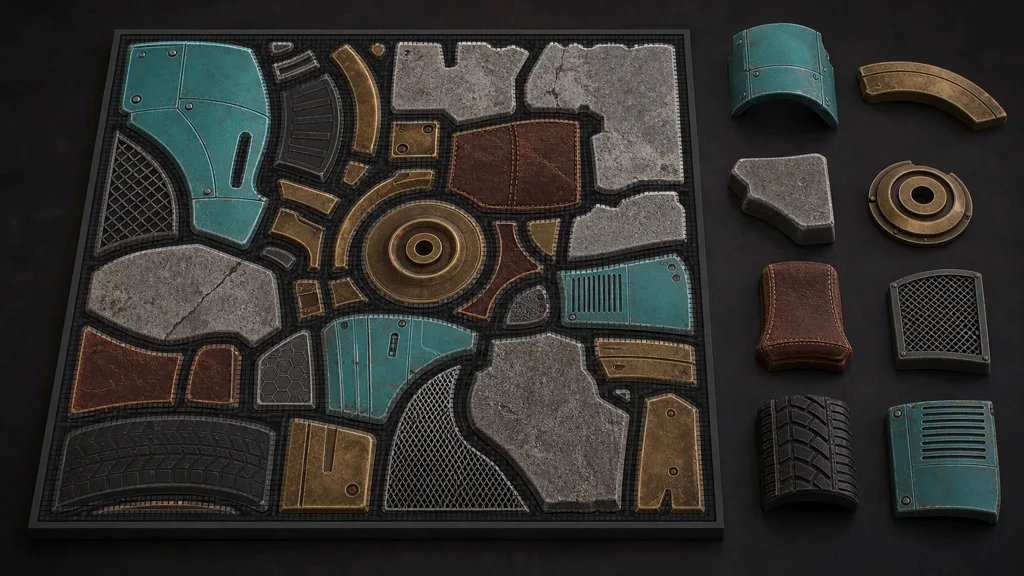
Good candidates for a texture atlas for games appear together, use the same shader model, need similar texel density, and are loaded or unloaded as one group. A modular corridor kit, a family of small workshop props, or one character with several equipment pieces can fit that pattern.
Keep assets separate when their runtime lives differ. A menu prop should not force a level-sized atlas into memory. A rare boss accessory should not sit inside the sheet used by every ordinary enemy. Transparent foliage, emissive signs, and opaque painted metal may also need different render states even if their UV islands fit neatly beside one another.
Before packing, record four things for each asset:
- Screen importance: how many pixels the asset covers at its closest approved camera.
- World scale: how much surface area each UV region represents.
- Material behavior: opaque, masked, transparent, emissive, two-sided, or otherwise specialized.
- Runtime group: which scene, character, biome, or modular kit loads it.
Group by those constraints first. Then pack. A perfectly filled atlas for assets that never coexist is tidy in the source file and expensive everywhere else.
Use consistent texture atlas UV mapping rules across the group. Large hero-facing panels can receive more area than hidden brackets, but identical bolts should not jump between sharp and blurry as the camera moves. The existing UV mapping guide covers island orientation, distortion, seams, and texel density in more detail.
Build every PBR texture atlas from the same layout
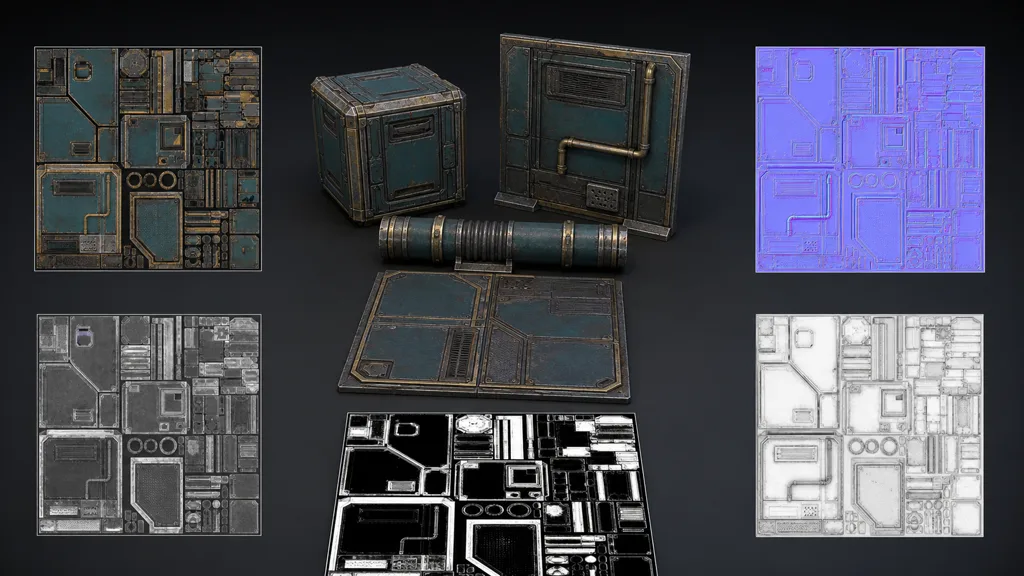
A PBR texture atlas is a family, not a lone base-colour sheet. Every output must use identical dimensions, island positions, rotations, padding, and crop. If the normal atlas shifts by two pixels while base colour does not, bevels and scratches detach from the features they describe. If the metalness atlas was repacked independently, painted panels may become conductive by accident.
Create one approved UV layout and reuse it everywhere. Bake or author all maps against that layout. Keep color maps and physical data maps separate during processing: base colour is normally stored as color data, while normal, roughness, metalness, AO, and height must not receive an sRGB conversion that bends their values.
Shared borders need the same semantic material on every map. A teal painted island should carry teal base colour, dielectric metalness, plausible paint roughness, matching surface normals, and restrained AO. Edge dilation must extend each map’s own values; copying the base-colour gutter into a normal map would be an impressively efficient way to create nonsense.
Channel packing can reduce the number of atlas files when the target shader expects it. Record the channel order beside the asset and keep it consistent. The PBR workflow guide explains map meaning and channel packing; the atlas changes where those values live, not what they mean.
How to make a texture atlas without painting into a corner
The safest answer to how to make a texture atlas is to make the constraints explicit before merging files:
- Define the runtime group. List the meshes that share a shader, scene lifecycle, and target platform.
- Choose an atlas resolution. Derive it from required texel density and total occupied surface area, then check the platform limit.
- Normalize UV scale. Set a common texel-density target and reserve extra area only where the camera or design earns it.
- Pack islands with real gutters. Leave enough room for edge dilation, mipmaps, compression blocks, and future edits.
- Bake the complete map family. Use the same layout for base colour, normal, roughness, metalness, AO, and optional maps.
- Dilate every island. Extend valid edge pixels into the gutter rather than leaving transparent, black, or unrelated colors nearby.
- Import and test in the target engine. Inspect several mip levels, camera distances, compression settings, and representative lighting.
Keep the source UV layout and packing recipe. A new prop added later should not require manually nudging every old island while hoping no bake cache remembers the previous coordinates. If the kit is expected to grow, reserve documented expansion space or version the atlas rather than repeatedly reshuffling shipped UVs.
Do not rotate normal-mapped islands unless the baker and tangent workflow handle that rotation correctly. Most modern pipelines can, but an unexplained diagonal dent is a poor time to discover that one export step could not.
Stop texture atlas bleeding with padding and mipmaps
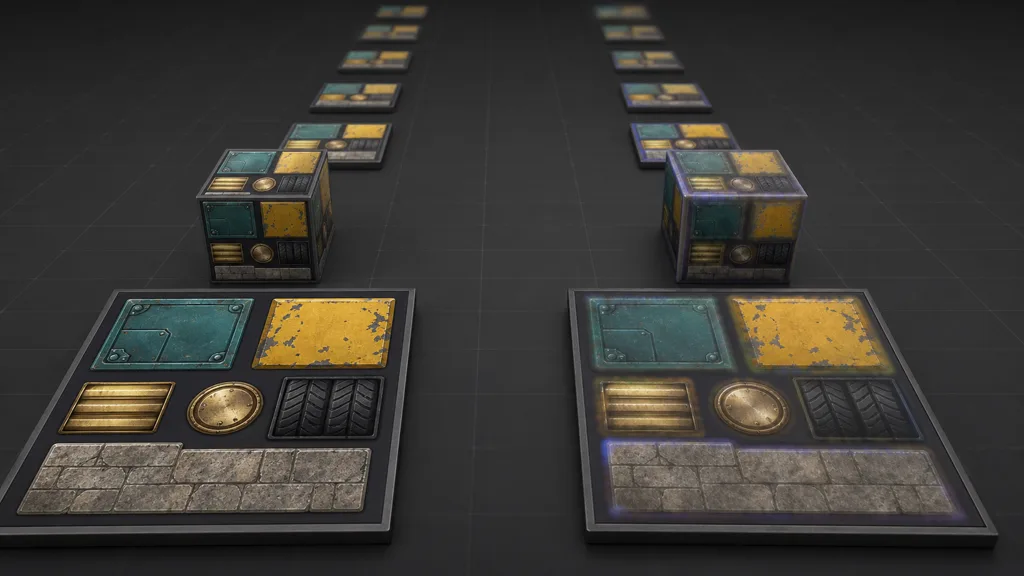
Texture atlas bleeding happens when filtering samples pixels outside the intended island. At full resolution the UV can look correct, yet bilinear or anisotropic filtering reads nearby colors at island edges. Texture atlas mipmaps make the problem more visible because each smaller mip combines larger neighborhoods of the original image. Eventually a narrow gutter collapses and two unrelated materials share a sample.
Padding has two parts. Empty spacing between UV islands prevents overlap, while dilation fills the border around each island with repeated valid edge pixels. Both matter. Empty black gutters still create dark halos; generous spacing without dilation simply gives the halo more black to consider.
There is no universal texture atlas padding number because the safe distance depends on atlas resolution, mip count, compression, anisotropy, UV scale, and the smallest mip the object will use. Start with the exporter’s tested preset, then inspect the actual mip chain. Sixteen pixels become eight, four, two, one, and then a philosophical disagreement between neighboring islands.
Compression adds another boundary. Block-compressed formats work in fixed pixel blocks, so align and pad small islands with those blocks in mind. Clamp sampling to the atlas and keep UVs inside the valid region, but do not expect clamp mode to protect internal island borders; those are still surrounded by other atlas pixels.
Texture atlas vs trim sheet vs texture array
These systems solve related but different problems. Choose by reuse pattern rather than by which one produced the neatest tutorial screenshot.
| System | Best fit | Main constraint |
|---|---|---|
| Texture atlas | Many unique or semi-unique regions rendered as one material family | UV islands need assigned regions and enough padding |
| Trim sheet | Modular assets reuse strips, edges, panels, and bands | UVs conform to reusable horizontal or vertical features |
| Texture array | Many same-sized textures selected by an index in the shader | Platform and shader support; slices share dimensions and format |
| Tileable material | Large surfaces repeat one coordinated map set | Repetition must be hidden and scale stays independent of unique detail |
In texture atlas vs trim sheet decisions, an atlas gives each part an address; a trim sheet gives many parts permission to reuse the same address. Trim sheets excel at repeated architectural edges and panels. Atlases suit unique signs, prop faces, small baked details, or a kit containing several distinct surface patches. Many environment pipelines combine both.
Read the trim sheets guide before committing architectural modules to unique atlas space. A doorframe repeated eighty times has made a persuasive case for reuse.
Budget a texture atlas for engines and runtime
An atlas should be measured in the shipped build, not the image editor. Check GPU format, mip overhead, streaming granularity, material count, batch behavior, and whether combining meshes is appropriate. A single 4096 atlas can cost more at runtime than several smaller textures if it remains resident for one tiny visible prop.
| Target | Atlas handoff to verify |
|---|---|
| Unity | Consistent material and import settings; sprite and 3D atlases are separate workflows; profile batching in the chosen render pipeline |
| Unreal Engine | Streaming and mip behavior, texture groups, UV precision, and whether virtual texturing better fits a large set |
| Godot | Material reuse, filter and mip settings, compression, and intended UV coordinates on imported meshes |
| Three.js | Download size, decoded GPU memory, color-space annotation, material reuse, and atlas cleanup |
For detailed imports, use the Unity guide, Unreal Engine guide, Godot guide, or Three.js materials guide. For deciding whether 1K, 2K, or 4K is justified, use the texture resolution guide.
Keep atlases within one color/data class and compression strategy. Combining base colour with roughness in a decorative four-quadrant image may look efficient, but the sampler cannot interpret one quadrant as sRGB and the next as linear data. Files are cheaper than incorrect shading.
Validate the texture atlas before shipping
Test the best texture atlas workflow 2026 can offer with ordinary hostile evidence: distance, movement, compression, and a busy scene. Use the final exported textures, not the uncompressed source.
- Inspect every UV seam under neutral and grazing light.
- Force lower mip levels and look for colored fringes, dark outlines, or normal-map contamination.
- Move the camera through the expected distance range and watch for sudden sharpness changes.
- Compare texel density across neighboring props and repeated modules.
- Profile material changes, texture memory, download or streaming cost, and draw submissions.
- Test the lowest supported quality setting and target hardware.
- Add one asset to the source atlas to prove the update process is repeatable.
Temporarily exaggerate gutter colors so sampling leaks become obvious. A subtle brown halo can survive several reviews; fluorescent evidence tends to receive prompt engineering attention of the non-AI kind.
An atlas succeeds when it makes the scene cheaper to submit and easier to own without making revisions fragile. If one changed prop forces a 4096 texture download, rebake, and retest across five maps, split the ownership group. Consolidation is a tool, not a loyalty oath.
FAQ
What is a texture atlas?
A texture atlas is one image containing several texture regions used by multiple mesh parts or meshes. Their UV coordinates point to assigned regions, allowing compatible assets to share a texture and often a material.
How do I make a texture atlas for a game?
Group assets with the same shader and runtime lifecycle, choose a resolution from texel-density needs, pack their UV islands with padding, and bake every PBR map from the same layout. Import the atlas with correct color space and compression, then inspect mip levels and camera distance in the target engine.
How much padding does a texture atlas need?
Padding depends on resolution, mip count, compression blocks, filtering, and the smallest mip that will be sampled. Use an exporter preset tested for the target, dilate valid edge pixels through the gutter, and inspect the generated mip chain rather than trusting one fixed number.
Why is my texture atlas bleeding at a distance?
Lower mip levels average wider pixel neighborhoods, so insufficient padding lets neighboring atlas regions contaminate one another. Increase island spacing and edge dilation, verify UVs stay inside their regions, and test the engine's final compression and filtering settings.
Should normal maps use the same texture atlas layout?
Yes. Normal, roughness, metalness, AO, height, and base colour atlases must share identical island positions and dimensions. Each map needs its own correct dilation values and data-map import settings.
Is a texture atlas better than a trim sheet?
Neither is universally better. A texture atlas stores several assigned regions, while a trim sheet encourages many UVs to reuse the same strips and panels; choose an atlas for distinct parts and a trim sheet for repeated architectural features.
Do texture atlases reduce draw calls?
They can reduce material changes and enable batching when the meshes share compatible shaders, render states, and submission rules. An atlas alone does not merge meshes or guarantee fewer draw calls, so verify the result with the engine profiler.
Try CraftPBR
CraftPBR can supply and organize the material content that feeds a PBR texture atlas:
- Text-to-PBR creates a coordinated material set from a physical surface description.
- Photo-to-PBR converts a controlled surface photo into aligned base colour, normal, roughness, height, AO, and metalness.
- Node workspace keeps masks, tiling, levels, layers, and material variations editable before atlas packing.
- Engine export prepares clear map roles, normal orientation, color/data handling, and channel packing for common targets.
- Free tier lets you build and test a complete material before assigning atlas space.
- CC0 output lets you use, modify, pack, and ship generated materials without attribution.
Share the image where it helps. Keep the material logic sharp enough to survive the sharing.