You know that feeling when you apply a perfect texture to a model and it comes out smeared, stretched, or split by an ugly line? That’s a UV mapping problem. UVs are the invisible bridge between a flat 2D texture and a 3D surface, and getting them right is the difference between a clean material and a mess.
UV mapping is one of those fundamentals everyone has to learn and nobody finds glamorous. This guide makes it click: what UVs actually are, why models get “unwrapped,” how seams and texel density work, and the problems that trip people up.
What UVs actually are
A 3D point has three coordinates: X, Y, Z. A texture is a 2D image, so its coordinates need different letters — U (horizontal) and V (vertical). UV mapping assigns every vertex of a model a (U, V) position on the flat texture, so the renderer knows exactly which pixel to paint on which part of the surface.
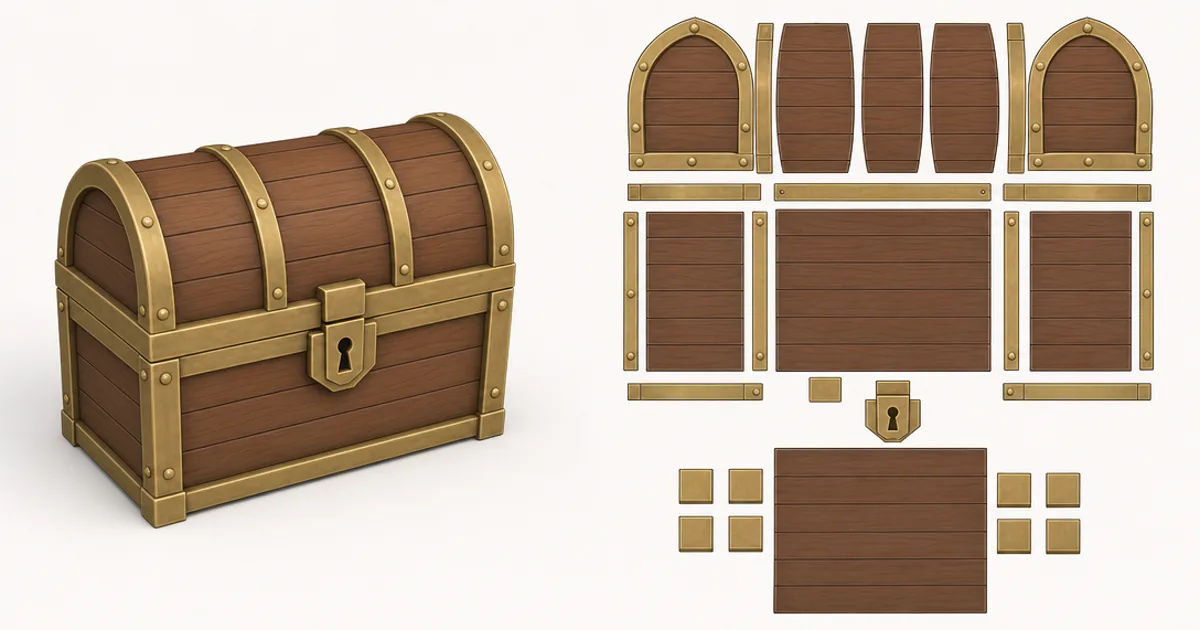
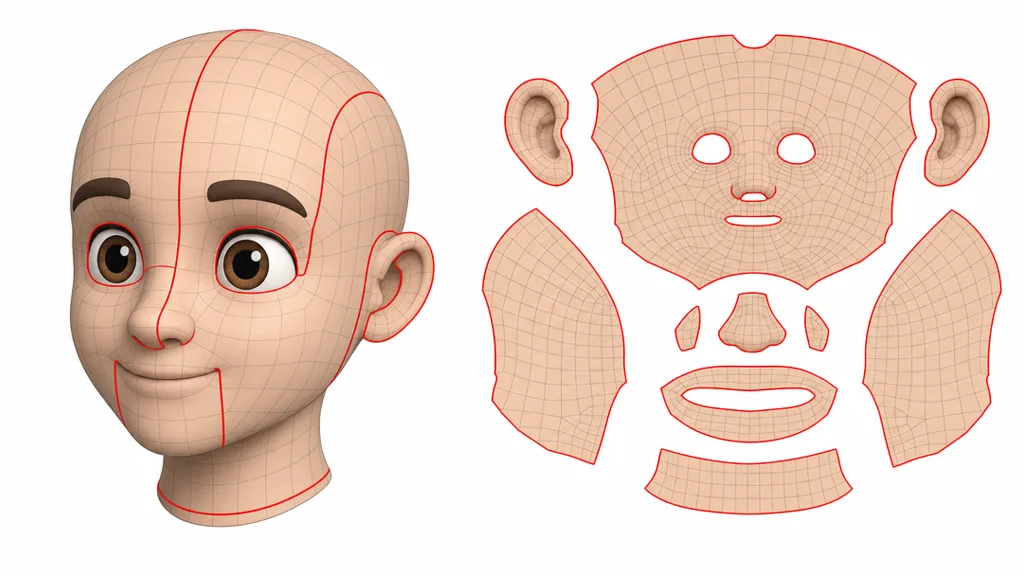
Think of it like skinning an orange and laying the peel flat, or unfolding a cardboard box. The 3D surface gets “unwrapped” into a flat 2D layout — the UV layout — that the texture is painted onto. When the model is rendered, that flat texture wraps back onto the 3D shape exactly.
Seams: where the surface gets cut
You can’t flatten a closed 3D surface without cutting it somewhere — try flattening a ball and it tears. Those deliberate cuts are seams. They’re unavoidable, so the craft is placing them where they won’t be seen (inside a sleeve, under an arm, along a natural edge) and making the texture line up across them so the join disappears.
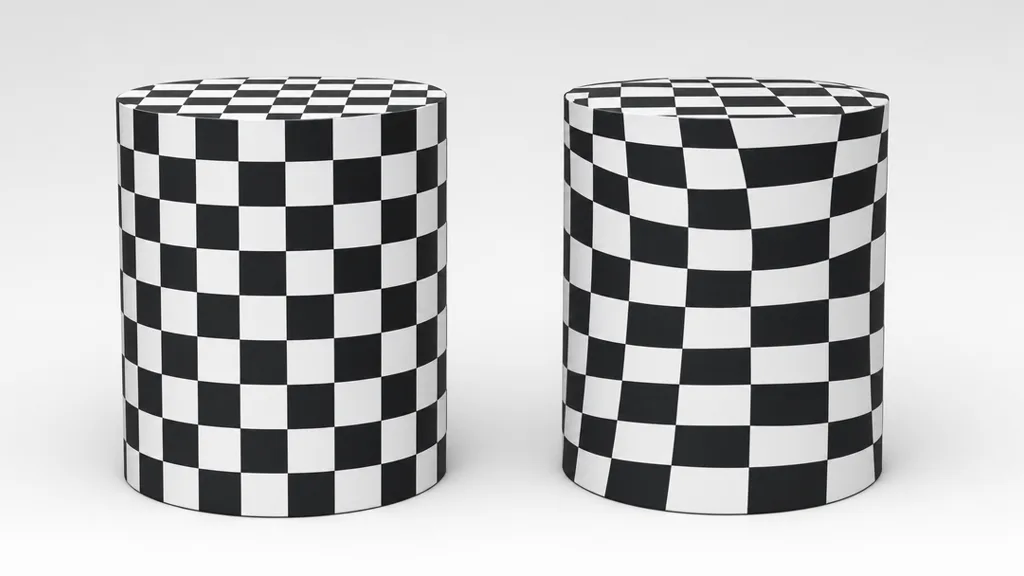
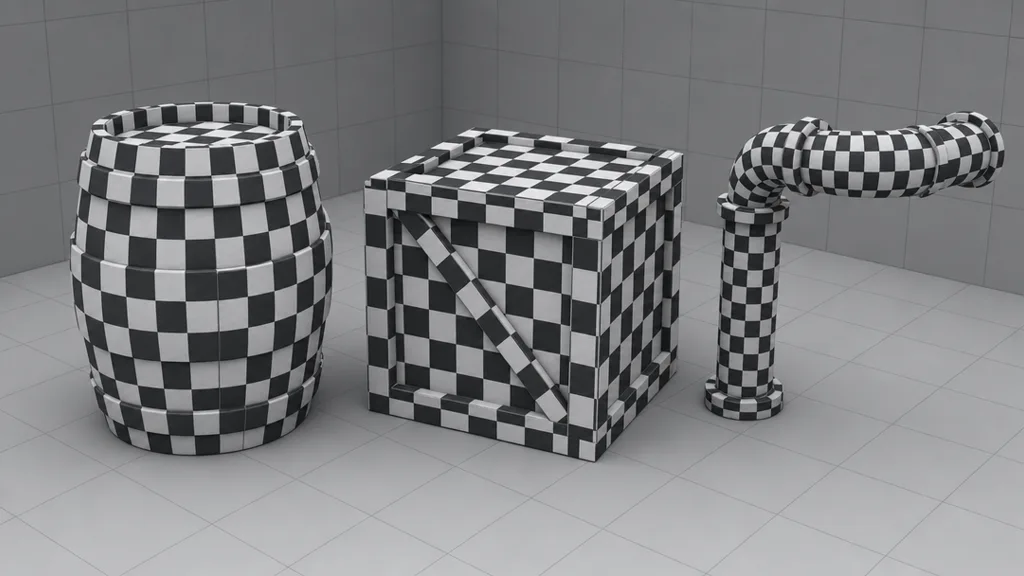
Distortion: the checker test
The classic way to check UVs is to apply a checker texture of even squares. If the squares stay square and the same size everywhere, the UVs are clean. If they stretch into rectangles, the texture is being distorted; if they shrink or grow, the texel density is uneven. Artists use the checker test constantly because distortion is invisible on a colour texture until it’s too late.
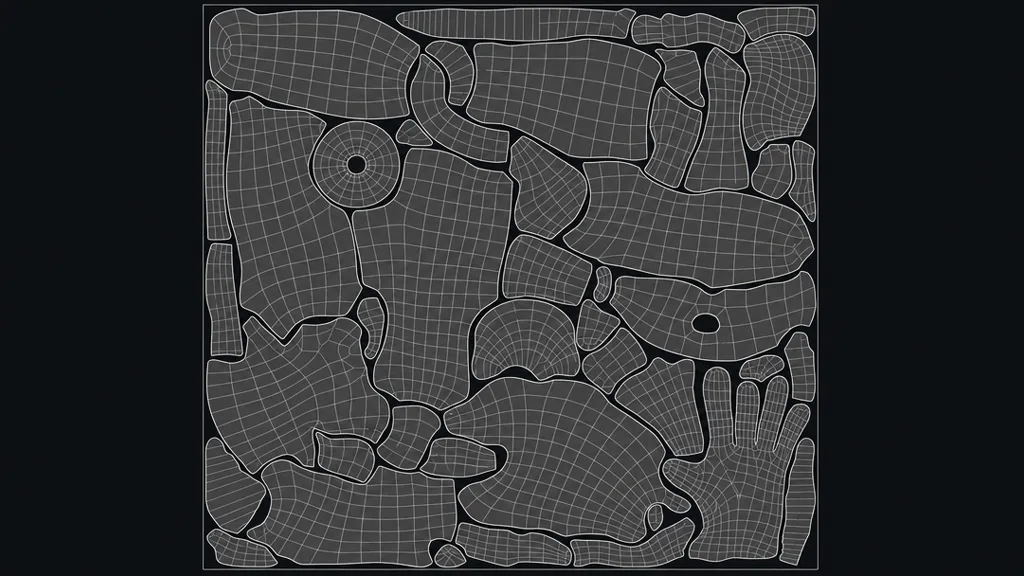
UV islands and packing
Each cut piece of the surface becomes a flat UV island. All the islands have to be arranged inside the UV space — the 0-to-1 square — without overlapping (unless you intend to reuse texture space). Packing them efficiently means more texture resolution per island and less wasted space, which is why good UV layouts look like a neatly fitted jigsaw.
Texel density: keeping detail even
Texel density is how many texture pixels cover a unit of surface. If one object’s islands are scaled bigger than another’s, it gets more texture detail and looks crisper — and the mismatch is jarring when they sit side by side. Consistent texel density across a scene keeps everything at the same fidelity, which is why artists scale UV islands to a shared standard.
Common UV problems
- Stretching — islands too small for their surface; the texture smears. Fix with more even unwrapping.
- Visible seams — placed somewhere obvious, or the texture doesn’t line up across them. Move them and match the texture.
- Inconsistent texel density — crisp and blurry surfaces next to each other. Scale islands to a shared standard.
- Overlapping UVs — two surfaces share texture space unintentionally, so painting one paints the other. Fine for mirrored/tiled, bad otherwise.
- Wasted space — islands packed loosely, throwing away resolution. Pack tighter.
When you barely need UVs: tileable materials
For unique hero assets, careful UV unwrapping is essential. But for large surfaces covered in a tileable material — floors, walls, terrain — simple box or planar UVs are often enough, because a seamless tileable texture repeats cleanly over them without needing perfectly laid-out islands. That’s why so much environment work pairs basic UVs with good tiling materials.
It’s also why AI-generated seamless textures are so practical: a model still needs UVs to receive a texture, but an AI text-to-texture material tiles over simple UVs without the painstaking island layout a unique texture demands. (For how textures themselves work once they’re on the model, see what is a 3D texture.)
How to unwrap a model, briefly
- Mark seams where the surface should be cut — natural edges, hidden areas.
- Unwrap — let the software project and flatten the faces into islands.
- Check with a checker — fix stretching and uneven density.
- Pack and scale — arrange islands in the 0-1 space at consistent texel density.
Blender, Maya, and 3ds Max all do this, with auto-unwrap for simple shapes and manual control for hero assets.
Key takeaways
- UV mapping unwraps a 3D surface flat so a 2D texture knows where to sit on it
- U and V are the 2D texture coordinates, since X, Y, Z are taken by 3D space
- Seams are unavoidable cuts; hide them and line the texture up across them
- Use the checker test to catch stretching and uneven texel density
- Pack UV islands tightly at consistent texel density for even detail and no wasted resolution
- Tileable materials need only simple UVs, which is why they pair so well with AI-generated seamless textures