You know that feeling when you can picture the exact surface you need — sun-bleached driftwood, oxidized copper with green patina creeping into the seams — but turning that picture in your head into actual texture maps means an afternoon in Photoshop and three browser tabs of reference photos? Text to texture AI deletes the afternoon. You describe the surface in plain English, and a model hands you back albedo, normal, roughness, AO, and metalness maps. That’s the whole pitch, and it actually works now.
What is text to texture AI and why should you care?
Text to texture AI is exactly what it says: you type a description of a surface, and a trained model produces a complete material from it. Not a flat image you then have to process — a real text to PBR material, with every map a modern engine expects.
The “PBR” part matters. A pretty picture of brick is useless to your renderer; it needs to know how rough the brick is, which way each bump faces, and where the crevices self-shadow. Prompt-based texture creation done right gives you all of that from one sentence:
- Albedo — the base colour, with no baked lighting
- Normal — surface direction, faking bumps without geometry
- Roughness — how sharp or blurry reflections are
- AO — contact shadows in the cracks
- Metalness — metal or not, no fence-sitting
If you make 3D anything in 2026 — games, archviz, product renders, VTuber sets — this is the fastest path from idea to usable surface that exists. You should care because your time is worth more than hand-painting a roughness map at midnight.
Why the old texturing workflow makes you want to quit
Here’s how making one material used to go:
- Hunt for reference photos that almost match what you want
- Discover the lighting is baked into every photo, so you spend an hour delighting
- Hand-paint or filter a normal map and squint at it under a test light
- Guess roughness values like you’re appraising minerals — is wet asphalt 0.4 or 0.6?
- Paint an AO map while your will to live quietly exits
- Tile it. Find the seams. Fight the seams. Lose to the seams.
- Import to engine. It looks wrong. Tweak. Re-export. Repeat until deadline
One material. Half a day, easily. And a single scene needs dozens. This is why so many indie projects ship with three textures stretched across the entire game — not laziness, just math. Nobody has 200 afternoons.
How does text to texture AI work?
The mechanism is less mysterious than it looks. A model trained on enormous amounts of material data learns the relationships between how a surface looks and how it physically behaves. When you write “cracked desert clay, bone dry,” it doesn’t just draw cracks — it knows dry clay is high-roughness, that the cracks recede (so they go darker in AO and deeper in the normal), and that none of it is metallic.
So a good text to material AI doesn’t generate one image and fake the rest. It produces a coherent set where the maps agree with each other: the bumps in the normal line up with the dark lines in the albedo, and the roughness shifts exactly where the surface is worn. You describe intent; the model fills in the physics.
The honest question everyone asks: does it actually look good? For the overwhelming majority of game and archviz work — environment surfaces, props, set dressing, kitbash material libraries — you genuinely cannot tell it apart from hand-authored work. The gap that remains is on signature hero assets with very specific art direction, and even that closes a little every month.
Photo to PBR: when you have a reference instead of words
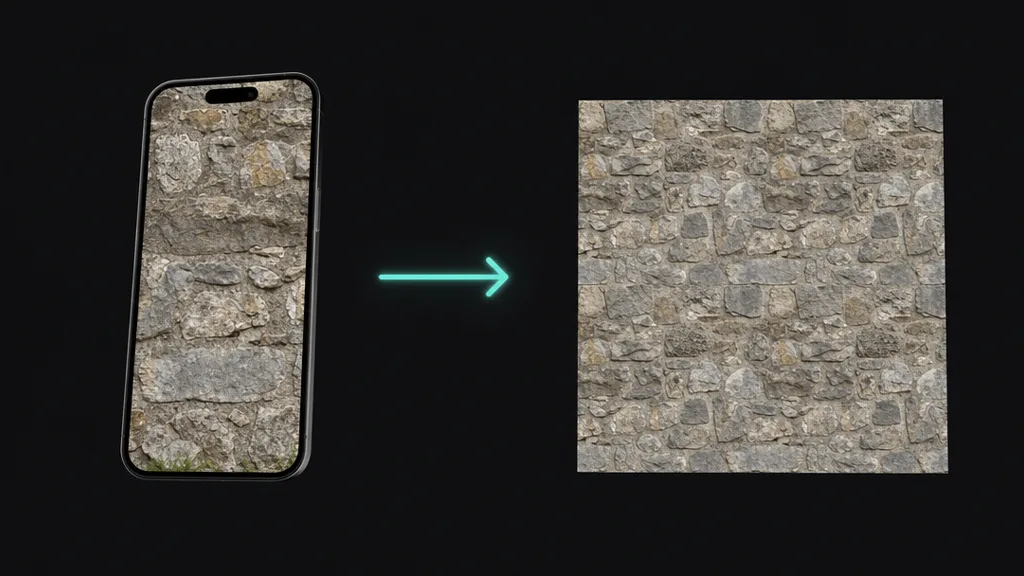
Text is great until the thing in your head is a specific surface you walked past this morning. That’s where the photo path comes in: upload a reference, and the same pipeline runs in reverse — perspective correction, delighting, edge synthesis so it tiles, then the PBR split. Words for the surfaces you imagine, photos for the surfaces you find. Most real projects use both, and a tool like CraftPBR lets you mix them in the same library without switching apps. (If seams are your enemy, the seamless tileable textures guide goes deep on why they happen.)
The thing most text to texture tools get wrong
Here’s the trap to watch for: plenty of tools take your prompt, generate a single colour image, and then run a generic filter to “derive” the other maps. The result looks fine as a thumbnail and falls apart on a real surface.
The tell is the roughness map. If it’s just a desaturated copy of the albedo, the tool didn’t understand your material — it guessed. Real AI texture maps have roughness that reflects actual wear: smoother where a floor is polished by foot traffic, rougher where it’s scuffed. The normal map should carry genuine surface direction, not an embossed version of the colour. When you’re evaluating any text to texture workflow, generate something with mixed materials — say “painted metal with rust bleeding through chipped paint” — and check whether the rust is rougher than the paint. If every map looks like a tinted version of the same picture, keep walking.
What separates a good text to texture AI from a bad one
- All five maps, properly derived. Not albedo plus three filters. If the roughness doesn’t respond to the material you described, the tool is faking it.
- Prompt understanding, not keyword matching. “Mossy” should add moss in the damp recesses, not tint the whole thing green. Test it with a compound description and see if it reasons about where things go.
- Tiling that holds up. A material you can’t repeat is a poster, not a texture. Edges must wrap by default.
- Resolution that survives a close-up. Zoom in. If a “4K” output is a blurry 512 in a trench coat, you’ll find out during your hero shot, which is the worst time.
- You own the output. Check the license. CC0 or full commercial rights means no lawyer emails about the cobblestone in your Steam game.
Free vs. paid: an honest look
Free libraries — Poly Haven, ambientCG — are run by genuine heroes and the quality is excellent. The ceiling is selection: you get what already exists. The moment you need“alien chitin plating with bioluminescent veins,” scrolling stops being a strategy.
Free AI tiers — most AI material creator for games tools give you a handful of generations to judge quality. Fair. One red flag: if the free tier watermarks the output, the tool doesn’t trust itself. Move on.
Paid tools — the arithmetic is simple. If you need 40 materials this week, a subscription pays for itself before lunch on day one. If a tool saves you even an hour a week versus manual authoring, it’s cheaper than your coffee and far better for your blood pressure.
Engine setup: Unity, Unreal, Blender, Godot

Whatever produced your maps, wiring them up is the same five connections everywhere:
- Unity — URP/HDRP Lit material. Albedo → Base Map, Normal → Normal Map (set the import type or Unity nags you), Roughness → Smoothness (invert it — Unity stores smoothness, the opposite of roughness), AO → Occlusion, Metalness → Metallic. Set Wrap Mode to Repeat for tiling.
- Unreal — Material Editor, drop Texture Sample nodes, wire to the matching pins. Unreal speaks standard PBR, so there’s no translation tax. Multiply your TexCoord by a scalar parameter to tile all maps together.
- Blender — Principled BSDF. Route each map to its input; the normal goes through a Normal Map node first. Set every Image Texture’s colour space to Non-Color except the albedo. Node Wrangler’s Ctrl+Shift+T builds the whole rig in one shortcut.
- Godot — StandardMaterial3D, assign maps in the inspector, done. Texture repeat is on by default in Godot 4. We love Godot. Don’t @ me.
Where text to texture AI is heading
The prompts are getting conversational. Instead of engineering one perfect description, you’ll iterate out loud — “make it wetter,” “more wear on the corners,” “less saturated” — and watch the material update. Some of that is already here.
The bigger shift is real-time. We’re approaching previews that update as you type, which turns texturing from a render-and-wait loop into something closer to sketching. Pair that with multi-material blending — drop a “rain” influence onto stone and get pooling, darkening, and specular shifts for free — and the best text to texture AI in 2026 stops being a generator you visit and becomes a surface you sculpt with sentences. The distance between “I need a material that looks like ___” and having it is collapsing toward zero.
Key takeaways
- Text to texture AI turns a written prompt into a full PBR material set in seconds
- The maps must be derived to physically agree — not one image filtered into fakes
- The roughness map is the tell: if it’s a tinted albedo, the tool guessed
- For most game and archviz work, the output is indistinguishable from hand-authored
- Good prompts name the substance, the wear, and the finish