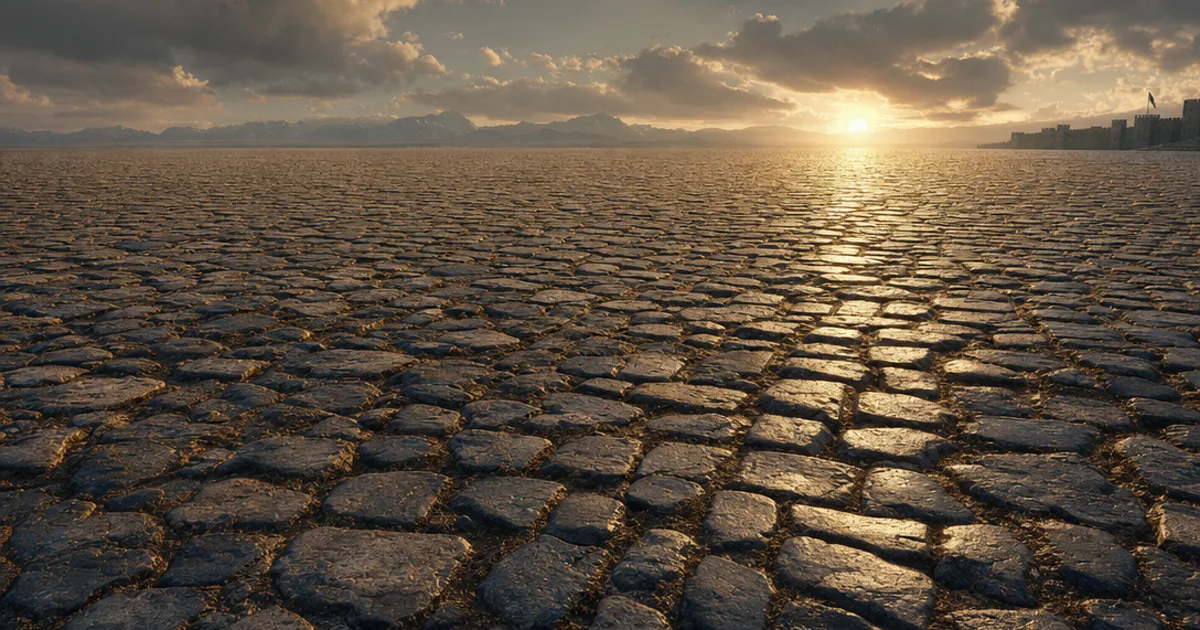
You know that feeling when you texture a huge terrain, hit play, and your beautiful dirt path has a visible grid stamped across it like graph paper? Every edge of every tile, screaming. That’s what happens when textures aren’t truly seamless — and fixing it by hand is one of the most tedious jobs in 3D. Here’s how seamless tileable textures actually work, why they go wrong, and how to get ones that don’t.
Seamless vs tileable — not the same thing
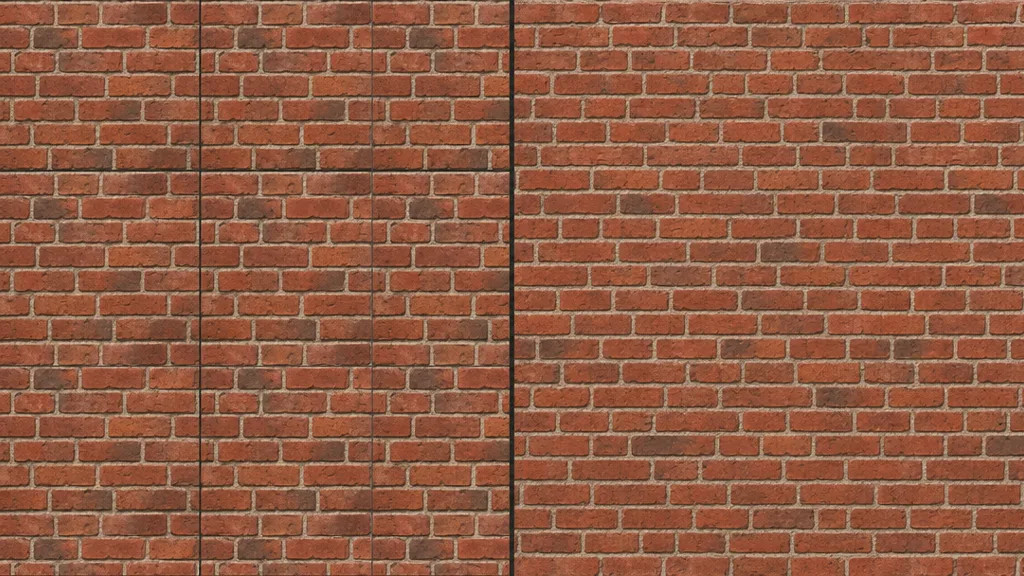
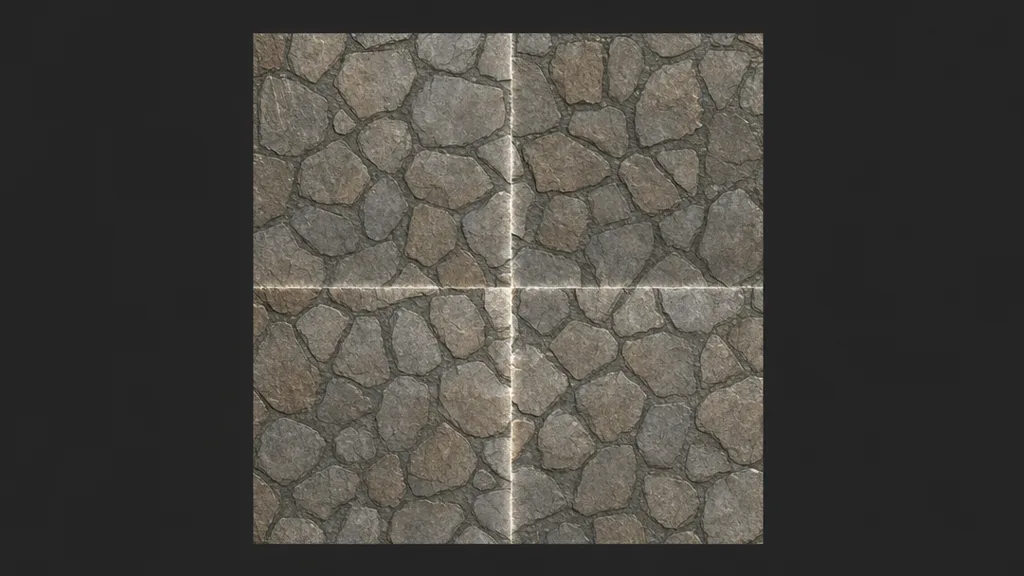
A tileable texture repeats across a surface — the engine wraps it at the UV edges so one image covers a stadium floor. A seamless texture does that without you noticing. Left edge flows into right edge, top into bottom, with no hard line where the image restarts.
Most textures are tileable by default — engines will happily repeat anything. Almost none are seamless by accident. Take a photo of brick, tile it, and you get:
- A hard colour break at every tile border, because the left side of your photo was lit differently than the right
- Half a brick on one edge meeting two-thirds of a brick on the other
- Normal map discontinuities that catch light along the seam like a glowing wire
And for tileable PBR materials, it’s not just the colour. All five maps — albedo, normal, roughness, AO, metalness — have to wrap. A seamless albedo with a non-seamless normal map still gives you a glowing seam under directional light. Most tutorials forget to mention that part.
Why textures have visible seams in the first place
Three culprits, usually all at once:
- Uneven lighting. Real-world surfaces are never lit evenly. Your photo is brighter on one side, and when the bright edge tiles against the dark edge — instant line. This is why delighting matters.
- Non-repeating features. A crack runs off the right edge of the image and doesn’t continue on the left. The pattern literally doesn’t connect.
- Perspective and lens distortion. Your phone photo is slightly tilted and barrel-distorted. The “horizontal” mortar lines aren’t horizontal, so they can’t line up when wrapped.
Fix one and the other two will still betray you. This is why “how to make a texture seamless” has been a top search query for two decades — the problem is genuinely annoying.
The old way: offset filter, clone stamp, despair
The traditional fix, in all its glory:
- Open the texture in Photoshop or GIMP
- Run Offset at half the width and height — this drags the seams into the centre as a big ugly cross
- Clone-stamp and heal-brush the cross until it disappears
- Tile it to check. Find the spot you missed. Go back a step.
- Realise the lighting gradient is still there, so the tiled version pulses bright-dark-bright across the floor
- Now do all of this again for the normal map, roughness map, and AO map — and pray your clone stamps land in the same places, or the maps stop agreeing with each other
That last step is the killer. Hand-fixing seams on a single albedo is tedious. Hand-fixing five maps consistently is a part-time job. One material, an hour or two if you’re good. Forty materials per project. You can see where this is going.
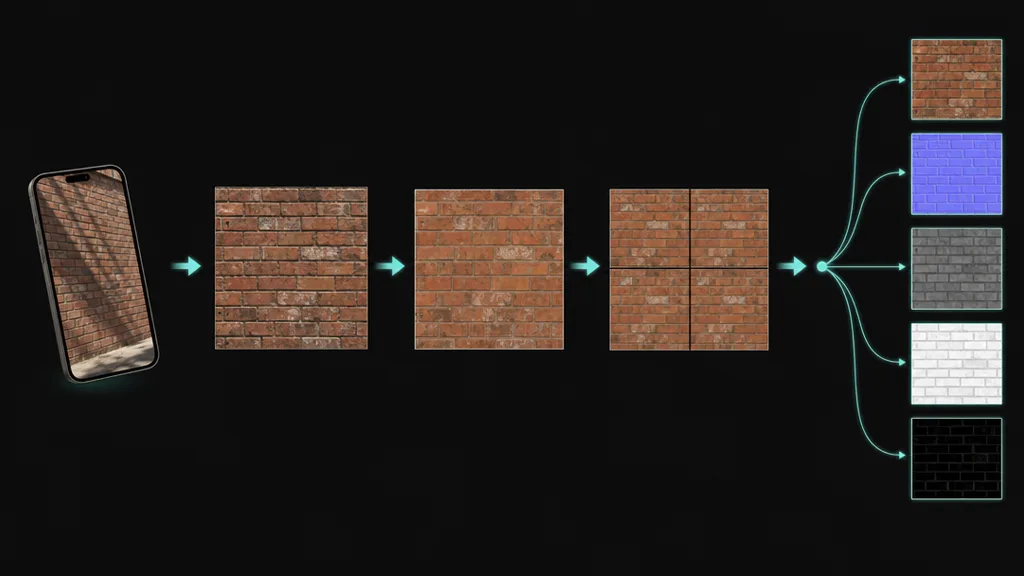
How AI makes textures seamless (properly)
Modern tools treat seamlessness as a generation constraint, not a post-process. Instead of patching seams after the fact, the texture is created — or reconstructed — so the edges mathematically wrap. The good ones run a pipeline:
- Perspective correction — straightens your tilted phone shot so patterns can actually align
- Delighting — removes the lighting gradient, which kills the bright-dark pulsing across tiles
- Edge-aware synthesis — regenerates the borders so features flow continuously across the wrap, instead of clone-stamping over the break
- Consistent map extraction — derives the normal, roughness, and AO from the already-seamless surface, so all five maps wrap identically
That fourth step is the one that separates real tools from toys. If a tool makes the albedo seamless and then runs a generic normal-from-height filter on the original photo, the maps disagree at the edges and your seam comes back as a lighting artifact. A proper photo-to-PBR workflow does the seam fix before the PBR split, once, upstream. This is how CraftPBR does it — every crafted material tiles by default, all maps, no checkbox to forget.
The second problem nobody warns you about: repetition
Here’s the trap: you finally get a perfectly seamless texture, tile it across a large floor, and it still looks wrong. No seams — but your eye picks up that one distinctive dark stone repeating every two metres in a perfect grid. Seamless ≠ invisible. Texture tiling artifacts come in two flavours, and you’ve only fixed the first.
Breaking up texture repetition is its own discipline:
- Keep features homogeneous. When crafting or choosing a texture, avoid one high-contrast “celebrity” feature — a unique stain, a single bright pebble. That’s the thing your eye will track across fifty tiles.
- Blend two variants. Tile two versions of the same material with a noise mask between them. Unreal and Unity shader graphs do this in a handful of nodes.
- Rotate or offset per-tile. Techniques like texture bombing or stochastic tiling sample the texture at randomised offsets. Costs a few shader instructions, kills the grid completely.
- Layer macro variation. A low-frequency tint or dirt overlay across the whole surface breaks the mathematical perfection that screams “tiled.”
A good crafter helps here too — ask for “even, uniform cobblestone without standout stones” and get a texture that’s designed to hide its own repetition.
What separates good seamless texture tools from bad ones
- Seamless by default, not by toggle. If seamlessness is an optional checkbox, you will forget it exactly once per project, and you’ll discover it after lightmap baking.
- All maps wrap, not just albedo. Tile the normal map and look at it under raking light. This is where the cheap tools fail. (Yes, we’ve shipped a glowing seam to production. Still mad.)
- Real synthesis, not mirroring. Some tools “fix” seams by mirroring the image at the edges. Congratulations, your brick wall is now a Rorschach test. Mirrored textures have an instantly recognisable butterfly pattern — arguably worse than the seam.
- Survives 4× tiling at full resolution. Tile it 4×4, zoom in on the corners where four tiles meet. Corner intersections are where lazy edge-blending falls apart.
Making tiling work in Unity, Unreal, Blender, Godot
- Unity — On the material, set Tiling on the Base Map (e.g. 4×4 for a large floor). Make sure the texture’s Wrap Mode is Repeat, not Clamp — Clamp smears the edge pixels and people mistake it for a broken texture. URP/HDRP Lit materials apply the same tiling to all maps automatically.
- Unreal — Multiply your TexCoord node by a scalar parameter and feed it into every Texture Sample. One parameter drives tiling for all five maps, so they can never drift apart. For big terrains, add a second sample at a different scale and blend — instant repetition breakup.
- Blender — Add a Mapping node between Texture Coordinate (UV) and your Image Texture nodes, and set Scale to your tile count. Set every Image Texture’s extension to Repeat. Ctrl+Shift+T with Node Wrangler sets the whole PBR rig up in one shortcut, because Blender.
- Godot — On a StandardMaterial3D, set UV1 → Scale to tile. Texture repeat is on by default in Godot 4 — one of those small mercies. We love Godot. Don’t @ me.
Where seamless texturing is heading
The endgame is textures that stop being rectangles. Stochastic and histogram-preserving tiling are moving from SIGGRAPH papers into stock engine features, which means the renderer hides repetition for you at runtime. On the authoring side, crafters are starting to produce sets of matched variants — four interchangeable versions of the same cobblestone that tile against each other — which is Wang tiles finally becoming practical without a PhD.
Short version: the best way to make seamless textures in 2026 is to never make them seamless yourself. Craft them that way, and spend the saved hours on the parts of your game that players actually praise.
Key takeaways
- Tileable means it repeats; seamless means you can’t tell — and you need both
- Seams come from uneven lighting, non-connecting features, and perspective distortion
- All five PBR maps must wrap identically — fix seams before map extraction, not after
- Seamless still isn’t enough: break up repetition with variants, noise blending, or stochastic tiling
- AI crafting makes textures seamless by default — the offset filter can finally rest