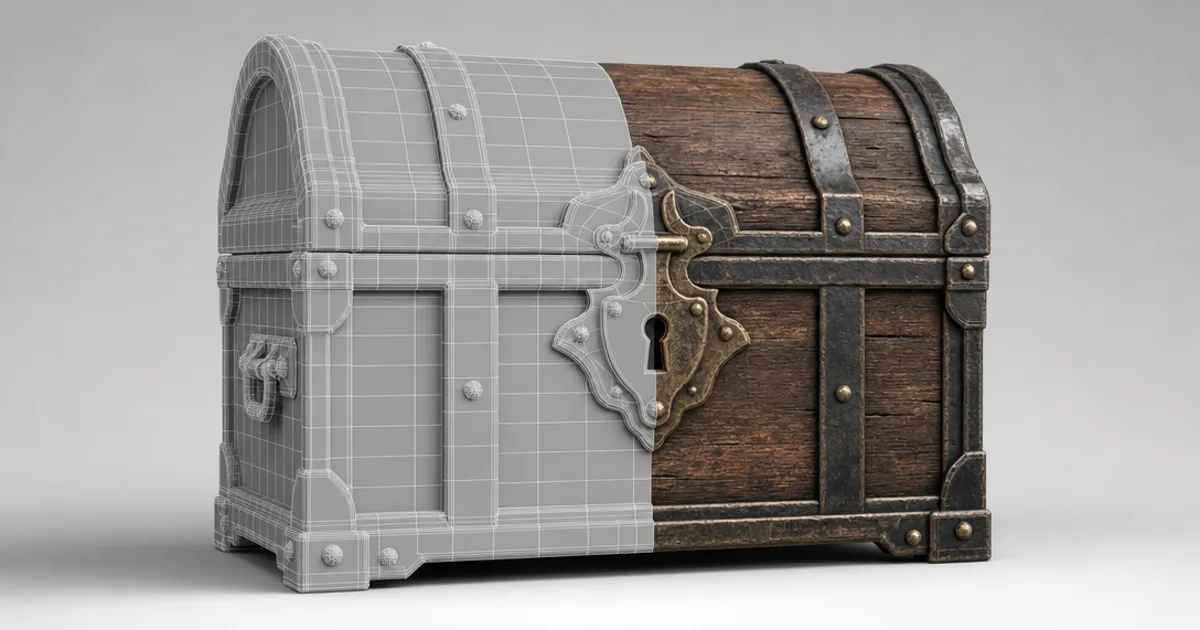
You know that feeling when you import a fresh 3D model and it’s just a flat grey blob? A 3D texture is what turns that blob into wood, rusted steel, or mossy stone. It’s an image wrapped onto the model’s surface — the skin over the shape — and in modern pipelines it’s not one image but a set of them working together.
If you’re new to 3D, the words pile up fast: texture, material, map, UV, PBR. This guide untangles them in plain English: what a 3D texture actually is, the maps it’s made of, how it sticks to a model, and how to make your own.
Texture vs material: what’s the difference?
People use the words interchangeably, but they’re not the same:
- A texture is a single image map — the colour, or the surface bumps, or the shininess.
- A material is the full recipe — several textures bundled with settings — that defines a complete surface.
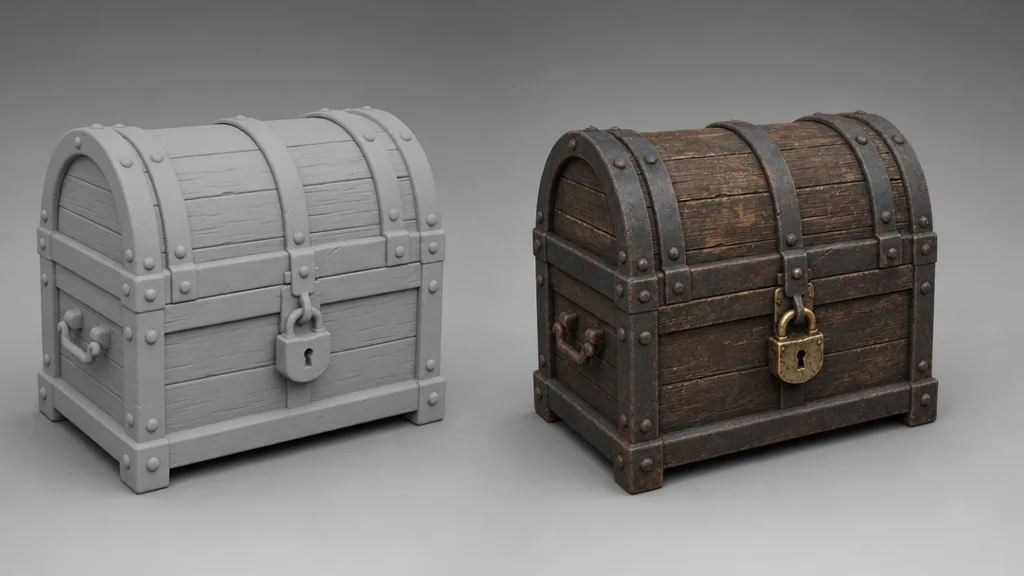
“Weathered oak” is a material. The colour map, normal map, and roughness map inside it are its textures. You apply materials to models; textures are the ingredients that make them up.
The core 3D texture maps
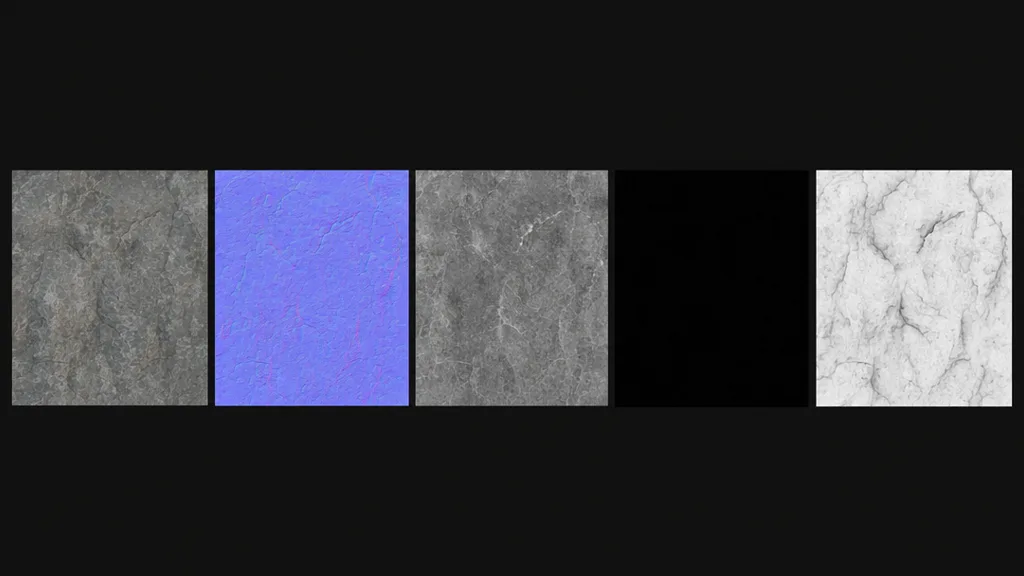
Modern 3D textures follow the PBR (physically based rendering) standard, which splits a surface into separate maps so it reacts to light correctly. The core set:
- Base colour (albedo) — the flat surface colour with no lighting baked in.
- Normal — fakes fine bumps and grooves without adding geometry. (See what a normal map is.)
- Roughness — how sharp or blurry reflections are: mirror to matte. (See what a roughness map is.)
- Metalness — marks which pixels are bare metal versus everything else.
- Ambient occlusion — soft contact shadow in cracks and crevices.
Some materials add a height/displacement map for real depth and an emissive map for parts that glow. Together these maps are what people mean by a modern “3D texture.”
How textures stick to a model: UV mapping
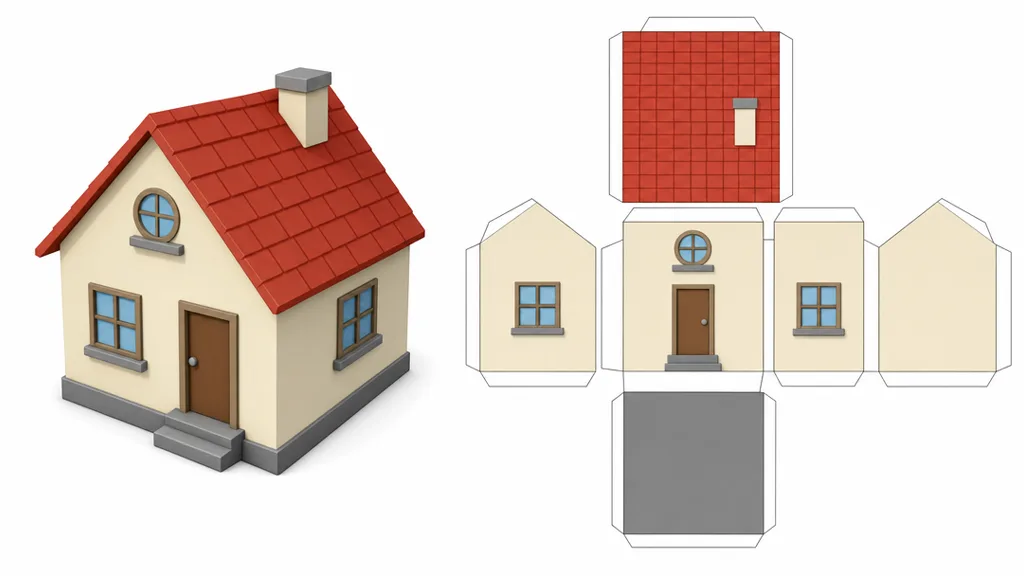
A texture is a flat 2D image, but a model is a 3D shape — so how does the image know where to go? Through UV mapping. The model’s surface is unwrapped flat into 2D coordinates (called U and V), like peeling a paper model apart and laying it out. Every point on the mesh maps to a spot on the texture image.
Good UVs mean the texture sits cleanly with no stretching or odd seams. Bad UVs cause smearing, pinching, and visible joins — which is why a great texture can still look wrong on a poorly unwrapped model.
Tiling and seamless textures
You can’t paint a unique texture across an entire floor or wall — it would need an enormous image. Instead you use a tileable texture: a small image that repeats with no visible edges, so one tile covers a huge surface. A seamless tileable texture wraps perfectly in every direction, which is how a 2K tile can cover a whole building.
Resolution and texel density
Texture resolution should match how close the camera gets to the surface:
- 1K (1024×1024) — mobile, background props, distant objects.
- 2K (2048×2048) — the modern baseline for most game and archviz assets.
- 4K (4096×4096) — hero objects seen at camera-near distances.
The goal is consistent texel density — roughly the same number of texture pixels per unit of surface across your scene — so nothing looks suddenly blurry next to something crisp.
Four ways to make 3D textures
- Paint them — hand-paint onto the model in a texturing app for full control.
- From a photo — convert a surface photo into PBR maps with a converter tool.
- Procedurally — build them from node graphs that generate detail mathematically.
- With AI — describe the surface in plain language and generate the full set.
That last route is the fastest for most surfaces. CraftPBR turns a text prompt (“mossy dungeon stone”) or a photo into a complete, tileable PBR texture set — colour, normal, roughness, metalness, AO — in about a minute, exported for your engine. It’s the same text to texture workflow studios are adopting.
Where 3D textures get used
Everywhere there’s a 3D surface: game characters and environments, archviz interiors, product renders, film VFX, VR/AR, and web 3D. The same PBR texture set drops into Unity, Unreal, Blender, Godot, and Three.js and looks consistent, because they all read the maps the same way.
Key takeaways
- A 3D texture is an image wrapped onto a model’s surface — the skin over the shape
- A texture is one map; a material is the full bundle of maps plus settings
- The core PBR set is base colour, normal, roughness, metalness, and ambient occlusion
- UV mapping unwraps the 3D surface flat so the texture knows where to go
- Tileable textures repeat to cover big surfaces; resolution should match camera distance
- You can paint, photo-convert, procedurally build, or AI-generate them — AI is the fastest for most surfaces