You know that feeling when a material looks perfect in one program and plastic in another? Before PBR, that was normal — every renderer faked light differently. The PBR workflowfixed it by agreeing on the physics: describe a surface as a set of real properties, and it looks the same everywhere.
PBR isn’t one button — it’s a workflow, a way of authoring materials as separate maps that each mean something physical. This guide walks the whole thing: the two workflow flavours, the standard map set, the pipeline from model to export, and the engine quirks that trip people up.
What “PBR workflow” actually means
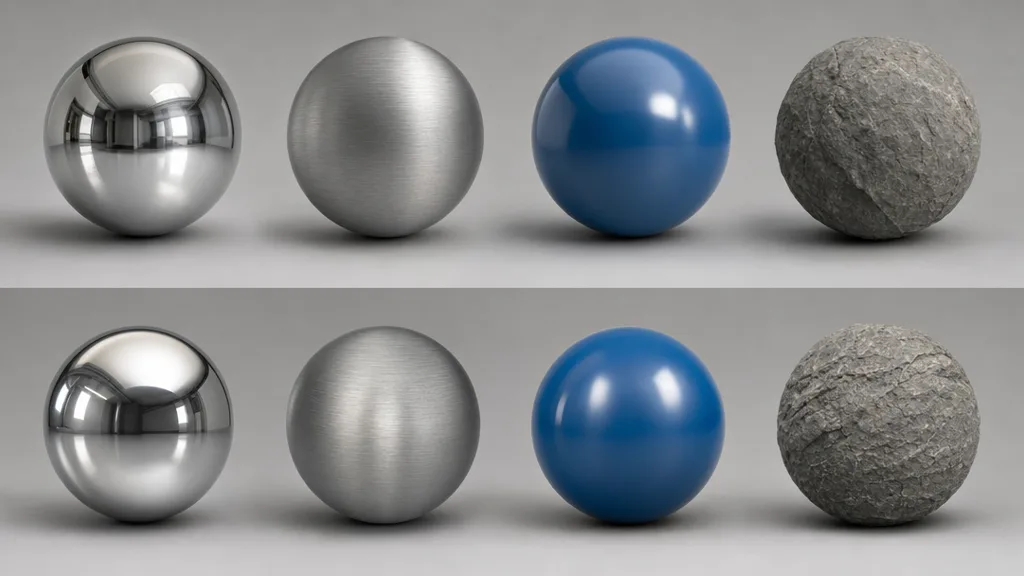
Physically based rendering models how light really behaves — energy conservation, Fresnel reflection, microsurface roughness. The workflow is how you feed it: instead of painting a single texture that bakes in colour, shadow, and shine, you author separate maps for each property. The colour goes in one map, the shininess in another, the bumps in a third. The renderer does the lighting. (For the concept itself, see what is PBR.)
Metalness vs specular: the two flavours
There are two standard PBR workflows, and most pipelines pick one:
- Metal/Rough (metalness) — a greyscale metalness map flags metal versus non-metal, and the engine derives reflectance from the base colour. Simpler, less memory, harder to get wrong. The modern default in Unity, Unreal, Blender, and Godot.
- Spec/Gloss (specular) — an RGB specular map stores reflectance colour directly, plus a glossiness map. More direct control, more memory, more room for physically impossible values.
Both describe the same physics and can match each other. Metalness won the standardisation battle because it’s leaner and more foolproof.
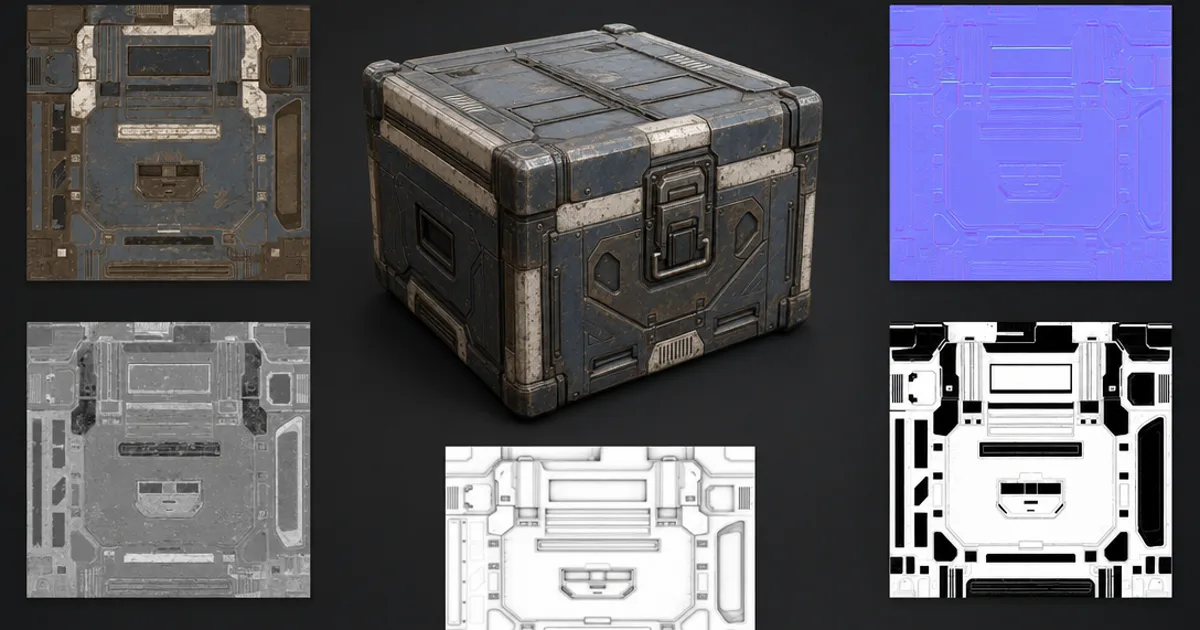
The standard PBR map set
A PBR material is a stack of maps, each controlling one property:
- Albedo / base colour — the pure surface colour, no lighting.
- Normal — fakes fine surface detail without geometry.
- Roughness — how sharp or blurry reflections are.
- Metalness — flags bare metal versus everything else.
- Ambient occlusion — soft contact shadow in crevices.
- Height / displacement — real depth for silhouettes (optional).
Some add emissive (glow) and opacity (transparency). Get this set right and the material reads correctly under any lighting.
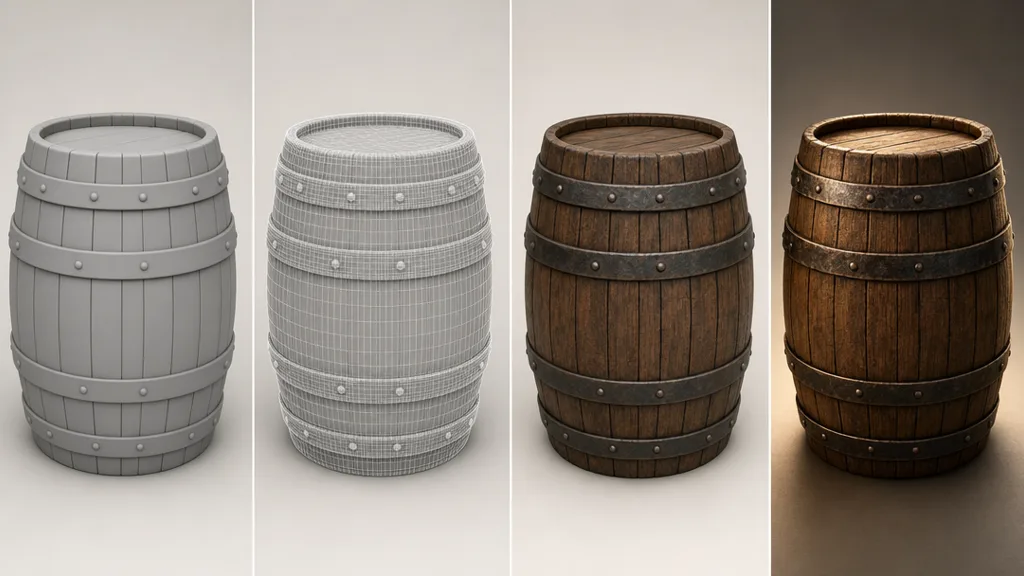
The texturing pipeline, step by step
- Model the asset (and often a high-poly version for detail).
- UV unwrap — lay the surface out flat with clean, non-overlapping UVs.
- Bake — project high-poly detail into normal, AO, and curvature maps on the low-poly.
- Texture — build up the surface with materials, masks, and wear, generating the full map set.
- Export — output the maps in your engine’s expected format, normal convention, and packing.
It’s a real craft, and for hero assets it’s worth every step. For the other 90% of surfaces — the floors, walls, props — it’s a lot of work for a tileable material.
Texel density and resolution
Keep texel density — texture pixels per unit of surface — consistent across a scene, or some objects look crisp next to blurry neighbours. Common targets are 1K for mobile and props, 2K for most assets, and 4K for hero close-ups. Tileable materials can be smaller because they repeat.
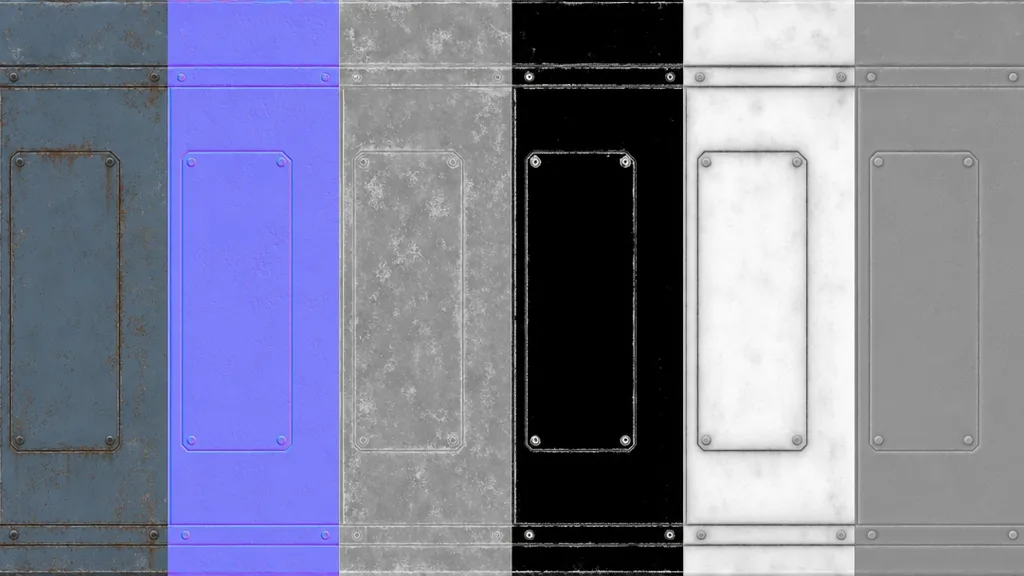
Channel packing: ORM and friends
To save memory, three greyscale maps are often packed into one texture’s RGB channels. The common ORM packing is Occlusion (red), Roughness (green), Metalness (blue). Unreal and most mobile pipelines use it; the data is identical, just combined. Know your engine’s expected packing before export.
The same maps, different engines
- Unity — metalness workflow; packs metalness + smoothness (inverted roughness); OpenGL normals.
- Unreal — metalness workflow; ORM packing common; expects DirectX normals (flip green if authored OpenGL).
- Blender — metalness via Principled BSDF; OpenGL normals; separate map inputs.
- Godot — metalness workflow; OpenGL normals; ORM-style packing supported.
The AI shortcut
The full pipeline is the right tool for hero assets, but it’s overkill for a tileable wood floor or a metal wall. That’s where AI collapses the workflow: describe a surface or drop a photo and get a complete, ready-to-use PBR map set in about a minute. CraftPBR outputs base colour, normal, roughness, metalness, AO, and height already matched — the same text to texture workflow, doing the map authoring for you. (See it applied in the create PBR materials with AI guide.)
Common PBR workflow pitfalls
- Wrong colour space — albedo and emissive are sRGB; normal, roughness, metalness, AO, height are linear.
- Wrong normal convention — OpenGL vs DirectX; bumps look inverted if mismatched.
- Baked lighting in albedo — AO and shadow belong in their own maps, not the base colour.
- Inconsistent texel density — crisp and blurry surfaces side by side.
- Wrong channel packing — feeding an ORM texture to an engine expecting separate maps.
Key takeaways
- The PBR workflow describes a surface as separate physical-property maps the renderer combines
- Metal/rough is the modern default over spec/gloss — leaner and harder to get wrong
- The core map set is albedo, normal, roughness, metalness, and AO, plus optional height
- The classic pipeline is model → UV → bake → texture → export; AI collapses it for tileable surfaces
- Mind colour space, normal convention, and channel packing when moving between engines
- Keep texel density consistent so nothing looks suddenly blurry