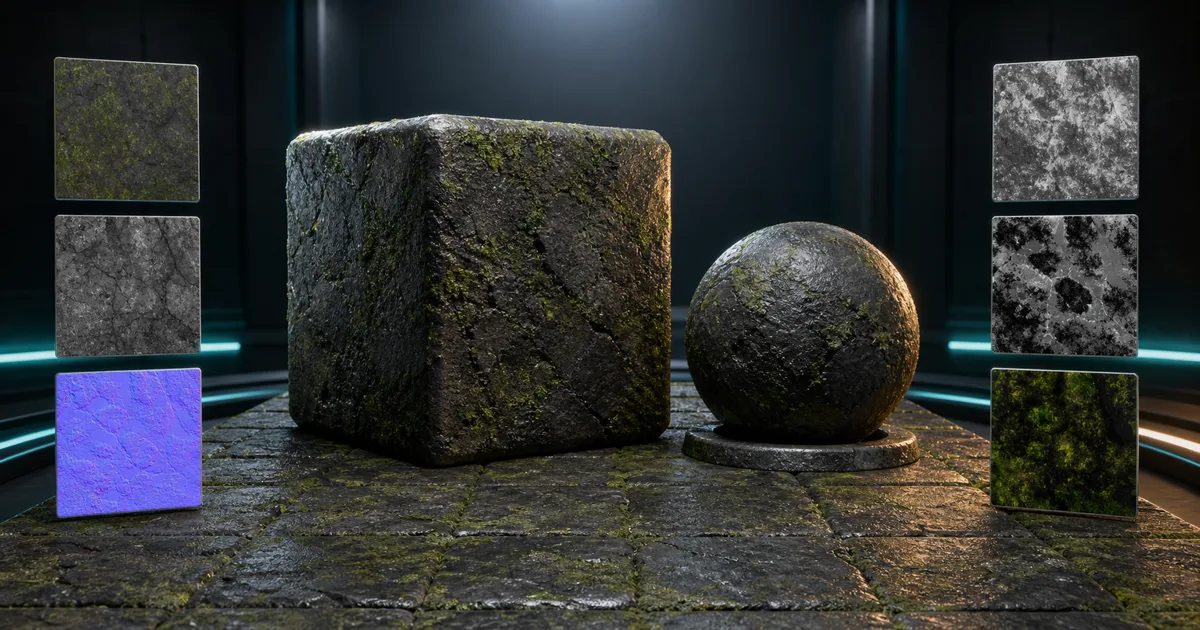
A Godot textures AI workflow turns a material idea into maps that Godot 4 can actually shade: albedo, normal, roughness, ambient occlusion, metallic, and sometimes height or emission. The generation is only the opening move. Map coherence, OpenGL normal orientation, ORM packing, import compression, mipmaps, physical scale, and material settings decide whether the result looks like stone or an unusually committed bar of soap.
This guide treats the texture set as evidence. You will audit what each map claims, choose between StandardMaterial3D and ORMMaterial3D, import data without damaging it, and test the finished material in a scene designed to reveal problems. Godot will not flag a roughness map for lying; the test scene has to catch it.
Start a Godot textures AI workflow with a surface hypothesis
Before generating anything, write down what the surface is made of. “Old green wall” is an image prompt. “Moss in the cracks of rough basalt blocks, dry stone faces, no exposed metal, one metre per tile” is a material hypothesis.
Record five facts:
- Substances: stone, paint, steel, rust, dust, moss, glaze, fabric, or another actual material.
- Layer order: which substance sits above another, and what wear exposes underneath.
- Physical coverage: how many centimetres or metres one texture tile represents.
- Projection: repeating UVs, a unique unwrap, triplanar mapping, trim sheet, or decal.
- Target: Forward+, Mobile, or Compatibility renderer, plus the real device class.
Those facts stop a Godot textures AI generator from confusing colour with physics. Moss may be darker than stone, but darkness does not make it metallic. A pale mineral streak may be smoother or rougher than its surroundings; brightness alone cannot decide. Treat the prompt as a compact material specification, then keep the generated maps editable so those interpretations can be corrected.
For a broader view of map responsibilities, read What Is PBR? and the PBR workflow guide.
Make one coherent map set, not six independent opinions
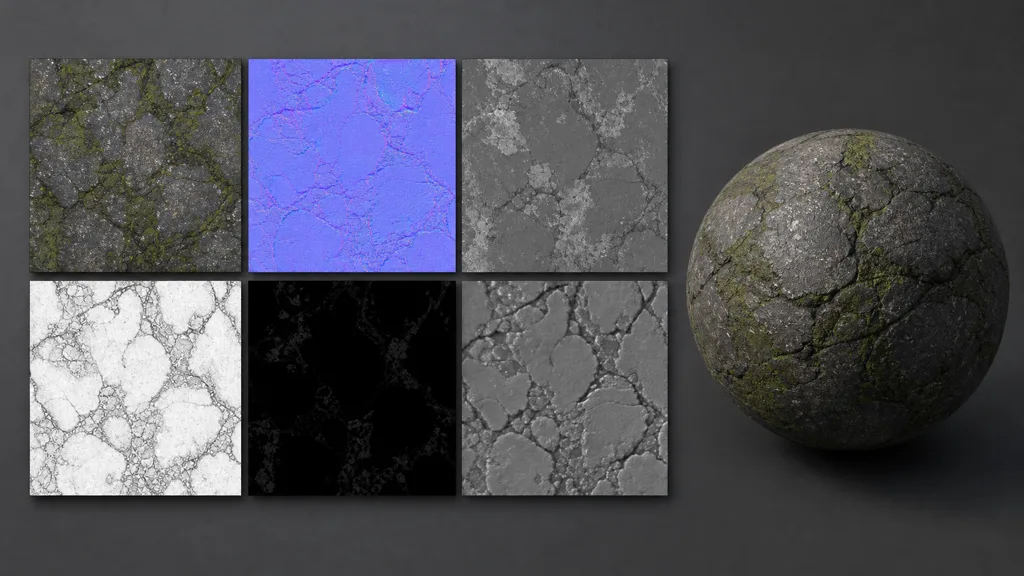
Useful Godot textures AI outputs share feature boundaries. If a crack appears in height, the normal should describe the same crack. If moss fills that crack, albedo and roughness may change there while metallic stays at zero. Generating each map in isolation often produces six plausible files that disagree on where the surface is.
Audit the set by role:
- Albedo stores lighting-neutral surface colour. Remove cast shadows, bright reflections, and baked cavity shading.
- Normal stores small directional relief. Godot expects tangent-space, OpenGL-style normals with positive Y.
- Roughness controls reflection spread. Black is smooth; white is rough.
- Ambient occlusion adds restrained indirect-light reduction in tight cavities, not a second shadow pass.
- Metallic identifies exposed conductive material. Stone, moss, dirt, paint, and rust are dielectric.
- Height describes elevation for parallax or displacement techniques; it does not alter geometry by merely existing.
Compare recognizable features across all maps at full resolution. Then inspect broad, medium, and micro frequencies separately. A paving joint may belong in height and normal; fine pores may belong mostly in normal and roughness; a painted stripe may belong only in albedo. When camera noise enters every channel, mipmaps turn it into distant glitter.
A node-based correction stage is valuable after generation. Shared masks keep boundaries registered while independent level controls let you tune roughness, height, or metallic without asking the generator to rediscover the whole surface.
Choose the Godot PBR material before export
Godot 4 gives most opaque PBR surfaces two practical built-in destinations:
| Material | Best fit | Texture layout |
|---|---|---|
StandardMaterial3D | Separate masks, fast iteration, different resolutions per map | Individual AO, roughness, and metallic textures |
ORMMaterial3D | Fewer texture samples and a compact engine delivery set | AO in red, roughness in green, metallic in blue |
ShaderMaterial | Custom blending, unusual projection, runtime logic, or unsupported effects | Whatever the shader explicitly defines |
Use StandardMaterial3D while diagnosing a new Godot PBR material. Separate maps are easy to inspect and can use different resolutions. Once the material is approved, ORMMaterial3D is a good destination when AO, roughness, and metallic can share UVs, resolution, mip behavior, filtering, and compression.
Do not reach for a custom shader merely because it exists. Built-in materials already cover common PBR controls, UV scaling, texture repeat, triplanar projection, transparency modes, and normal mapping. Convert to shader code only when the surface needs behavior the built-in path cannot express. A shader with forty uniforms is not automatically more production-ready; sometimes it is just a questionnaire.
Apply Godot texture import settings by data type
When a Godot textures AI workflow reaches export, preserve lossless masters outside the engine-specific delivery folder. PNG or TGA are sensible for ordinary 8-bit maps; EXR is useful when genuine HDR or extra precision is required. Avoid JPEG for normals and masks because ringing alters numeric values before Godot applies platform compression.
In Godot’s Import dock:
- Import each source as
Texture2D. - Let Detect 3D identify textures used by a
BaseMaterial3D; it enables mipmaps and changes compression to a 3D-friendly mode automatically. - Confirm mipmaps remain enabled for normal gameplay textures. They reduce distant grain and improve sampling, though they add roughly one third to texture memory.
- Use VRAM Compressed for typical 3D delivery, then inspect the target renderer. Forward+ and Mobile can use the high-quality compression option; Compatibility uses the lower-cost path.
- For a normal map, keep Compress > Normal Map on Detect or Enable so Godot can use red-green compression suited to tangent normals.
- If a DirectX normal arrived from another tool, enable Process > Normal Map Invert Y instead of editing the material to compensate.
The right Godot texture import settings depend on content. A crisp mask with thin edges may suffer under aggressive block compression. A broad roughness map may tolerate it well. Lossless storage makes a file look clean on disk but uses substantially more texture memory at runtime, so compare visual difference on the target device rather than treating one mode as virtuous.
Pack a Godot ORM texture without mixing its meanings
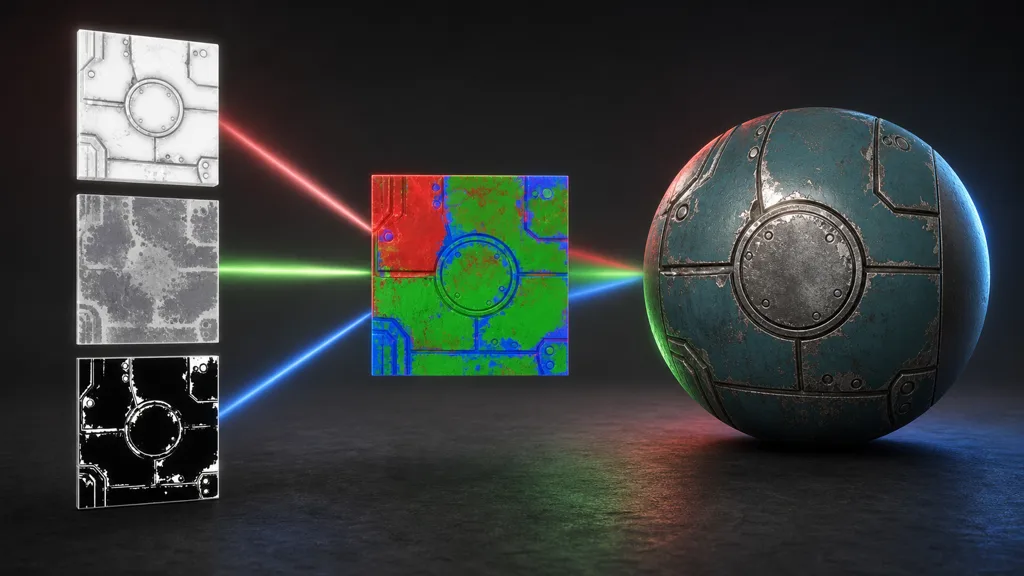
A Godot ORM texture stores ambient occlusion in red, roughness in green, and metallic in blue. Assign it to ORMMaterial3D; the material reads the three scalar channels for their intended properties.
Packing is appropriate when the masks share:
- Resolution and physical coverage.
- UV set and tiling.
- Wrap and filtering behavior.
- Mipmap policy.
- Compression tolerance.
Keep the unpacked masters. Channel packing is an export decision, not the only surviving copy of the material. If the metallic mask needs crisp 2K boundaries but AO only needs a soft 512-pixel field, forcing both into a 2K ORM texture wastes memory. Conversely, resizing one mask carelessly before packing can shift features and make the material disagree with itself.
Test the packed result against the separate-map version. A weathered painted panel should keep paint non-metallic, expose metallic values only where bare metal is visible, and vary roughness independently of colour. If the packed version changes the look, inspect channel order, export gamma handling, and compression before adjusting the artistic values.
Give normals, height, and texture scale separate jobs
For Godot normal map setup, export OpenGL-style tangent normals. If you receive a DirectX-style normal, invert Y in the Import dock. Godot’s built-in material path uses the red and green channels and reconstructs the remaining direction, which pairs well with RGTC compression.
Check orientation under a small light moving in four directions. A known raised bevel should stay raised; a dent should not switch identity as the camera moves. Excessive normal strength can crush grazing highlights and expose UV seams, so begin at the authored strength.
Height is separate. In a built-in material it can drive height mapping, but the result is still a shading technique rather than new silhouette geometry. Use it for modest surface depth, then judge artifacts at grazing angles. Large stones, deep gaps, roof tiles, and cliff overhangs generally need geometry or a more deliberate displacement solution.
Finally, set real scale. If a 2K tile represents two metres, make that convention consistent across meshes. Enable repeat for tileable maps, use UV scaling deliberately, and test at least a four-by-four grid. Edge continuity removes seams; it does not hide the memorable black stone that appears every two metres. Use decals, vertex colour, a low-frequency overlay, or world triplanar variation to break repetition without damaging the base tile. The seamless tileable textures guide covers that repair in detail.
Budget Godot PBR textures for the renderer you ship
Texture dimensions should follow camera coverage, not optimism. A close hero prop may justify 4K. A repeated wall often looks better with a clean 1K or 2K tile, a detail normal, and controlled macro variation. The texture resolution guide helps translate camera distance into a sane starting point.
For Godot PBR textures, inspect three budgets together:
- Memory: resolution, channel count, mipmaps, and runtime compression determine GPU use.
- Bandwidth: layered materials and repeated samples cost more even when each file is small.
- Shader work: triplanar mapping samples each texture across multiple axes; detail layers and custom blends multiply that cost.
Test Forward+, Mobile, or Compatibility rather than assuming they produce identical compression and feature support. Basis Universal is useful when compact distribution and transcoding matter, while platform VRAM formats usually prioritize runtime sampling. Thin masks, high-frequency normals, and gentle roughness gradients deserve visual comparison after import.
The best Godot AI texture generator in 2026 is not the one that exports the largest folder. It produces coherent masters plus a delivery set sized for the actual camera and renderer.
Interrogate the material in a tiny Godot test scene
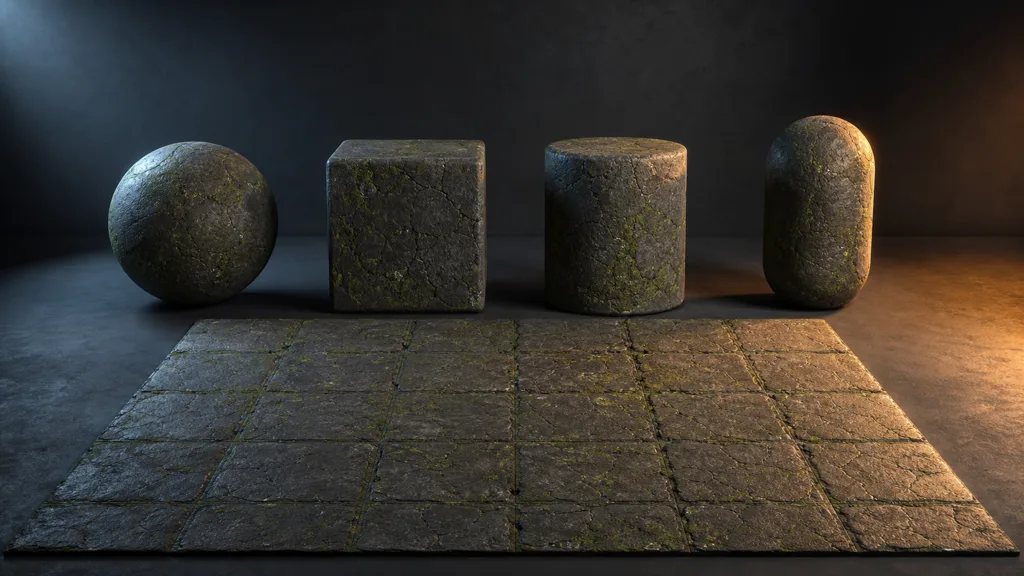
Build one reusable scene for every Godot textures AI material workflow:
- Add a sphere, beveled cube, cylinder, capsule, and large plane.
- Apply the same material and match physical texture scale on every mesh.
- Use a neutral
WorldEnvironmentplus one hardOmniLight3DorSpotLight3Dyou can move. - Rotate the light across the sphere to inspect roughness and normal direction.
- Check the beveled cube and cylinder for tangent seams and stretching.
- Tile the plane repeatedly to expose edge seams and repeated landmarks.
- Switch to the target renderer and platform import settings.
- Compare the separate-mask material with the packed ORM version.
Temporarily replace albedo with neutral gray to judge roughness, metallic, and normal response. Then disable normal and AO to confirm the albedo contains no fixed lighting. Review at gameplay distance as well as close range; a material can be excellent at twelve pixels wide without revealing its entire pore census.
Debug AI textures for Godot by symptom
When Godot textures AI results look wrong, isolate the signal before changing values:
- Relief appears inverted: the source normal is DirectX-style; enable Normal Map Invert Y.
- The surface looks wet: roughness is inverted, too dark, or damaged during export.
- Stone reflects like metal: metallic was derived from image brightness instead of substance.
- A fixed shadow survives relighting: albedo still contains captured illumination or baked AO.
- Fine detail sparkles at distance: normal and roughness frequencies are too strong for the mips and compression.
- The tile forms a grid: edges match, but an internal landmark repeats.
- The ORM version differs from separate maps: channel order, resizing, or compression changed the data.
- The same material changes scale between meshes: UV density or material UV scaling is inconsistent.
Disconnect maps one at a time. Change one variable, reimport, and retest under the same light. Randomly moving three sliders can eventually make a screenshot attractive, but it also destroys the evidence about which setting was wrong.
Try CraftPBR
CraftPBR makes a Godot textures AI workflow editable from prompt to engine:
- Text-to-PBR generates a coordinated map set from a physical material description.
- Photo-to-PBR turns a captured surface into aligned albedo, normal, roughness, height, AO, and metallic maps.
- Node workspace keeps masks, tiling, ranges, blending, and cleanup adjustable.
- Engine export prepares OpenGL normals, Godot-friendly names, separate masks, and ORM packing.
- Free tier lets you test a real material before choosing a production route.
- CC0 output lets you use, modify, and ship generated materials without attribution.
Create Godot-ready PBR materials with CraftPBR →
Generate the maps. Then let Godot cross-examine them.