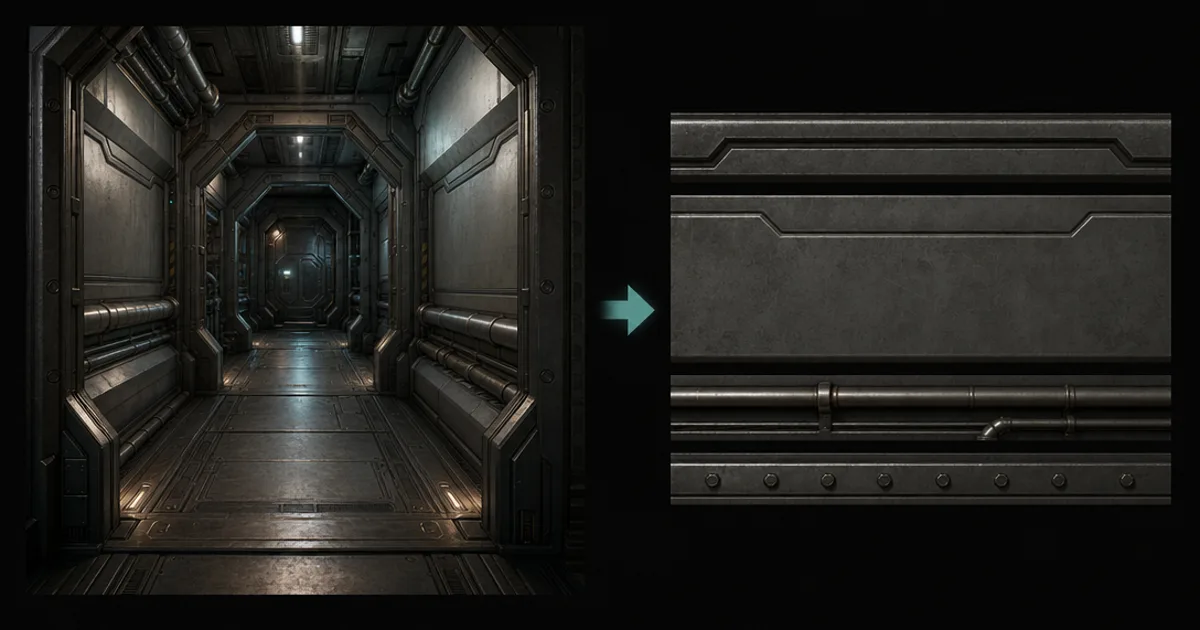
That entire sci-fi corridor — the panel seams, the pipe runs, the beveled edges, the bolt rows — is very likely skinned from a single texture. Trim sheets are the quiet efficiency trick that lets a couple of authored textures cover an enormous amount of level, and they are how modular environment art actually gets built at scale. Here is what a trim sheet is, why studios lean on them so hard, and how to design one that carries a whole set.
What a trim sheet actually is
A trim sheet is one texture packed with horizontal strips of reusable detail — a beveled panel edge, a row of bolts, a pipe, a border, a grate — stacked up the height of the image. Nothing is tied to a specific mesh. Instead, when you model a wall or a beam, you map its faces onto whichever strip should show there. The texture is authored once; the geometry is what decides which piece of it appears where. Skin a door, a pillar, and a ceiling beam from the same sheet and they share every pixel.
Why modular art runs on them
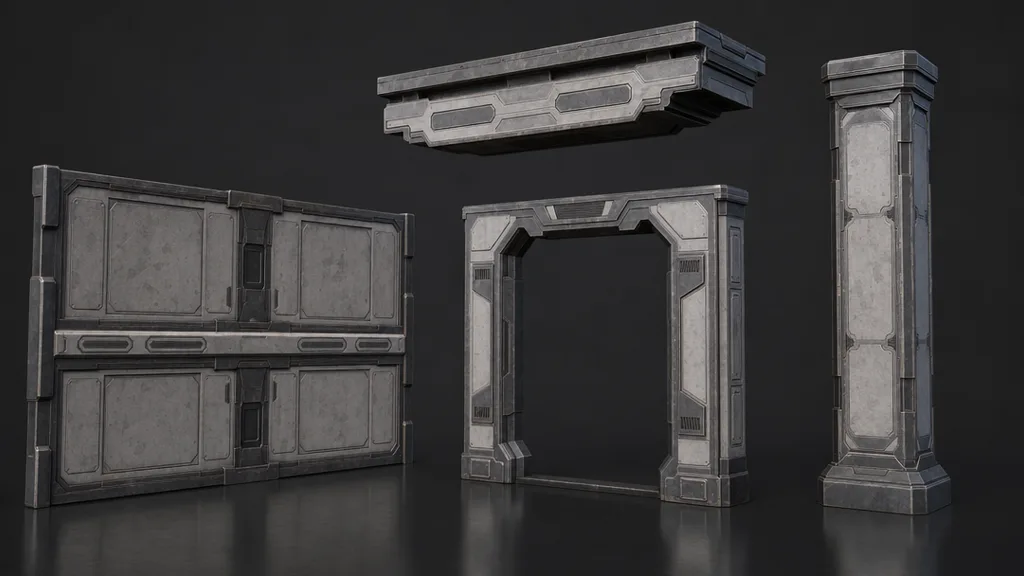
The payoff is reuse, and it compounds. One trim sheet skins dozens of modular kit pieces, so the texture memory for a whole corridor set can be a fraction of what unique texturing would cost. The look stays consistent because every piece pulls from the same authored detail. And the build speed is the real reason artists love it: cut the geometry, slide the UVs onto a strip, move on — no unique unwrap, no per-mesh texturing pass. Scale that across a level and it is the difference between shipping and not.
How you use one
The mechanism is all in the UVs. Because the strips run horizontally and tile on that axis, a trim can stretch to any length — a two-metre door frame and a twenty-metre girder use the same strip, just scaled along its length. You model the piece so its faces line up with the strip heights, then lay each face’s UVs over the strip you want it to wear. There is no unwrapping in the usual sense; there is placing geometry onto a menu of details. Read the UV mapping guide for the underlying mechanics.
Trim sheet, tiling, or unique — when each wins
These are not rivals; they are three tools that share a level:
- Tiling textures repeat across big flat areas — floors, broad walls, ground. See seamless tileable textures.
- Trim sheets handle edges, borders, and running details along geometry, reused across the whole kit.
- Unique textures are saved for hero assets the camera studies up close, where reuse would show.
- Decals add the one-off character — signs, stains, damage — on top of all of the above.
A well-built environment is mostly tiling and trims, with unique and decals spent only where they earn their memory.
Designing a trim sheet that holds up
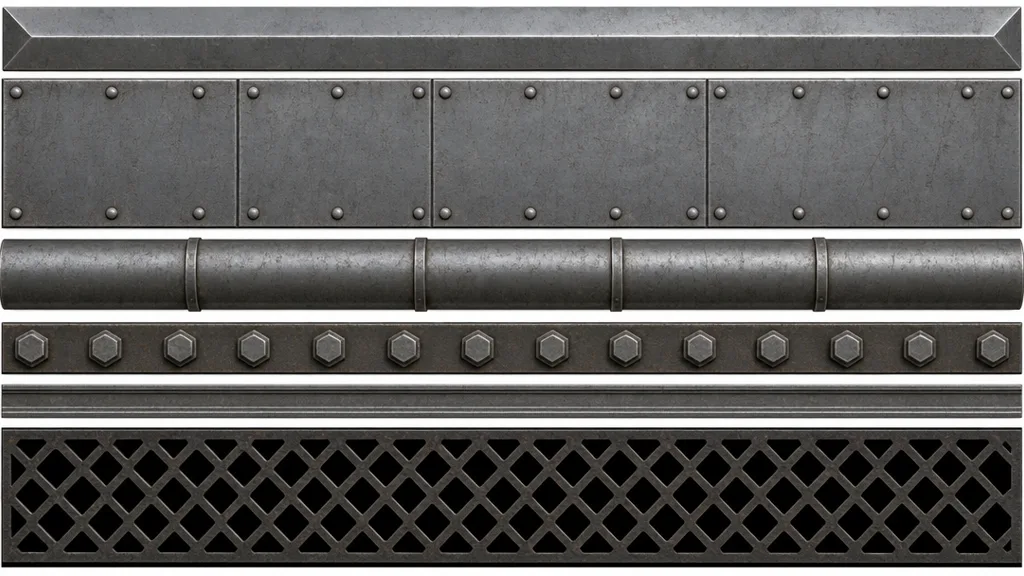
A good sheet is planned, not doodled. Keep every strip at the same real-world scale so a bolt on one piece matches a bolt on the next. Make the strips tile horizontally so trims run any length cleanly. Include variety in the heights — a couple of edge bevels, a wide panel or two, a pipe, a bolt row, a thin border — and reserve a strip for alpha if the kit needs cutouts like grates. Give the most-used trims more vertical pixels, since that is where resolution matters most. And bake the detail from a high-poly so the normal and AO carry real relief rather than a painted fake.
Making the trim texture
The classic route: model the strip details high-poly, bake them onto a flat plane for the normal, AO, and curvature, then author colour and roughness. You can shortcut the surface work by generating the base materials and details — panels, metal, pipes — from prompts or photos and composing them into strips, so the sheet comes together from a library of generated surfaces instead of sculpting every millimetre. Either way the output is one shared PBR set: colour, normal, roughness, AO.
Try CraftPBR
- Text-to-PBR — generate the surfaces that fill your trim strips
- Photo-to-PBR — turn reference into tiling material for the sheet
- Free tools — normal map, height map, seam editor
- Engine export — Unity, Unreal, Blender, Godot, Three.js
- CC0 license — everything you make is yours