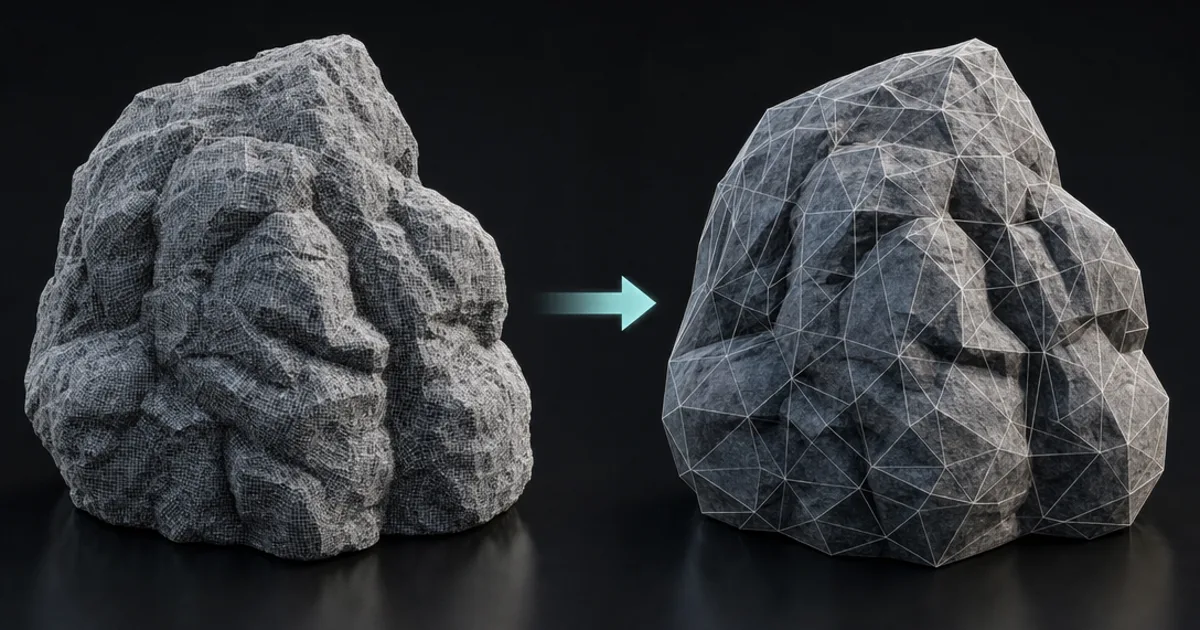
The most detailed-looking asset in your scene almost certainly has barely any geometry. The detail you see — the pores, the chipped edges, the deep gouges — lives in a texture, transferred there from a heavy sculpt the player never loads. That transfer is texture baking, and it is the quiet trick that lets a game run a rock that looks like it has millions of polygons while actually shipping a few thousand. Here is what baking moves, how the projection works, and why bakes go wrong.
What baking actually transfers
Baking captures the surface of a detailed source and writes it into the texture space of a simpler target. Usually the source is a high-poly sculpt and the target is a game-ready low-poly that shares its silhouette but not its detail. The baker walks the low-poly’s UVs, samples the high-poly at each point, and records what it finds. The sculpt can then be thrown away — its detail now lives in the maps.
The maps you bake — not just the normal
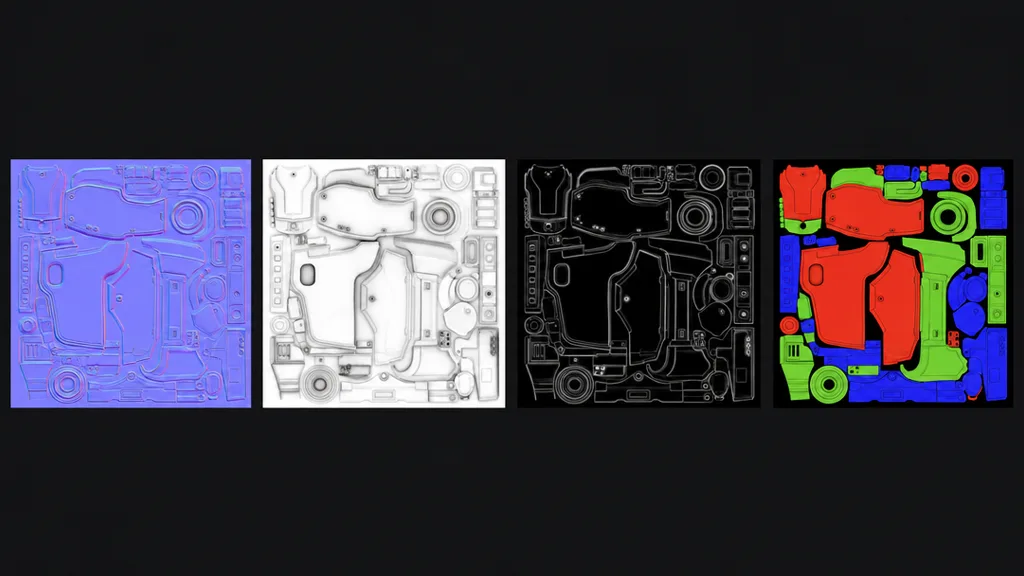
Most people think of baking as making a normal map, but the bake produces a whole suite. Normal carries the sculpted surface direction. Ambient occlusion records where crevices trap shadow. Curvature marks the exposed edges and recessed seams, which is what drives edge-wear and dirt in a smart-material workflow. A material ID map paints each part a flat colour for easy masking, and thickness feeds subsurface scattering. Which ones you bake depends on how you plan to texture — but normal and AO come out of nearly every bake.
How the projection works — cage and ray distance
The mechanism is a ray cast. From each point on the low-poly, the baker shoots a ray outward and inward to find the nearest high-poly surface, then records its normal, its occlusion, and so on. The question is how far to search, and that is what a cage or a ray distance controls. A cage is an inflated shell of the low-poly that bounds the search; ray distance sets the same reach numerically. Too short and the rays never reach a raised bolt or a fin, so it vanishes from the bake. Too long and a ray from one surface hits a neighbouring part and paints its detail in the wrong place. Most of baking is dialing this range until the rays catch the detail you want and nothing you don’t.
The errors everyone hits
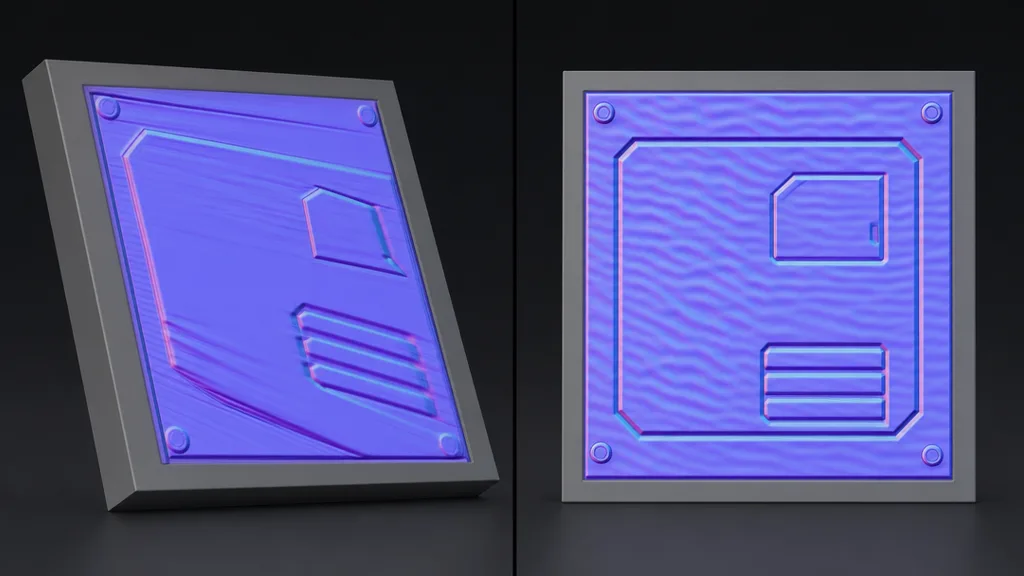
- Skewing — detail smears on faces angled away from the high-poly. Fix with a better-matched low-poly, bevels on hard corners, and a tuned cage.
- Waviness — flat panels bake with a rippled normal. Usually the low-poly is too coarse for the form, or hard edges don’t line up with UV seams. Split UVs on every hard edge.
- Exploded or seamed normals — visible facets or a hard line across a smooth surface. Set smoothing groups correctly and match them to your UV islands.
- ID or AO bleed — colours or shadows leak across UV borders. Add padding/dilation and give islands more space.
Notice the pattern: almost every bake problem is a low-poly or UV problem, not a sculpt problem. Fix the target and the cage before you touch the source.
Baking without a high-poly
Not every surface needs a sculpt. For flat materials — walls, ground, fabric — you can derive the same map types from a height field or a photo instead of projecting from geometry. It is not a true high-to-low bake, but it yields a normal, AO, and curvature all the same. CraftPBR’s free normal map and height map tools do exactly this from an image, and text-to-PBR generates the whole set from a prompt — no sculpt, no cage, no ray distance to fight.
Where people bake
- Marmoset Toolbag — the artist favourite for baking: real-time preview, per-object cage painting, and easy skew fixing.
- Substance 3D Painter / Designer — bakes the full map suite and feeds it straight into smart materials that read the curvature and AO.
- Blender — bakes free with Cycles; use a Cage object and match smoothing to UV seams. Slower to set up but no extra software.
Try CraftPBR
- Text-to-PBR — a prompt yields normal, AO, roughness, metalness and height, no bake
- Photo-to-PBR — a photo becomes a full map set
- Free tools — normal map, height map, seam editor
- Engine export — Unity, Unreal, Blender, Godot, Three.js
- CC0 license — yours to ship