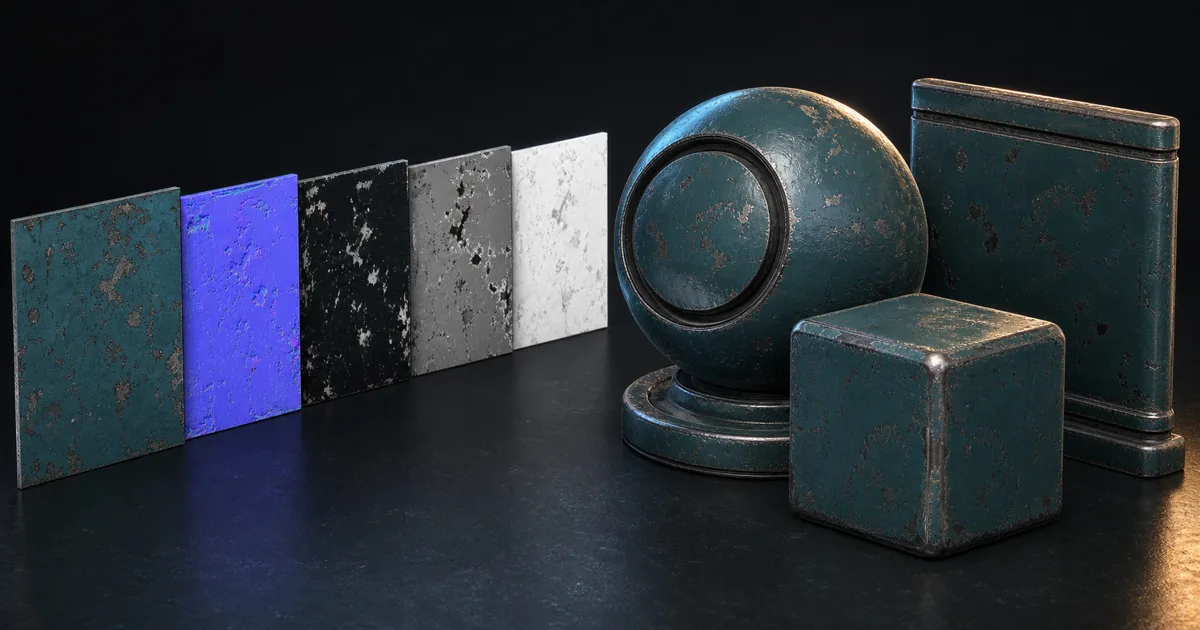
A material can look perfect in a texture tool and arrive in Unity resembling damp chalk. The files are rarely the whole problem. Unity PBR textures depend on import type, colour space, normal orientation, channel packing, shader family, and the lighting used to judge them. Miss one setting and a polished steel panel becomes grey plastic with suspicious dents.
This guide gives you a repeatable setup for the Built-in Render Pipeline, Universal Render Pipeline (URP), and High Definition Render Pipeline (HDRP). You will learn what each map contributes, which imports use sRGB, where Unity expects smoothness, how to wire the common Lit shaders, and how to test a material before it escapes into fifty prefabs.
Start with the render pipeline, not the texture folder
Unity does not have one universal PBR material interface. The physics are similar across pipelines, but the shader inputs and packing conventions differ:
| Pipeline | Common shader | Base colour | Metal and smoothness | AO |
|---|---|---|---|---|
| Built-in | Standard | Albedo | Metallic RGB, smoothness A | Occlusion |
| URP | URP/Lit | Base Map | Metallic R, smoothness A | Occlusion Map |
| HDRP | HDRP/Lit | Base Color Map | Mask Map: metallic R, smoothness A | Mask Map G |
Choose the pipeline and shader before exporting Unity PBR textures. If you build a separate roughness PNG and then discover that the target shader reads smoothness from another texture’s alpha channel, you have not lost the material. You have merely discovered Unity’s preferred filing system.
The standard metalness workflow is the safest default. The specular workflow is also available in some shaders, but mixing conventions across a project makes review harder. If you migrate pipelines, confirm the shader, packed channels, normal strength, tiling, emission, transparency mode, and render-face settings in a small conversion scene.
What each Unity PBR texture actually does
A useful Unity PBR material normally starts with four to six aligned maps:
- Base colour or albedo stores pigment without baked directional light. It is colour data, so Unity should sample it as sRGB.
- Normal stores tangent-space surface direction and must be imported as a Normal map.
- Metallic classifies bare conductive material versus dielectric paint, rust, dirt, stone, and wood.
- Smoothness is the inverse of roughness. White produces tighter reflections; black produces broader reflections.
- Ambient occlusion adds restrained cavity darkening where indirect light is limited.
- Height can drive parallax or displacement when the selected shader supports it.
- Emission adds self-lit colour; bloom remains a separate post effect.
All maps must describe the same surface at the same scale. A paint chip should line up across base colour, normal, metallic, and smoothness. The values differ because each map answers a different physical question, but the boundary cannot wander. For the underlying model, read What Is PBR? and the PBR workflow guide.
Import Unity PBR textures with the correct data settings
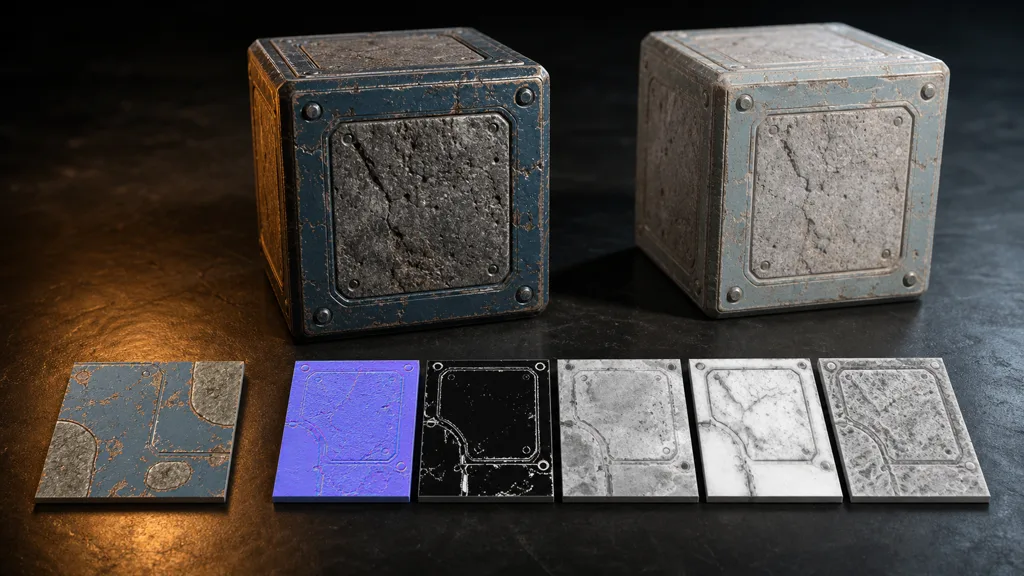
- Import base colour as a Default texture with sRGB enabled. Unity converts it to linear values for lighting.
- Set the normal texture type to Normal map. Confirm the source is a tangent-space normal rather than a grayscale height image.
- Disable sRGB for metallic, smoothness, AO, height, and packed masks. These are numeric inputs, not display colours.
- Choose alpha handling deliberately. If smoothness is stored in alpha, confirm the source alpha is imported and selected by the shader.
- Set wrap mode by use. Repeating surfaces use Repeat; unique atlases often use Clamp.
- Set compression and maximum size for the target platform. Inspect the build-target preview, not only the desktop editor.
The usual Unity normal map import settings are Texture Type: Normal map and Create from Grayscale: off for a real tangent-space normal. Unity normally expects a DirectX-style Y orientation. If dents appear as bumps, invert the green channel in the export workflow. Do not compensate by turning the light upside down; the rest of the level may object.
Keep clean source masters outside packed delivery files. Separate base colour, roughness, metallic, AO, height, and normal maps let you re-export for another Unity pipeline or renderer without unpicking yesterday’s alpha channels.
Pack metallic and smoothness without destroying either
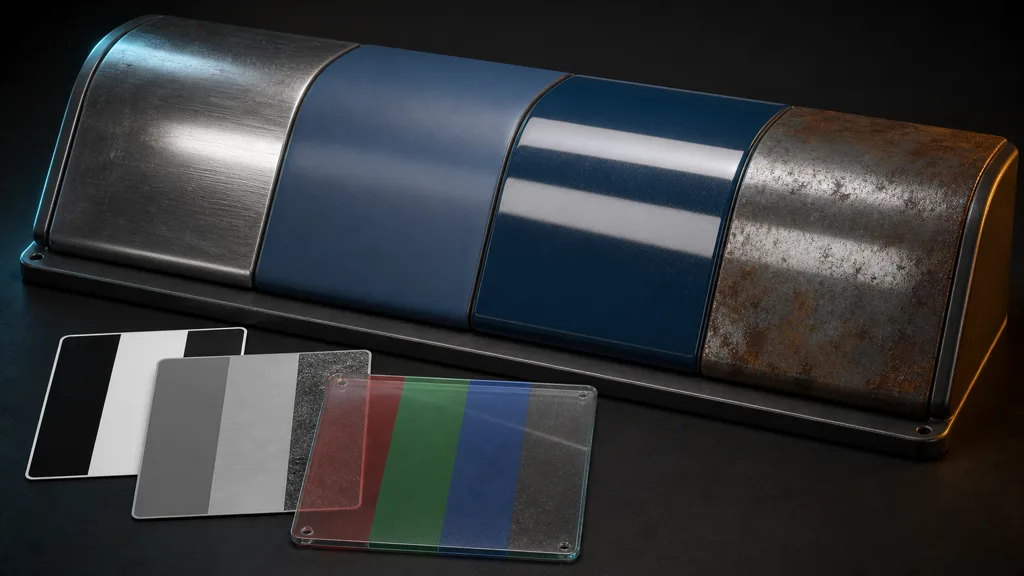
Many Unity texture maps use smoothness rather than roughness: smoothness = 1 - roughness.
Built-in Standard commonly stores metallic in RGB and smoothness in alpha. URP Lit commonly uses metallic in red and smoothness in alpha. HDRP’s Mask Map packs metallic in red, AO in green, detail mask in blue, and smoothness in alpha. Build a Unity metallic smoothness map from independent masters, disable sRGB, and inspect the imported alpha and compression.
Painted metal is a good test. Intact paint is non-metallic, exposed steel is metallic, polished scratches may be smoother, and rust is non-metallic and rough. If one luminance conversion drives both masks, dark blue paint may become metal and bright rust may become plastic. The shader will render the values faithfully. Faithfulness can be awkward.
Avoid JPEG for masks and normals. Lossy colour compression can introduce ringing and cross-channel contamination before Unity applies its own platform compression.
Build materials in Built-in, URP, and HDRP
For Unity Standard shader texture maps, choose Standard with the Metallic workflow, assign base colour to Albedo, the metallic/smoothness texture to Metallic, the imported normal to Normal Map, and AO to Occlusion. Use Height Map only when parallax is worth its cost and artifacts.
For Unity URP Lit material textures, assign Base Map, Metallic Map, Normal Map, and Occlusion Map, then confirm whether Smoothness Source reads Metallic Alpha or Albedo Alpha. Metallic Alpha is usually easier to manage for opaque materials.
For Unity HDRP Lit material textures, assign Base Color Map, Mask Map, and Normal Map. HDRP offers detail maps, coat masks, displacement, and material types, but start with the smallest set that explains the surface. Adding a control because the Inspector has room for it is how materials acquire knobs nobody can defend.
Across pipelines, keep base-colour tint neutral while checking the texture, verify tiling, check normal strength at 1 before exaggerating it, and keep ordinary opaque materials opaque.
Fix normals, scale, and compression before blaming the shader
- Relief is inverted: flip the normal map’s green channel for the expected convention.
- The material is too shiny: roughness was not inverted, smoothness alpha is missing, or a scalar overrides the map.
- Everything looks metallic: the mask contains image luminance rather than material classification.
- The colour is too dark or pale: sRGB is wrong, a tint is active, or lighting and exposure changed.
- Fine detail sparkles: normal or smoothness detail is too strong for its resolution, mip filtering, and compression.
- Scale changes between props: tiling was chosen by eye rather than a recorded metres-per-tile value.
Use the normal map guide for tangent-space problems and the texture resolution guide when memory and camera distance need to agree. Record physical coverage, such as a 2K map representing one square metre, and keep that scale across material instances.
Validate Unity PBR textures in a small test scene
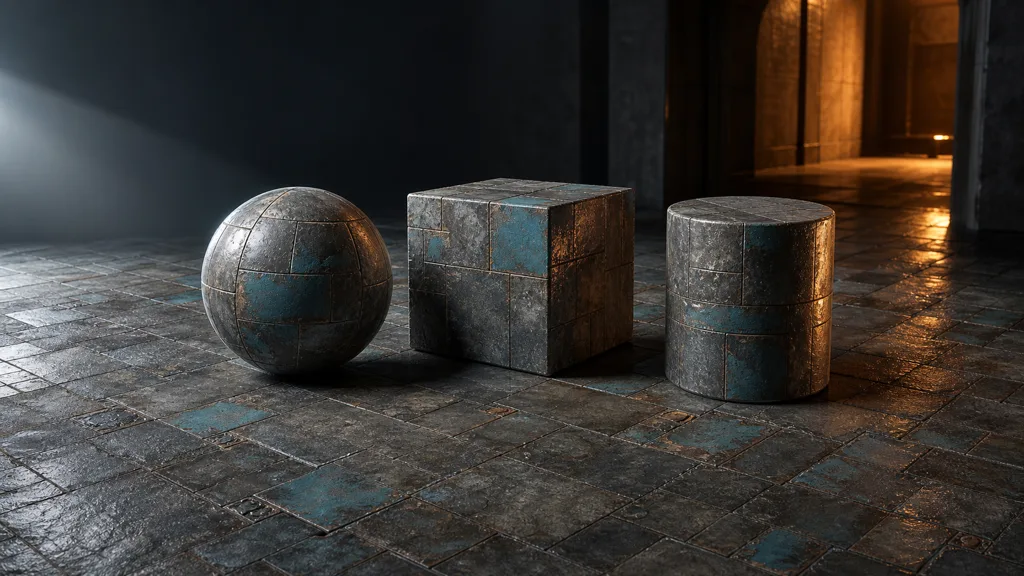
Build one reusable material lab containing a sphere, beveled cube, cylinder, and large plane. Add a neutral environment, one small bright light you can rotate, and a second warmer or cooler environment.
- Move the light across the sphere to judge smoothness and highlight continuity.
- Use the cube to find normal seams, excessive edge wear, and broken tangent response.
- Use the cylinder to expose directional distortion and inconsistent texel density.
- Tile the plane at least four by four to reveal seams and repeated landmarks.
- Disable base colour to inspect metallic, smoothness, and normal response without pigment.
- Disable normal and AO to confirm that base colour contains no baked directional lighting.
- Switch to the real build platform and inspect mipmaps, compression, and memory.
The best PBR textures for Unity in 2026 are not the ones with the most channels. They stay plausible under moving light, at gameplay distance, on target hardware, and across the pipeline the project actually ships.
Budget texture memory where the camera can see it
A 4K base colour, normal, mask, and AO set can consume far more GPU memory than its folder size suggests. Use the Texture Importer preview and Profiler after platform compression. Pack masks when the shader supports it, but remember that channels in one texture share resolution, mipmaps, wrap mode, and compression.
Set maximum size from camera distance and screen coverage. Hero props may justify 2K or 4K maps. Repeated environment materials often benefit more from a clean 1K or 2K tile plus detail normals and macro variation. Texture streaming can help large scenes, but it cannot recover detail that was never visible or fix a map imported in the wrong colour space.
Try CraftPBR
CraftPBR prepares Unity PBR textures as an editable material workflow:
- Text-to-PBR creates coordinated map sets from a physical material description.
- Photo-to-PBR converts a captured surface into aligned base colour, normal, roughness, height, AO, and metallic maps.
- Node workspace keeps masks, ranges, tiling, blending, and channel packing adjustable.
- Engine export handles Unity naming, colour spaces, normal convention, smoothness inversion, and packed-map layouts.
- Free tier lets you test a real material before choosing a production route.
- CC0 output lets you use, modify, and ship generated materials without attribution.
Create Unity-ready PBR materials with CraftPBR →
Unity will render the values you give it. CraftPBR helps make sure those values describe the same planet.