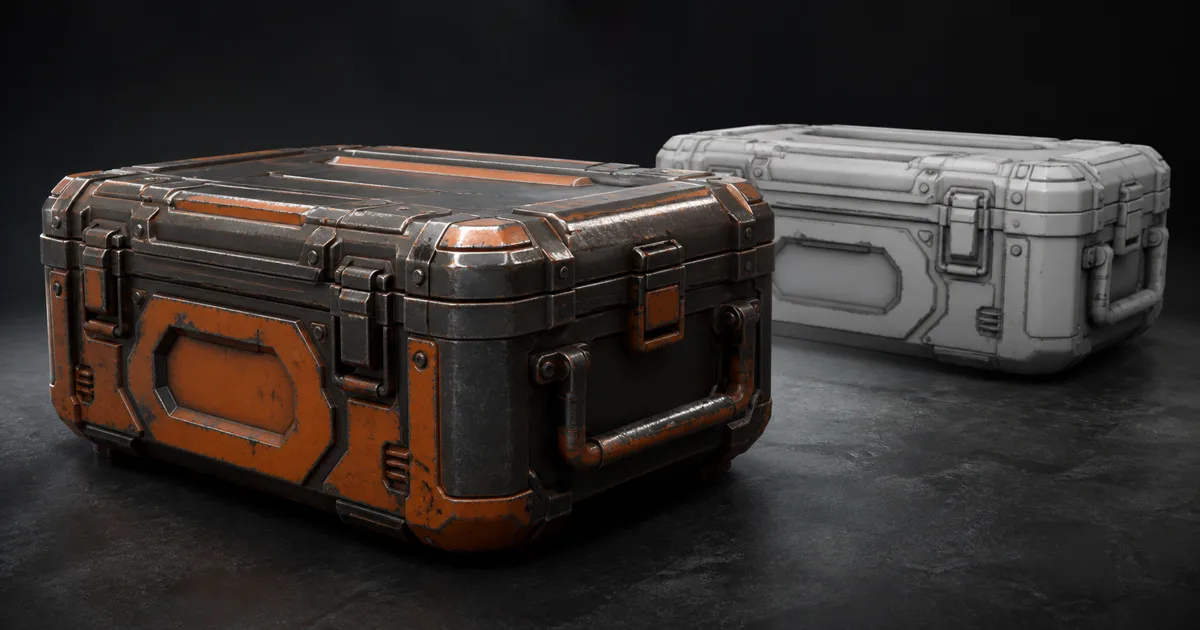
A curvature map converts local changes in surface shape into grayscale data. Convex edges can become bright, concave seams can become dark, and broad flat areas can sit near neutral gray. That makes the map useful for masking chipped paint, polished corners, cavity dust, darkened seams, and other effects that tend to follow geometry.
Useful is not the same as finished. A raw bake describes shape, not history. It cannot know whether a corner was handled, whether a recess faces upward, or whether a painted panel spent ten years indoors. Apply the bake everywhere at full strength and the asset acquires the familiar procedural uniform: every edge scraped, every groove dirty, every bolt announcing that a generator has located it.
This guide treats curvature as what it is: a compact geometric clue that becomes convincing only after scale, cleanup, material logic, and art direction join the conversation.
What a curvature map actually stores
Curvature measures how quickly a surface normal changes across nearby points. On a flat plane, neighboring normals point roughly the same way. Around a rounded outer edge, they diverge away from the surface; inside a groove, they turn toward one another. A mesh curvature map encodes those local relationships into a texture aligned with the model’s UVs.
The common grayscale convention is:
- white or light values for convex forms such as bevels, ridges, and exposed corners;
- black or dark values for concave forms such as seams, sockets, panel gaps, and recessed joints;
- middle gray for areas with little local curvature.
Some tools invert the result, separate convexity and concavity, or normalize the range differently. Check the preview rather than trusting the filename. A mask called Curvature can still arrive with the artistic temperament of a negative photograph.
A curvature map is usually derived from mesh geometry, baked normals, or both. It does not add lighting and should not be plugged into base color as a permanent highlight-and-shadow layer. Its main role is to drive masks during texturing or, occasionally, to supply a cheap runtime control signal.
Read convex, concave, and neutral values
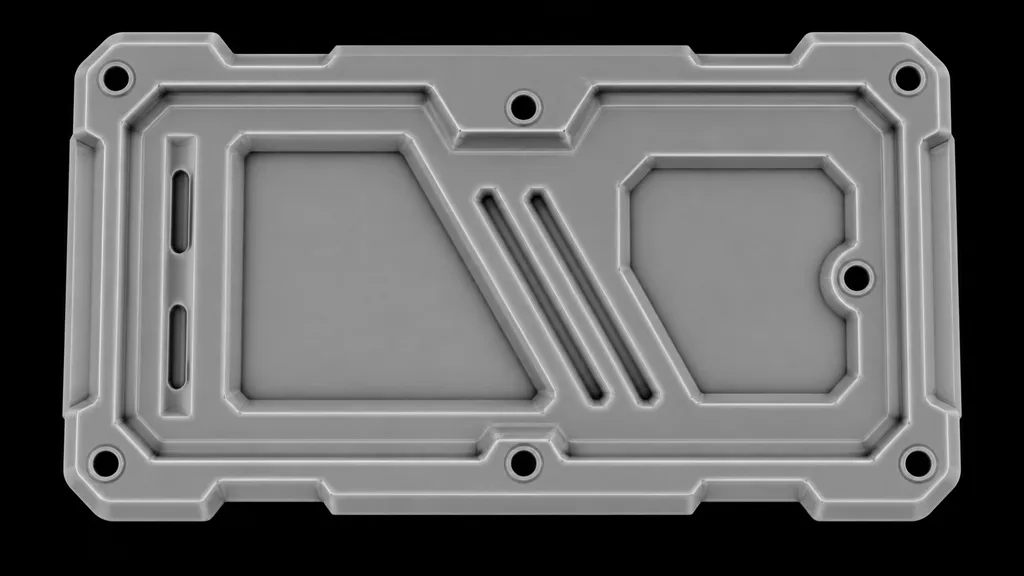
Before using a curvature texture, inspect it without any material layers. Large bevels should produce broader, softer bands than tiny chamfers. Deep channels should read as concave without becoming solid black holes. Flat faces should remain quiet unless small modeled detail changes their normals.
Scale matters. A narrow curvature search catches screw heads and tiny edge breaks. A wider search responds to large rolled corners and broad depressions. Production bakers often expose radius, sampling distance, or detail-scale controls for this reason. There is no universal setting: a wristwatch, a shipping container, and a cliff do not share an opinion about what counts as a small feature.
Keep at least two useful scales when the asset needs both fine and broad effects. A tight map can mask polished micro-bevels; a wider map can place general edge wear or cavity discoloration. Combining them deliberately is more controllable than forcing one bake to describe every frequency.
Check UV seams as well. Because the result is stored in UV space, insufficient padding can allow dark or light borders to bleed into neighboring islands through mipmaps. The UV mapping guide explains island padding and density, while the texture filtering guide covers why a clean full-resolution preview can still fail at distance.
Bake a curvature map without inventing seams
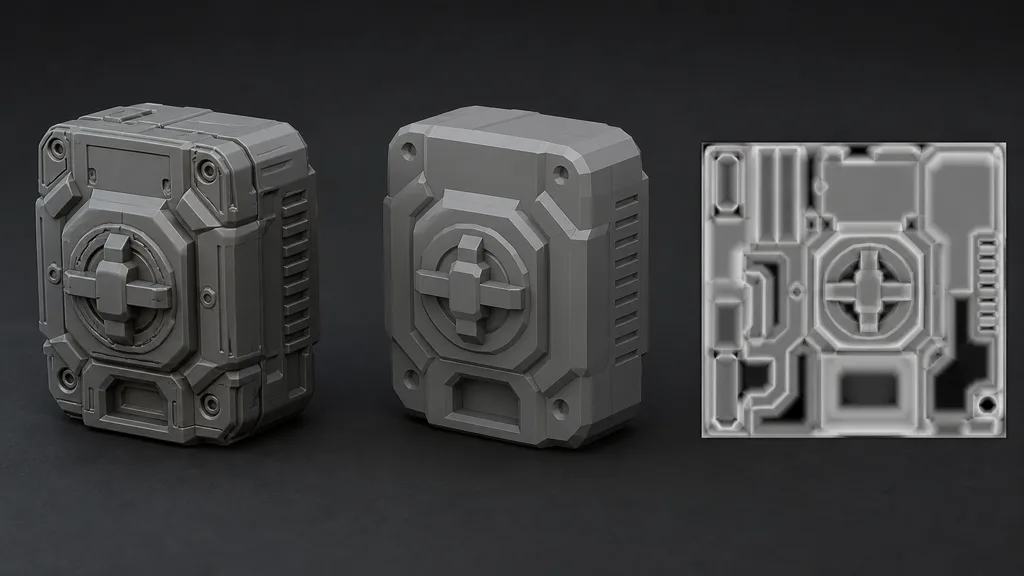
Use this curvature map baking sequence:
- Finish the forms that should affect the mask. Apply or preserve bevels, panel gaps, sockets, and major surface transitions. Do not expect a texture bake to invent geometry the normal field never contained.
- Prepare the low-poly mesh and UVs. Remove accidental overlaps, keep deliberate mirrored or stacked islands documented, and provide padding for the intended mip range.
- Match the high and low meshes. Use naming, bake groups, or explicit pairs so a nearby handle does not project its curvature onto the body panel.
- Set the cage or ray distance. The projection must reach the high-poly detail without crossing into unrelated parts. Test tight gaps and thin pieces first.
- Bake the normal map before curvature when required. Many texturing tools derive curvature from the baked tangent-space normal information. A skewed normal bake produces an equally confident skewed curvature result.
- Choose a radius appropriate to the asset. Start with the scale of the wear or accumulation you plan to mask, not the highest contrast the preview can display.
- Add antialiasing and dilation. Supersampling cleans diagonal features; padding protects island borders during filtering.
- Inspect the map on the model. Look for projection leaks, gradients across flat faces, broken mirrored edges, and noisy micro-detail before building generators on top.
The texture baking guide covers cages, skewing, smoothing splits, and high-to-low projection in more detail. When asking how to bake a curvature map, solve those foundation errors first. Increasing contrast cannot repair a ray that hit the wrong bolt.
Turn curvature into material decisions
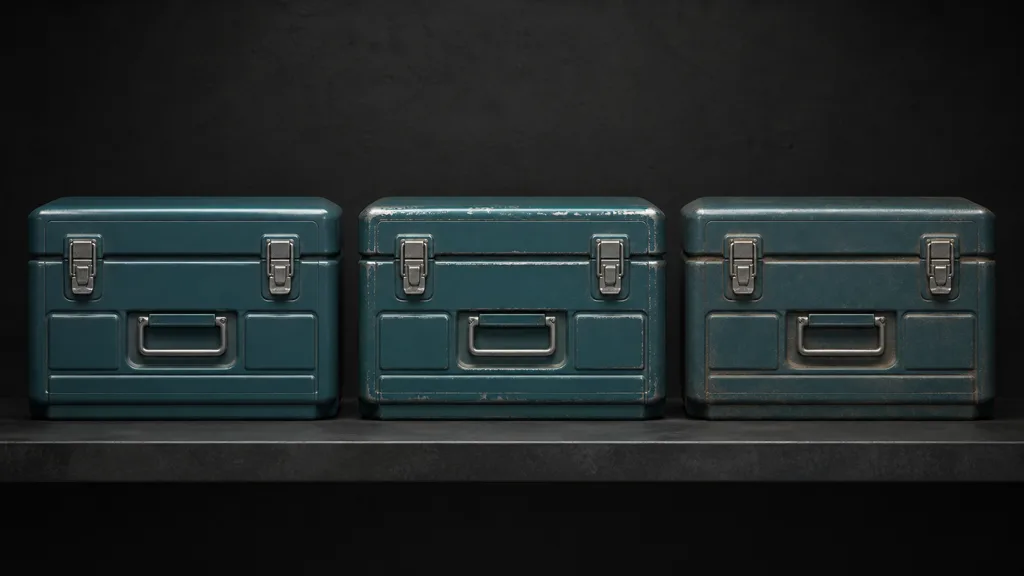
Use curvature to build selection masks, then intersect those masks with causes.
For edge wear, isolate convex values and combine them with a broad breakup texture, object-space direction, height, and a hand-painted exclusion mask. Exposed lower corners, handles, and contact points may wear strongly. A protected upper bevel under a cover may remain painted. Curvature finds both; context separates them.
For cavity buildup, isolate concave values and combine them with upward-facing orientation, ambient exposure, moisture paths, or local paint. Dust settles differently from grease. Rust begins where coatings fail and moisture remains, not in every groove merely because the groove completed a form.
The mask can affect several PBR channels at once, but each channel needs a plausible response. Chipped paint may expose metallic base color, switch metalness, reduce or increase roughness, and add a tiny normal or height transition. Dust may lighten base color, raise roughness, fill fine normal detail, and remain nonmetallic. Multiplying one grayscale mask into every channel produces coordination, but not necessarily a material.
The vertex painting guide is useful for local approvals and exclusions. The 3D texture painting guide covers layer masks and hand-painted corrections. A good procedural base saves brush time; it does not confiscate the brush.
Curvature map vs ambient occlusion, cavity, and normal maps
A curvature map vs ambient occlusion comparison starts with what each map measures. Curvature responds to local change in surface direction. Ambient occlusion estimates how much surrounding geometry blocks incoming ambient light. A convex lip can be bright in curvature but unoccluded in AO; a broad enclosed space can be dark in AO without containing a sharp concave edge.
A cavity map is usually a tighter, detail-focused occlusion signal. It emphasizes small recesses, pores, cracks, and seams. Depending on the baker, it may look similar to the concave half of curvature, but the measurement and intended use differ. Treat names as hints and inspect what the tool actually produced.
A normal map stores surface orientation, normally as RGB vectors. It changes shading; curvature is commonly derived from those orientation changes and used as a mask. A height or displacement map stores elevation, while a thickness map estimates distance through the mesh. None is a drop-in substitute for the others.
| Map | Describes | Common use |
|---|---|---|
| Curvature | Local convex and concave shape changes | Edge wear, cavity masks, material selection |
| Ambient occlusion | Broader blocked ambient exposure | Restrained contact and crevice shading |
| Cavity | Small-scale recessed detail | Dirt masks and fine material response |
| Normal | Surface orientation | Lighting detail without extra silhouette geometry |
| Height | Relative surface elevation | Parallax, displacement, material blending |
See the ambient occlusion map guide and normal map guide for the neighboring signals. Keeping them separate makes debugging far less philosophical.
Clean noise before it becomes wear
High-frequency normal detail can turn a raw curvature map into static. Every pore, stamped letter, and compression ripple may generate a bright-dark halo. That is useful only if the intended mask operates at that scale.
Blur or denoise the source used for broad wear, bake multiple radii, and use levels gently. Hard thresholding creates brittle one-pixel rims that shimmer under mipmapping. Wider transitions survive filtering and give downstream masks room for variation.
| Symptom | Likely cause | Better test |
|---|---|---|
| Every edge has identical paint loss | Raw convex mask used directly | Multiply by exposure and hand-painted exclusions |
| Flat faces look dirty | Noisy normals or projection gradients | Rebake with cleaner normals and isolate broad scale |
| Thin black or white UV outlines | Insufficient dilation or mismatched cage | Inspect islands on a contrasting background |
| Wear flickers at distance | Mask is too sharp for its mip chain | Soften the transition and inspect lower mips |
| Mirrored sides disagree | Tangent or projection mismatch | Compare normal and curvature bakes per island |
| Tiny details dominate the map | Radius is too narrow | Bake separate fine and broad curvature scales |
If the map will be packed with other masks, store it as linear data and document the channel. The texture channel packing guide covers color space and compression. A beautiful mask sampled as sRGB can become a different mask before the shader even uses it.
Curvature maps in Substance Painter, Blender, Unity, and Unreal
For a curvature map for Substance Painter, bake the mesh maps after the low-poly normals and UVs are final enough to trust. Smart masks and generators can use curvature immediately, but inspect their output at material scale and add paint or fill layers for exclusions. Re-bake after changing bevels, smoothing, or projection pairs; an old map attached to new geometry is a very tidy source of wrong answers.
For a curvature map Blender workflow, curvature can be derived procedurally from geometry or baked through a node-based setup, depending on the renderer and version. For portable delivery, bake the final mask into the same UV layout as the PBR set, verify it in a simple material, and keep the procedural graph as the editable source. Avoid depending on a viewport-only look if the asset must leave Blender.
For a curvature map Unity or curvature map Unreal Engine material, decide whether the effect belongs in authoring or at runtime. Pre-baked wear and dirt are cheaper, deterministic, and easy to art-direct. Runtime curvature approximations can help procedural meshes or dynamic effects, but they add shader work and may respond to screen-space derivatives or tessellation differently across distance. Ship the dynamic version only when the effect genuinely changes during play.
In either engine, import the mask as linear data, disable color-style compression where it damages the required precision, and consider packing it with compatible masks. Test the final material under moving light and through its mip chain. The best curvature map workflow 2026 is still the one where the bake survives the camera, the compression settings, and an artist asking why the protected underside has been polished.
FAQ
What is a curvature map?
A curvature map is a grayscale texture that records local convex and concave changes across a mesh. It is mainly used as a mask for edge wear, cavity dirt, polishing, and other geometry-aware material effects.
How do you bake a curvature map?
Prepare the low-poly UVs, match the high and low meshes, set a clean cage, and bake the required normal information before curvature if the tool derives from it. Choose a radius that matches the intended effect, add padding, then inspect the result on the model for leaks and noise.
What is a curvature map used for in Substance Painter?
Substance Painter uses curvature in smart masks and generators to find exposed edges and recessed areas. Treat the generated result as a starting mask, then combine it with direction, noise, material logic, and hand-painted corrections.
Is a curvature map the same as ambient occlusion?
No. Curvature measures local changes in surface direction, while ambient occlusion estimates how much nearby geometry blocks ambient light. They can both darken creases in a preview, but they describe different properties and should remain separate inputs.
Can I make a curvature map from a normal map?
Yes. Many tools estimate curvature from changes between neighboring normal-map vectors. The result inherits any skewing, seams, noise, or compression in that normal map, so start from a clean high-quality bake.
Do games need a curvature map at runtime?
Usually not. Curvature often does its work during texture authoring and is baked into the final base color, roughness, metalness, or masks. Keep it at runtime only when the shader needs adjustable or dynamic geometry-aware effects.
Why is my curvature map noisy?
The source normals may contain very fine detail, projection errors, hard-surface shading artifacts, or compression. Bake separate radii, clean the normal bake, soften broad masks, and reserve the noisy version for effects that truly need micro-detail.
Try CraftPBR
CraftPBR supplies the coordinated surface maps that a curvature map can help art-direct:
- Text-to-PBR generates a complete material set from a physical surface description.
- Photo-to-PBR converts a controlled reference photo into aligned PBR maps.
- Node workspace keeps edge breakup, cavity response, roughness, map balance, and variations editable.
- Engine export prepares normal orientation, roughness or smoothness, channel packing, and filenames for common destinations.
- Free tier lets you generate and validate a full material before committing it to an asset pipeline.
- CC0 output lets you modify, render, and ship generated textures without attribution.
Create a material to drive with your curvature masks →
Let geometry nominate the pixels. Make the material earn the final vote.