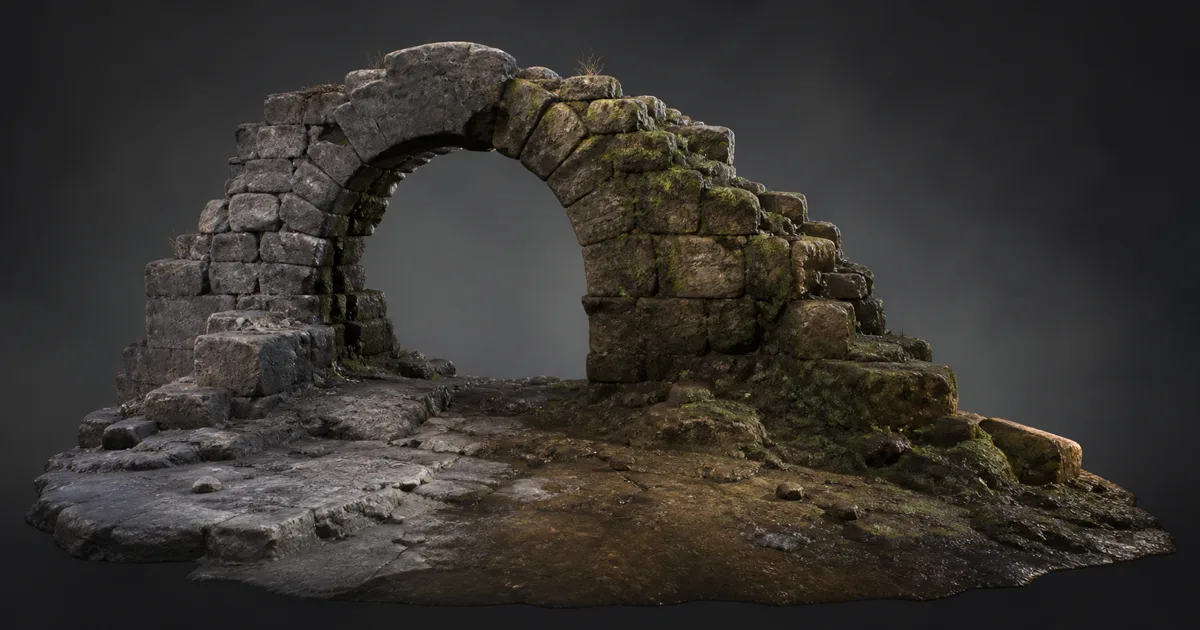
A mesh vertex is an improbably economical storage device. Alongside position, normal, and UV data, it can carry color values that a shader reads as paintable masks. Vertex painting turns those values into local art direction: moss where water lingers, dust on sheltered ledges, mud beside a path, or polished wear around repeated contact.
The paint follows geometry while visible detail still comes from tileable PBR materials. You get local variation without authoring a unique 4K set for every wall. The catch: vertex painting only has the resolution supplied by the mesh, and every blended layer still costs shader work.
What vertex painting actually stores
Vertex color is usually four scalar channels: red, green, blue, and alpha. The renderer interpolates those values across each triangle, producing a smooth mask at every shaded pixel. A material can use one channel to blend two surfaces, or treat several channels as weights for a larger layer stack.
The colors need not appear as visible red, green, and blue. In a vertex color material blending graph, red might mean moss, green might mean mud, blue might mean wetness, and alpha might reserve a wear mask. A debug view shows the colors directly; the shipping material uses them as data.
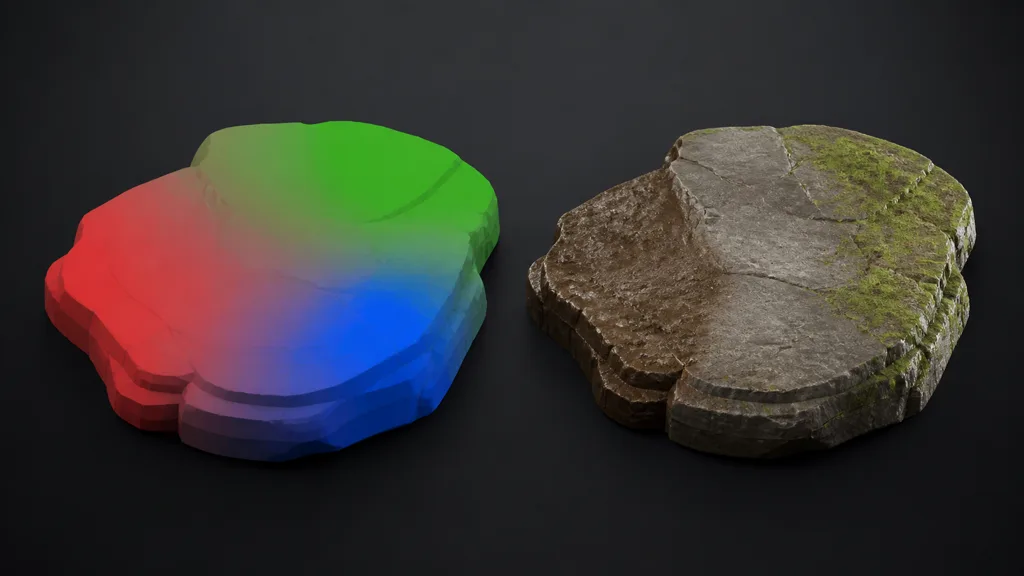
Decide the channel contract before painting. Record each channel’s meaning, default value, whether weights must sum to one, and what happens when every value is zero. White initialization can make all layers compete immediately; black initialization can make the base layer predictable. Neither is universally right, but an undocumented default is reliably wrong during handoff.
Use vertex colors for low-frequency placement, not for pores, scratches, or crisp lettering. Those details belong in the blended textures, decals, or geometry. Vertex paint masks answer where a material state appears. The PBR maps answer what that state looks like up close.
Mesh density sets the brush resolution
Vertex paint exists only at vertices and is interpolated between them. A broad quad has four samples no matter how enthusiastically the cursor circles its center. If a transition needs to bend around a drain, follow a stair edge, or form a narrow path, the mesh must provide vertices along that shape.
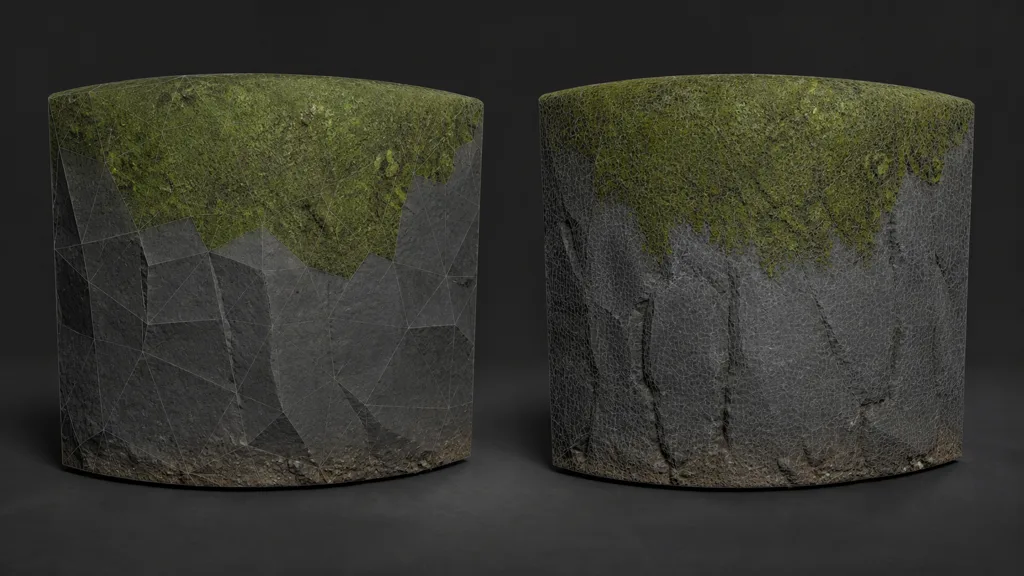
This does not mean subdividing everything into confetti. Add density where painted boundaries need control and keep topology regular enough for smooth interpolation. Long thin triangles can pull a soft boundary into spikes. Uneven tessellation makes the same brush radius behave differently across adjacent modules. Test the actual import because welding, LOD generation, and mesh optimization can change vertex counts or split vertices at UVs, normals, and material boundaries.
When someone asks why does vertex paint look blurry, the first check is topology, not texture resolution. Toggle a wireframe view and compare edge length with the desired paint feature. If the feature is smaller than the surrounding triangles, use more geometry, move that information into a texture mask, or accept a broader transition. Increasing a moss texture from 2K to 4K cannot sharpen a mask that has one useful vertex every half metre.
For modular kits, keep compatible density near shared edges so a blend does not end crisply on one piece and dissolve across its neighbor. The UV mapping guide covers the separate texture-coordinate system.
Plan channels around material states, not paint colors
A two-layer blend is straightforward: one channel drives a linear interpolation from material A to material B. Three or four layers require a weight strategy. Independent RGB channels can overlap, normalized weights can divide by their total, and sequential lerps can make later layers dominate earlier ones. These graphs may show the same inputs while producing different results.
Start by naming states in physical terms:
- base stone;
- damp stone;
- moss growth;
- deposited dirt;
- optional wear or puddle control.
Then decide whether a state needs a full material or only a modifier. Wet stone may reuse the stone base color and normal while lowering roughness and darkening color. Moss usually needs its own base color, normal, roughness, and possibly height response. A wear channel may only alter roughness and reveal a cleaner base. Treating every idea as a complete four-texture layer makes the shader expensive before it becomes interesting.
Keep a channel debug mode in the master material. Display R, G, B, A, their sum, and the final normalized weights. It turns a vague complaint such as “the mud wins” into evidence. Shader graphs are far easier to repair when the masks stop pretending to be scenery.
How to vertex paint materials without breaking PBR
- Choose the material states. Define the base and each local variation by physical cause, not merely by color.
- Prepare compatible PBR sets. Give every true layer aligned base color, normal, roughness, metalness, height, and AO data where relevant.
- Write the RGBA contract. Assign channels, defaults, normalization, and fallback behavior before painting.
- Check vertex density. Inspect topology at the intended world scale and add control only where useful boundaries need it.
- Build and debug the blend. Preview each channel and confirm that base color, normals, and scalar maps use the same weights.
- Paint broad causes first. Place moisture, traffic, exposure, and deposits; add breakup from texture detail rather than tiny brush scribbles.
- Test LODs and instances. Verify that paint survives mesh import, simplification, duplicated modules, and the chosen asset-versus-instance workflow.
- Profile the final material. Measure texture samples, shader instructions, memory, and visual stability on target hardware.
For PBR material blending, interpolate complete material properties rather than only base color. Blend roughness with roughness, metalness with metalness, and normals with a method suitable for normal vectors. A green tint over stone is not moss if the reflection and surface detail remain polished granite.
Height-aware blending can make one material appear to collect inside the cavities of another. Use it gently and keep a plain weight path available for diagnosis. Aggressive contrast functions produce attractive close-ups and brittle distant mips. If the edge boils when the camera moves, the material is auditioning for a different project.
Make the transition follow a physical cause
Good blend textures with vertex colors workflows combine hand placement with procedural logic. Vertex paint provides intent; slope, world-space up direction, cavity, height, and noise refine the boundary. Moss can favor upward-facing damp surfaces. Dust can accumulate on sheltered horizontal ledges. Mud can spread from the ground and gather in depressions. Wear can follow paths and contact zones.
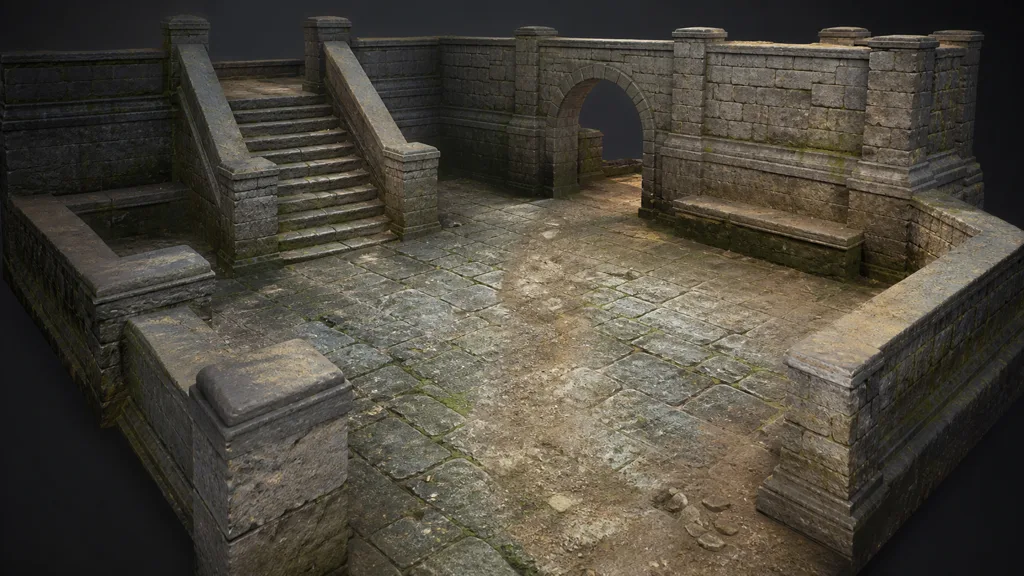
Do not let one grunge texture modulate every channel. Shared breakup can align the edge, but color, roughness, normal strength, and height should respond according to the two materials being mixed. A moss boundary may be irregular in color while its dampness extends farther into the stone. A dusty layer can soften normals without turning metalness gray.
For terrain texture blending, reserve vertex or landscape weights for broad material placement and let each layer tile at a sensible physical scale. Add a separate macro variation frequency to prevent acres of identical detail. The seamless texture guide explains how to build quiet reusable tiles; vertex painting gives those tiles somewhere specific to happen.
Budget the blend before adding another layer
Vertex color data itself is small. The blended material is where cost accumulates. Each layer may sample base color, normal, roughness, AO, height, and macro detail. Four layers can become dozens of samples, plus blending math, triplanar projections, parallax, or runtime virtual-texture lookups.
Share UV calculations and sampler states where the engine permits. Pack compatible scalar maps using the texture channel packing guide. Skip constant maps: nonmetal dirt does not need a sampled black metalness texture. Use a simpler master variant when a platform cannot afford the full stack.
Inspect distant behavior too. Height blends can become unstable after mipmapping, and LODs may remove painted vertices. Transfer important weights to each approved LOD. The best vertex painting workflow 2026 keeps its material history stable across the shipped camera range.
Vertex painting in Unity, Unreal Engine, and Blender
For vertex painting Unity workflows, the mesh carries a color value for each vertex; Unity’s Mesh.colors documentation exposes that data. In Shader Graph, read the Vertex Color output, split RGBA, and use the chosen channel contract to blend complete material properties. Built-in shaders do not all display vertex color automatically, so the material must explicitly consume it. Confirm whether paint is authored in the DCC, generated by tooling, or stored in a custom editor workflow before building a large content pipeline.
For vertex painting Unreal Engine, the material uses a Vertex Color expression and Mesh Paint can paint color or layer weights in the viewport. Epic documents two-, three-, four-, and five-texture weight strategies, but the material graph must match the selected paint mode. Decide whether color belongs to the static-mesh asset or a placed instance, then test reimport and LOD behavior. A perfect instance paint pass is not useful if the next mesh revision politely replaces its vertices.
For vertex painting Blender, create and select a color attribute, paint it in Vertex Paint mode, then read that named attribute in the material. Verify the attribute domain and export support expected by the destination format. Blender is useful for authoring and preview, but the receiving engine still needs the same attribute name or semantic, channel contract, and material logic.
Across all three, use a small validation asset with known red, green, blue, and alpha regions. Import it before production art. If a channel is missing, gamma-shifted, reordered, or dropped, a deliberately ugly test mesh will say so faster than a tasteful ruin.
Diagnose vertex painting failures channel by channel
| Symptom | Likely cause | Fast test |
|---|---|---|
| Paint edge is broad or angular | Too few vertices or uneven triangles | Show wireframe and compare edge length with the desired feature |
| One layer dominates everywhere | Wrong defaults, lerp order, or unnormalized weights | Display RGBA and their sum as grayscale |
| Color blends but lighting jumps | Roughness, normal, or metalness uses different weights | Replace all layers with flat diagnostic values |
| Detail swims across the boundary | Mismatched UV scale or projection spaces | Feed both layers the same checker and mapping |
| Paint changes on another copy | Asset color used when instance data was expected | Paint one duplicate and inspect the source mesh data |
| LOD pops to a different blend | Vertex colors were not transferred | Force each LOD and display raw vertex color |
| Material is unexpectedly costly | Too many layers or height and triplanar samples | Profile one-layer, two-layer, and final variants |
Finish with a three-distance review: close enough to judge map coherence, medium distance to judge the transition shape, and far enough to expose LOD and mip behavior. Vertex color painting should remain art-directable at the first two distances and stable at the third. If it only works while the mesh is selected in a debug viewport, it has completed the tutorial but not the job.
FAQ
What is vertex painting in 3D?
Vertex painting stores color values on mesh vertices and interpolates them across triangles. A shader can display those colors directly or use their RGBA channels as masks for texture blending, wetness, wear, wind, or other local controls.
How do you blend textures with vertex colors?
Read a vertex-color channel in the material and use it as the weight between two complete PBR material sets. For more layers, define an RGB or RGBA weight strategy, then preview and normalize the channels so overlapping paint behaves predictably.
Why does vertex paint look blurry?
The mesh probably lacks enough vertices near the desired boundary, so interpolation spans large triangles. Add purposeful topology, paint a broader feature, or move crisp detail into a texture mask; increasing the layer texture resolution alone will not sharpen the vertex mask.
Does vertex painting add draw calls?
Vertex colors alone do not necessarily add a draw call, but the shader that consumes them can become more expensive through extra texture samples and blending instructions. Profile the complete material and target platform rather than judging cost by the small size of the paint data.
Can vertex painting blend normal and roughness maps?
Yes, and it usually should when blending two materials. Apply the same logical weights to base color, roughness, metalness, AO, and normal detail, using an appropriate normal-blending method so the transition remains physically coherent.
Is vertex painting better than texture painting?
Neither is universally better. Vertex painting is compact, follows the mesh, and suits broad reusable masks; texture painting provides finer, UV-dependent detail. Production materials often use vertex paint for placement and tileable textures or decals for high-frequency information.
Does vertex painting work with LODs?
Yes, but each LOD needs compatible color data. Simplification changes vertices and interpolation, so transfer or bake the weights and review every LOD; otherwise painted boundaries can shift or disappear at distance.
Try CraftPBR
CraftPBR supplies the material layers that make vertex painting useful instead of merely colorful:
- Text-to-PBR generates aligned material sets from descriptions such as damp limestone, compacted soil, or soft moss.
- Photo-to-PBR converts a controlled surface photograph into coordinated base color, normal, roughness, height, AO, and metalness.
- Node workspace keeps tiling, map levels, layer cleanup, and export decisions editable before the materials enter an engine blend graph.
- Engine export prepares roughness or smoothness, normal orientation, channel packing, and filenames for common destinations.
- Free tier lets you build and test a complete PBR layer before expanding the material stack.
- CC0 output lets you modify, blend, render, and ship generated materials without attribution.
Create the PBR layers for a vertex-painted material →
Paint the causes. Let the shader handle the evidence.