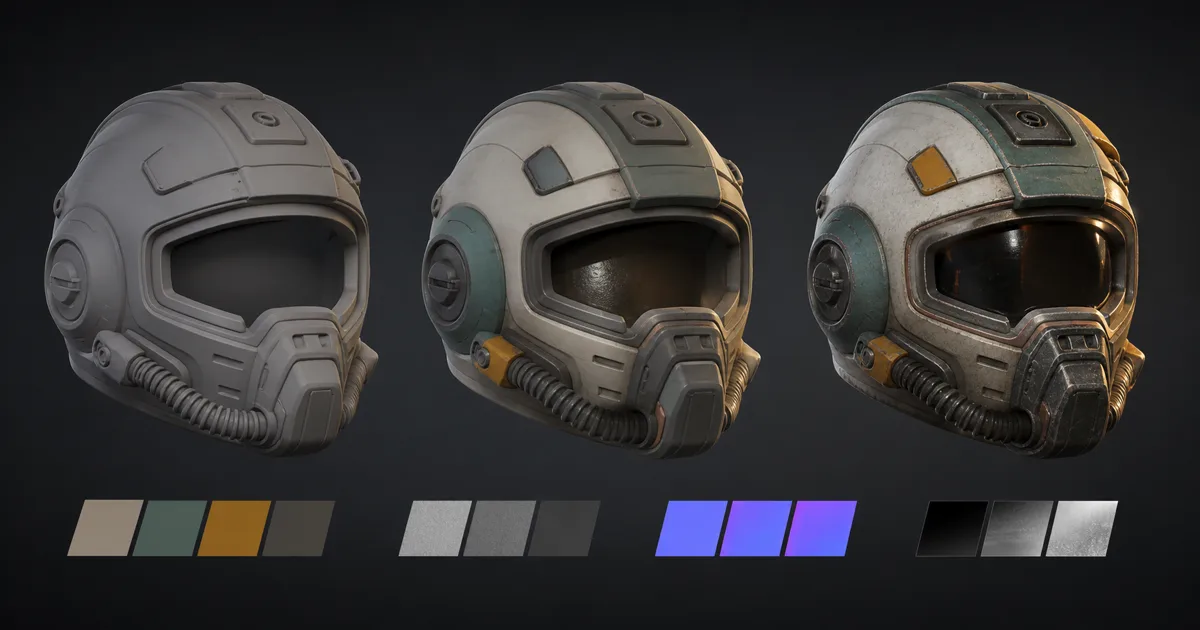
The first mark in 3D texture painting should not be a scratch. It should be a decision about what the object is made from, how it was manufactured, who handles it, and which parts the camera can actually see. Once those answers exist, color, roughness, metalness, and surface relief can tell the same story instead of improvising four incompatible ones.
That is the useful distinction between decorating a mesh and running a production texture painting workflow. The artist prepares trustworthy mesh data, establishes broad materials, adds functional variation, then validates the result under lighting that has no interest in being polite. This guide follows that order for game assets, whether the painting happens in Blender, Substance 3D Painter, ArmorPaint, Mari, or another layer-based tool.
Start 3D texture painting with a material brief
Before opening a brush panel, write a one-paragraph material brief. Name the major substances, their manufacturing state, their age, the environment they occupy, and the approved camera distance. A maintenance robot might use powder-coated steel panels, cast aluminum joints, rubber tires, and dust from a dry quarry. That sentence already rules out random chrome patches, identical roughness everywhere, and tropical moss making an ambitious career change.
Collect references by material behavior rather than by silhouette alone. One image may explain chipped powder coat, another oily fingerprints, another the way dust softens rubber. Look for evidence under several lighting conditions. A frontal studio photo is useful for color; grazing light is better for roughness and shallow relief.
Set technical constraints beside the art brief:
- Final texture resolution and texel-density target.
- UV layout, mirrored regions, and any stacked shells.
- Tangent basis and normal-map orientation.
- Metallic-roughness or specular-glossiness shading model.
- Required exported maps and channel packing.
- Target engine, compression, and closest camera distance.
The UV mapping guide covers distortion, island placement, and texel density. Resolve those issues before detailed 3D texture painting. A brush can cross a seam in 3D view, but it cannot make a stretched UV island stop rationing pixels.
Build the bake evidence before painting detail
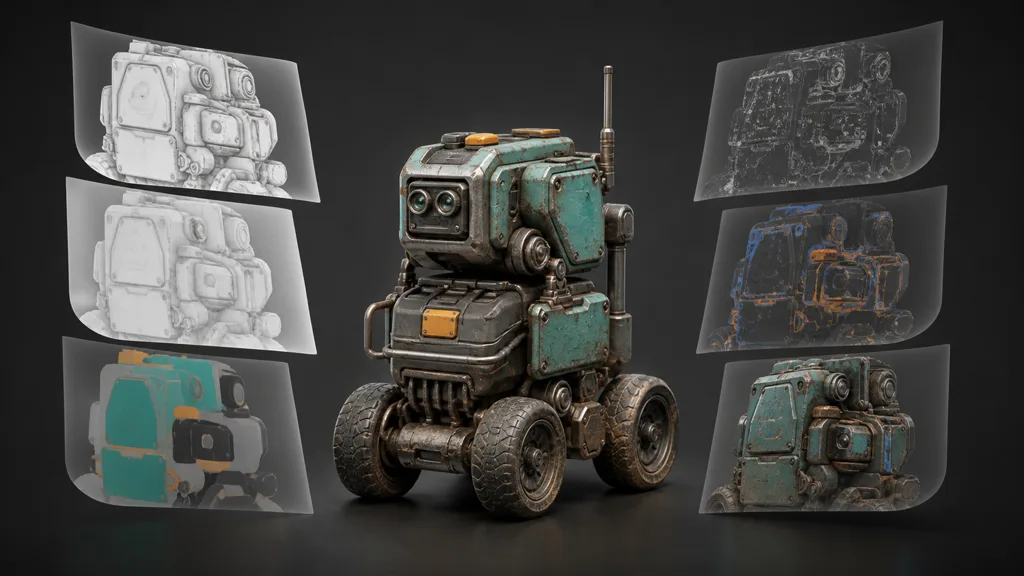
Most 3D model texture painting begins with mesh-derived maps. A tangent normal bake transfers small high-poly forms to the low-poly shading. Ambient occlusion estimates tight local exposure. Curvature identifies convex and concave transitions. Position, world-space normal, thickness, and material-ID maps can drive directional effects and masks.
These maps are evidence, not finished art. Curvature can help select worn edges, but a global edge-wear generator does not know which corners touch the floor, sit behind a guard, or were freshly replaced. AO can guide dust and cavity masks, but multiplying it heavily into base color bakes a lighting condition into the material. The asset then carries the same shadow into every room like personal luggage.
Inspect the bake on the low-poly mesh before painting:
- Look for waviness around hard edges and gradients caused by an unsuitable cage.
- Check skewed bolts, floating details, and missed rays.
- Confirm mirrored shells produce the intended tangent result.
- Test the normal map under a rotating neutral light.
- Verify dilation extends valid pixels beyond every UV island.
Fix bake failures at the cage, geometry, smoothing, or UV stage. Painting over them hides symptoms in one map while the normal map keeps presenting the original problem. The texture baking guide explains cages, ray distance, hard edges, and projection failures in detail.
How to paint textures on 3D models step by step
A dependable answer to how to paint textures on 3D models is to work from large material facts toward small local evidence:
- Prepare and test the mesh. Finalize UVs, triangulation policy, smoothing, names, scale, and material assignments; then run a checker and neutral-light test.
- Bake support maps. Produce clean normal, AO, curvature, position, thickness, and ID maps needed by the chosen tool.
- Block material families. Assign flat, readable groups for paint, bare metal, rubber, leather, wood, stone, or other substances before adding wear.
- Set physical response. Establish plausible roughness, metalness, and height ranges for each material under a neutral environment.
- Add designed variation. Use masks and layers for manufacturing marks, handling, abrasion, dust, leaks, fading, and repairs tied to the object’s construction.
- Repair seams and projections. Paint across UV borders in 3D view, inspect 2D islands, and remove stretching, mirrored clues, and padding gaps.
- Export and validate. Test the final map set in the target shader, under multiple lights, at delivery resolution and compression.
Save checkpoints after the blockout, physical-response pass, storytelling pass, and export setup. If an art director decides the asset should be factory-new, the correct response should be disabling a wear group, not negotiating with 180 merged layers.
Treat PBR texture painting as linked material behavior
In PBR texture painting, every channel describes one physical surface. Base color supplies lighting-neutral color. Roughness controls the spread of reflections. Metalness identifies conductor versus dielectric behavior. Normal and height describe small changes in form. AO is restrained local occlusion, not an invitation to paint dramatic shadows into every corner.
Build a small material range before detail. Painted steel might have a dielectric painted surface, a slightly irregular roughness response, and exposed metallic edges only where the coating is actually removed. Rubber stays nonmetallic, carries softer broad roughness variation, and collects fine dust differently. Oiled leather may be smoother at frequently handled areas without becoming polished metal.
Switch channels often. A stain visible only in base color looks printed. A scratch present only in the normal map can read like invisible engraving. A believable scrape may lighten or darken the base color, change roughness, interrupt a coating mask, expose metalness at the deepest point, and add a very small height response. Not every mark needs every channel, but every changed channel needs a reason.
The PBR workflow guide explains the metallic-roughness map set. During 3D texture painting, use that map logic as a consistency test: if a pixel claims to be bare steel in metalness, its base color and roughness should also behave like bare steel.
Use texture painting masks and layers with intent
Good texture painting layers separate decisions that may change independently. Keep broad material fills below manufacturing variation, local story details, and final grading. Name groups by purpose: paint_blue, bare_steel, rubber_dust, left_handle_polish. Names such as Layer 74 copy 2 accurately document only the passage of time.
Use texture painting masks to expose or restrict an effect without destroying its source. A fill layer can define the paint’s complete base-color, roughness, metalness, and height response; a mask then decides where that paint exists. Another layer can describe exposed primer beneath it. This is easier to revise than manually matching several channels with separate brush strokes.
Procedural masks are strongest as selectors and starting points. Curvature can find candidate edges, position can restrict dust near the ground, and ambient occlusion can locate sheltered cavities. Break their uniformity with hand edits based on function. High points do not wear equally: a protected upper rim may remain clean while one low handle loses paint because hundreds of hands used it.
Keep high-frequency noise late and subtle. Judge the asset first at expected game-camera distance. If the material reads only when the viewport is close enough to inspect individual pores, the texture has become a private exhibition.
Fix texture painting seams, mirroring, and projection errors
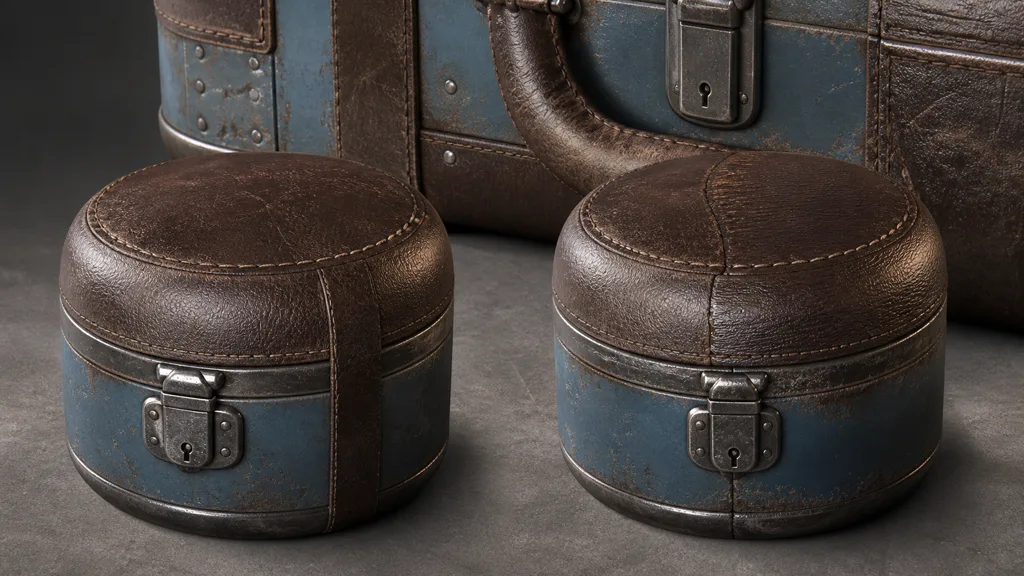
To fix texture painting seams, first identify whether the problem comes from color, data, padding, tangent shading, or projection. Paint across the border in 3D view, then inspect the corresponding islands in 2D. The edge pixels need enough dilation to survive filtering and mipmaps. Normal details must also agree with the target tangent basis.
Projection stretching appears when a decal or planar brush hits a surface at a shallow angle. Limit the projection angle, use tri-planar mapping for suitable broad materials, or place the mark from another view. Check hidden and back-facing polygons; a projected logo-shaped patch on the underside of a crate is less a detail than an alibi.
Mirrored UVs save space but duplicate directional wear, writing, leaks, and recognizable damage. Keep shared base materials and microdetail on mirrored shells, then reserve unique UV space or a separate decal/mask system for asymmetric story information. Stacked shells need the same conscious rule.
Run a seam test with exaggerated roughness and a bright grazing light. Base-color continuity can look fine while reflection width jumps across the border. Also inspect lower mip levels in the destination; a clean authoring viewport cannot prove that compressed edge pixels remain clean at distance.
Choose hand-painted vs PBR textures by the art direction
The hand-painted vs PBR textures choice is not realism versus skill. It is a decision about where lighting information lives. A strongly hand-painted style may place gradients, edge accents, simplified shadows, and color storytelling directly in the texture. A physically based pipeline asks the engine lights and reflection environment to do more of that work through separate material channels.
Stylized games often combine both. Artists simplify shapes and exaggerate color groupings while keeping roughness and normals coherent enough to respond to moving lights. The useful question is not whether the asset looks realistic; it is whether the authored lighting and runtime lighting cooperate.
| Direction | Texture emphasis | Validation priority |
|---|---|---|
| Painterly unlit or lightly lit | Designed color gradients, readable shapes, restrained map count | Silhouette, color hierarchy, camera distance |
| Stylized PBR | Simplified color plus intentional roughness and normal response | Light rotation, value grouping, controlled highlights |
| Realistic PBR | Reference-matched material ranges and subtle local evidence | Neutral and grazing light, channel accuracy, scale |
| Hybrid mobile workflow | Strong color read with economical packed data maps | Compression, memory, low-end shader behavior |
Avoid baking strong directional highlights into a PBR base-color map unless the style explicitly demands it. When the runtime sun moves and the painted highlight stays behind, the object appears to have retained legal counsel.
Export texture painting for game assets, then distrust the preview
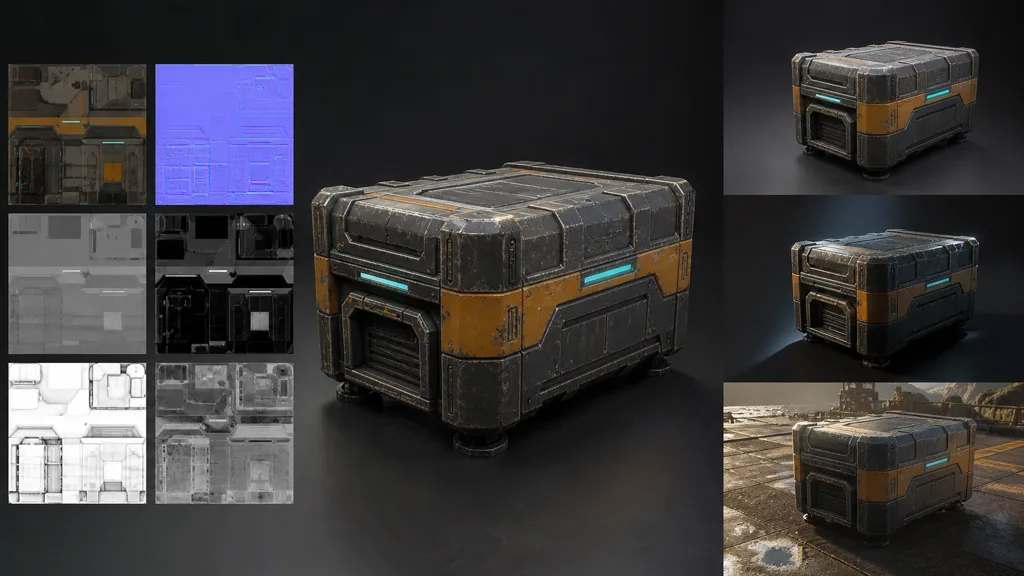
For texture painting for game assets, export only the maps the target shader understands. A common metallic-roughness set includes base color, normal, roughness, metalness, and AO, with optional height, opacity, emissive, or masks. Engines may pack AO, roughness, and metalness into different RGB orders, and normal maps may expect DirectX- or OpenGL-style Y orientation.
For reliable texture painting export for game engines:
- Classify base color and emissive as color images and physical maps as linear data.
- Record packed-channel order in the filename or asset manifest.
- Keep every map at the same crop, orientation, and intended resolution.
- Test alpha mode, two-sided shading, and opacity separately.
- Verify normal orientation with a known convex detail.
- Inspect the compressed build, not only source PNGs.
- Compare the asset under neutral, grazing, dark, and outdoor-like light.
For texture painting in Blender, paint or project into image textures assigned to the mesh, keep UV and image-slot ownership explicit, and use the shader preview to inspect multiple channels. Blender can handle a complete workflow, but a color brush on one active image does not automatically update roughness or metalness. Organize those images deliberately and save or pack them before closing the file.
Choose final resolution from camera evidence. The texture resolution guide explains 1K, 2K, and 4K tradeoffs. The best 3D texture painting workflow 2026 is not the one with the largest source files; it is the one that preserves the intended material after export, compression, mipmapping, and engine lighting.
FAQ
How do you texture paint a 3D model?
Prepare clean UVs, bake mesh maps, block broad materials, establish PBR response, and then add local variation through editable layers and masks. Finish by repairing seams and testing the exported maps in the target renderer or engine.
What is the best software for 3D texture painting?
The best choice depends on the asset, budget, and pipeline. Blender offers integrated modeling and painting, Substance 3D Painter focuses on layer-based PBR authoring, while tools such as ArmorPaint and Mari serve different real-time and high-resolution needs; test export compatibility before choosing.
Do you need UVs to texture paint a 3D model?
Most game-ready image-texture workflows need UVs so painted pixels have stable addresses on the mesh. Projection and vertex-paint workflows can reduce reliance on UVs during authoring, but conventional exported PBR maps still usually require a planned UV layout.
Why are there seams in my texture painting?
Visible seams can come from mismatched island borders, insufficient padding, projection discontinuity, mirrored content, or a tangent-normal mismatch. Inspect both 3D and 2D views, paint across the border, dilate edge pixels, and test the final compressed mip chain.
Should I paint roughness by hand?
Yes, but usually through material fills, masks, and controlled variation rather than a single destructive grayscale pass. Roughness should follow substance, manufacture, handling, and contamination; random noise rarely explains any of those.
What maps should I export after texture painting?
Export the maps required by the destination shader, commonly base color, normal, roughness, metalness, and AO, plus optional height, emissive, opacity, or masks. Confirm channel packing, color-space classification, normal orientation, and file format in the target engine.
Can Blender do 3D texture painting?
Yes. Blender can paint directly on mesh-assigned images and preview the results in a material, but you must manage the active image, UVs, PBR channels, and saved external files deliberately.
Try CraftPBR
CraftPBR can create the coherent material foundation that makes 3D texture painting faster and easier to direct:
- Text-to-PBR generates coordinated material maps from a physical surface description.
- Photo-to-PBR converts a controlled source photo into aligned base color, normal, roughness, height, AO, and metalness.
- Node workspace keeps masks, tiling, levels, layers, and variations editable before or after painting.
- Engine export prepares clear map roles, normal orientation, color/data handling, and packed channels for common targets.
- Free tier lets you build and test a complete material set before committing it to an asset.
- CC0 output lets you paint over, modify, bake, export, and ship generated materials without attribution.
Paint the evidence the object would earn. Let the shader handle the light.