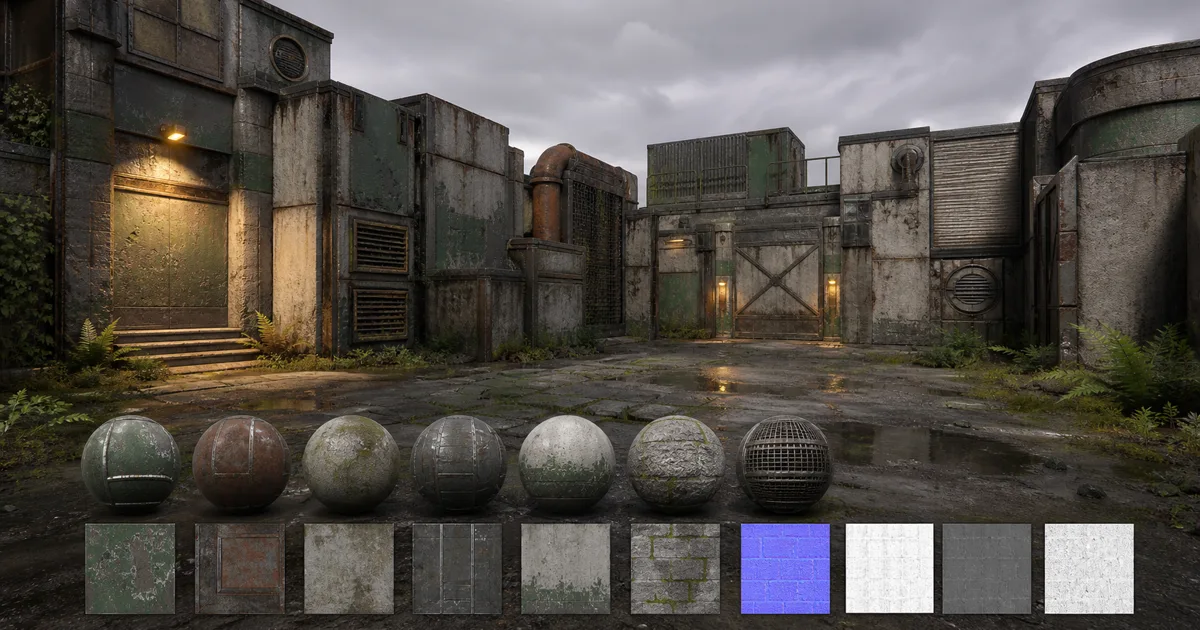
A level can contain thousands of textured surfaces, yet only a few deserve their own heroic 4K map set. A practical AI game textures workflow begins by deciding what the game needs: a unique texture for a focal prop, a tileable material for a wall, a trim sheet for modular architecture, or a decal for local storytelling. Generation comes after that decision.
This guide covers the production choices between prompt and engine: material definition, coordinated PBR maps, cleanup, resolution, packing, repetition, and testing in Unity, Unreal Engine, or Godot. The objective is a small, predictable texture system, not a folder of impressive squares.
Choose the texture system before generating anything
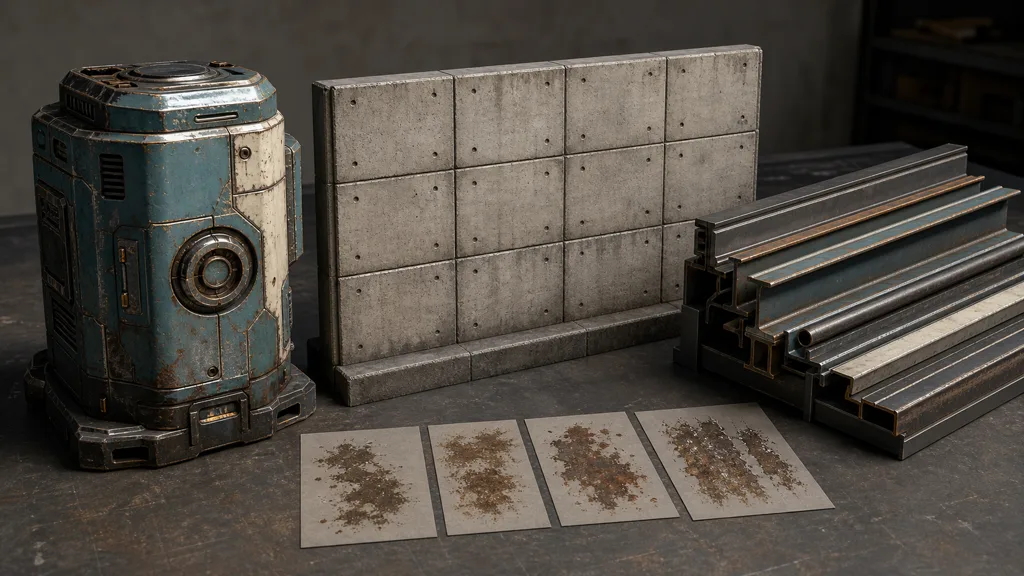
The first question for AI game textures is not “What prompt should I use?” It is “How will this surface be reused?” Four common answers cover most environment work:
- Unique texture sets fit hero props, characters, and objects with specific damage or painted markings. They offer precise art direction, but every asset adds memory and authoring cost.
- Tileable materials cover large walls, terrain, floors, cliffs, and roofs. They reuse a small map set efficiently, although obvious landmarks can reveal the repeat.
- Trim sheets pack reusable edges, beams, panels, mouldings, and bands into one atlas. They are excellent for modular kits because many meshes can share the same material. The trim sheet guide explains the UV workflow.
- Decals and masks add leaks, dirt, cracks, posters, numbers, or edge damage without baking each variation into the base material. They break repetition cheaply when used with restraint.
A strong environment combines them. A factory wall might use tileable concrete, metal trims, stain decals, and one unique control-console texture. Asking an AI game texture generator for a separate 4K wall for every corridor is like furnishing a house with only grand pianos. Record physical size, camera distance, UV method, maps, engine, budget, and tileability beside each asset.
Give every material a physical brief
Useful AI textures for games start with substances and construction, not adjectives alone. “Ancient wall” leaves too much room for decorative storytelling. “Rough limestone blocks, pale lime mortar recessed 12 mm, dry dust in lower cavities, one square metre per tile, no vines, overcast-neutral albedo” provides decisions that can be checked.
A compact material brief should define:
- Base substances: stone, paint, oxide, rubber, wood, mud, moss, or another physically identifiable layer.
- Layer order: paint sits over steel; rust replaces exposed steel; dust settles over both. The map set should respect that stack.
- Physical scale: specify the width of a plank, brick, paver, fabric weave, or complete tile in real units.
- Surface condition: dry, damp, polished, dusty, oxidized, oily, scorched, or recently cut.
- Distribution rules: where wear, moisture, dirt, and biological growth can plausibly collect.
- Production limits: tileability, texture resolution, target platform, channel packing, normal convention, and whether displacement is allowed.
Keep lighting separate from material language. “Wet stone” describes roughness; “stone under a golden sunset” describes illumination that should not be baked into base colour. For AI environment textures, request even illumination without cast shadows, highlights, perspective, or broad gradients. A generated brick image also has no inherent metres-per-tile value. Choose one, document it, and match the mesh UVs.
Generate AI game textures as one coherent PBR set
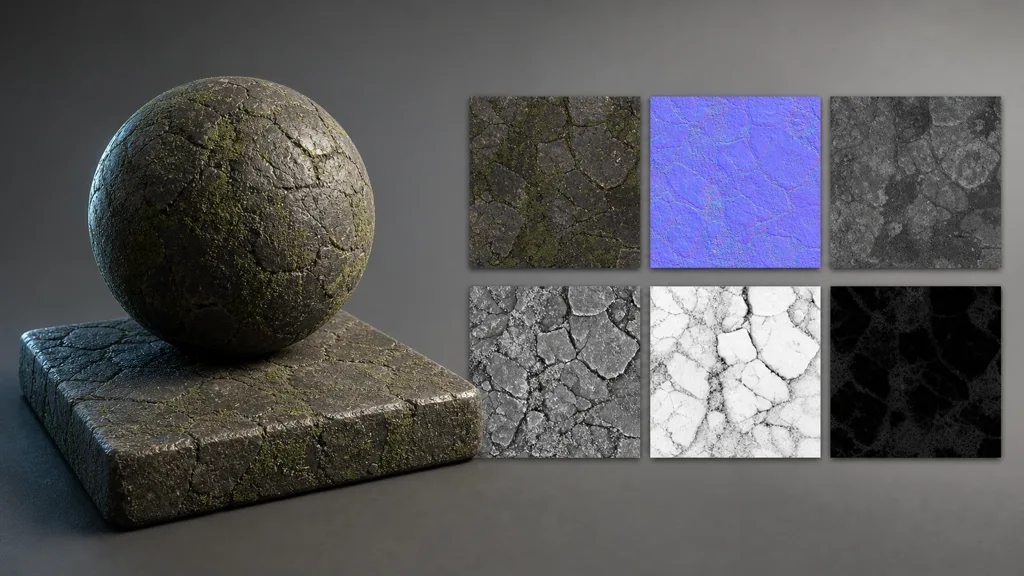
The defining quality of production-ready AI game textures is map coherence. Albedo, normal, roughness, height, ambient occlusion, and metalness are not six visual variations. They are six measurements of one surface.
Generate from one approved material source or use a tool that derives a coordinated set. Then audit the same landmarks across every map:
- A crack visible in albedo should appear at the same coordinates in normal, height, and AO.
- Moss should usually be rougher than wet stone and should not become metallic because it is bright green.
- Painted metal is dielectric at intact paint pixels and metallic only where the conductive substrate is exposed.
- Recessed mortar should agree across height, normal, and occlusion.
- Broad colour variation should not automatically become broad geometric relief.
Base colour should describe reflectance without fixed highlights or shadows. Roughness controls reflection spread. Metalness classifies exposed conductors, not “shiny things.” Normal changes shading direction; height describes elevation. AO can support cavities, but heavy AO in albedo creates permanent shadows.
For a deeper map-by-map explanation, use the PBR workflow guide. When the source is a prompt, the text-to-texture AI guide covers iteration and prompt structure.
Turn attractive outputs into game-ready PBR textures
Generation produces candidates. The next pass makes them usable. Review game-ready PBR textures at 100% size, tiled over at least a four-by-four area, and applied to simple geometry under a moving light.
Start with structural cleanup. Remove accidental borders, cropped features, perspective distortion, lighting gradients, and objects that cannot cross a tile boundary. Offset the texture by half its width and height so the original edges meet in the centre, then repair the join. After the seam disappears, scan the full tiled plane for large landmarks that form a checkerboard.
Next, separate material logic from visual drama:
- Neutralize highlights and cast shadows in base colour.
- Correct normal-map orientation for the target engine.
- Reduce noisy micro-normal detail that sparkles after mipmapping.
- Keep roughness variation tied to plausible surface changes.
- Clamp stray metalness values on stone, wood, paint, fabric, and dirt.
- Preserve enough height precision for smooth slopes; avoid crushed eight-bit images for major displacement when banding is visible.
Do not fix every problem with contrast. Stronger normals, harsher roughness, and deeper AO can make a thumbnail pop while becoming unstable in motion. Judge the surface under neutral and actual game lighting. A texture that needs one exact rim light is auditioning for a screenshot, not a level.
Budget resolution and channels by screen value
The right resolution for AI game textures comes from screen coverage and texel density, not the object's emotional importance. A repeated floor may need more consistent density than a small prop with elaborate backstory.
Choose a texel-density target for each asset class. Measure maximum on-screen size, consider camera distance and field of view, then test 1K, 2K, and 4K versions in motion. The texture resolution guide covers the calculation and memory tradeoffs.
Map count, bit depth, compression, mip chains, streaming, and material permutations also matter. Practical reductions include:
- Pack ambient occlusion, roughness, and metalness into RGB when they share UVs, resolution, compression needs, and mip behavior.
- Use one normal map rather than storing both normal and high-frequency height when the silhouette does not change.
- Share tileables and trim sheets across an asset family.
- Keep source masters separate and lossless, then produce engine-specific packed exports.
- Reserve 16-bit height for surfaces that visibly benefit from the precision.
- Profile on target hardware instead of inferring cost from file size on disk.
Compression should match the data: colour tolerates different artifacts than normals or thin masks. Always inspect the imported result because that is what the engine ships.
Break repetition without making every asset unique
Tileability removes seams; it does not remove repetition. The eye will still find a pale brick, dark pebble, diagonal scratch, or moss island returning at regular intervals. AI terrain textures are especially vulnerable because a single tile may cover a landscape large enough to acquire weather.
Break repetition at several spatial frequencies:
- Micro: normal and roughness detail for pores, grains, scratches, and weave.
- Material scale: the authored tile containing bricks, stones, boards, or clumps.
- Macro: low-frequency colour, roughness, moisture, or dirt variation applied independently of the base tile.
- Local story: decals, vertex-painted masks, puddles, tracks, repairs, debris, and mesh variation placed intentionally.
Rotate tiles only when the material allows it. Rotation suits soil and gravel, not runoff, wood grain, shingles, or machining. Stochastic sampling can hide repeats but costs shader work and may blur features; a macro texture or vertex-colour mask is often easier to direct.
Keep the base tile quiet enough to repeat. Put distinctive events in decals or masks where level artists can place them. This separation gives AI textures for indie games more mileage from a small library while preserving control over where the scene attracts attention.
Export AI game textures to Unity, Unreal Engine, and Godot
Engine presets should transform a clean master set, not redefine the material. Keep albedo, normal, roughness, metalness, height, and AO as separate source files. Then create the exact orientation and packing required by each target.
- Unity: Built-in and URP commonly use metallic in red with smoothness in alpha, while HDRP uses a mask map with several channels. Unity imports normal maps with a dedicated texture type. See the Unity PBR textures guide.
- Unreal Engine: tangent normals use the DirectX convention by default. A common ORM texture stores AO in red, roughness in green, and metalness in blue with sRGB disabled. See the Unreal Engine texture guide.
- Godot 4: tangent normals use the OpenGL convention, and the importer can invert Y for DirectX sources. StandardMaterial3D accepts separate maps; ORMMaterial3D accepts AO, roughness, and metalness packed into RGB. See the Godot textures guide.
Use explicit names such as factory_wall_normal_dx and factory_wall_orm, then store metres per tile, normal convention, channel layout, source version, and license beside the material.
Validate an AI game texture workflow in a material lab
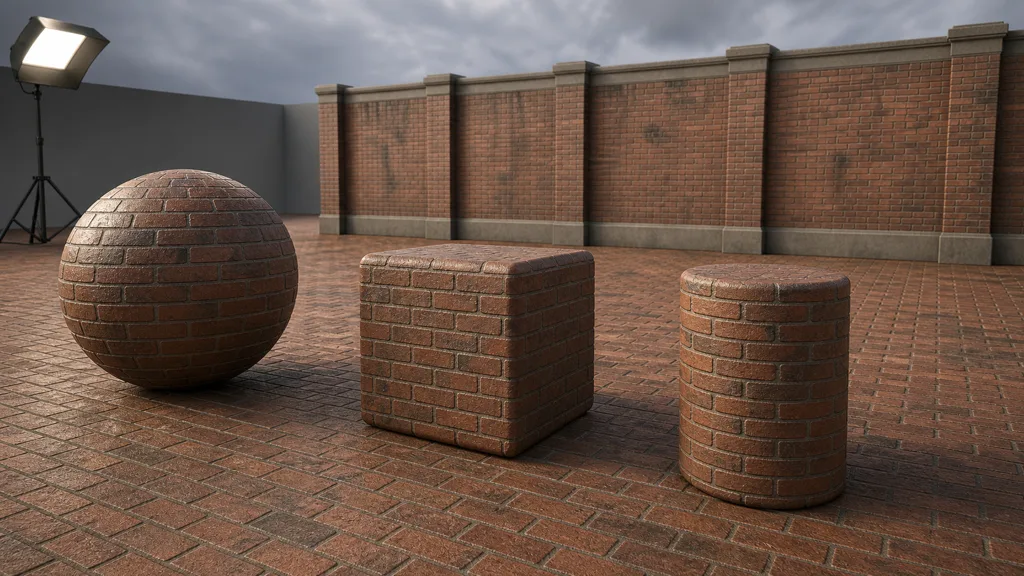
Build a small validation scene and use it for every game texture workflow. Include a sphere for reflection spread, a beveled cube for seams and edges, a cylinder for directional stretching, a large repeated plane, a real-scale reference, and one movable light.
Run the material through this order:
- Apply neutral base colour and inspect roughness and relief under a moving light.
- Restore base colour and check for baked illumination or unwanted colour casts.
- Tile the surface over a large plane and identify repeated landmarks.
- Inspect the silhouette to decide whether normal, parallax, or true displacement is justified.
- Move the camera from close-up to gameplay distance and watch mip transitions and shimmer.
- Test compressed engine imports rather than source images.
- Profile memory, streaming, and shader cost on the target device.
- Place the material in the actual level beside neighboring assets and compare scale, value, and wear language.
Approve the material in context. One excellent mud texture still fails when every road, boot, wall, and roof receives the same frequency. Generation may be enthusiastic; art direction decides where that enthusiasm belongs.
Try CraftPBR
CraftPBR turns AI game textures into an editable material workflow rather than a one-image handoff:
- Text-to-PBR generates a coordinated material set from a physical description.
- Photo-to-PBR converts a captured surface into aligned base colour, normal, roughness, height, AO, and metalness maps.
- Node workspace keeps masks, tiling, ranges, and material layers adjustable.
- Engine export prepares map names, normal orientation, colour/data settings, and channel packing for Unity, Unreal Engine, Blender, and Godot.
- Free tier lets you test a complete material before committing it to a production library.
- CC0 output lets you use, modify, and ship generated textures without attribution.
Create game-ready PBR materials with CraftPBR →
Build fewer texture sets. Make each one earn its memory.