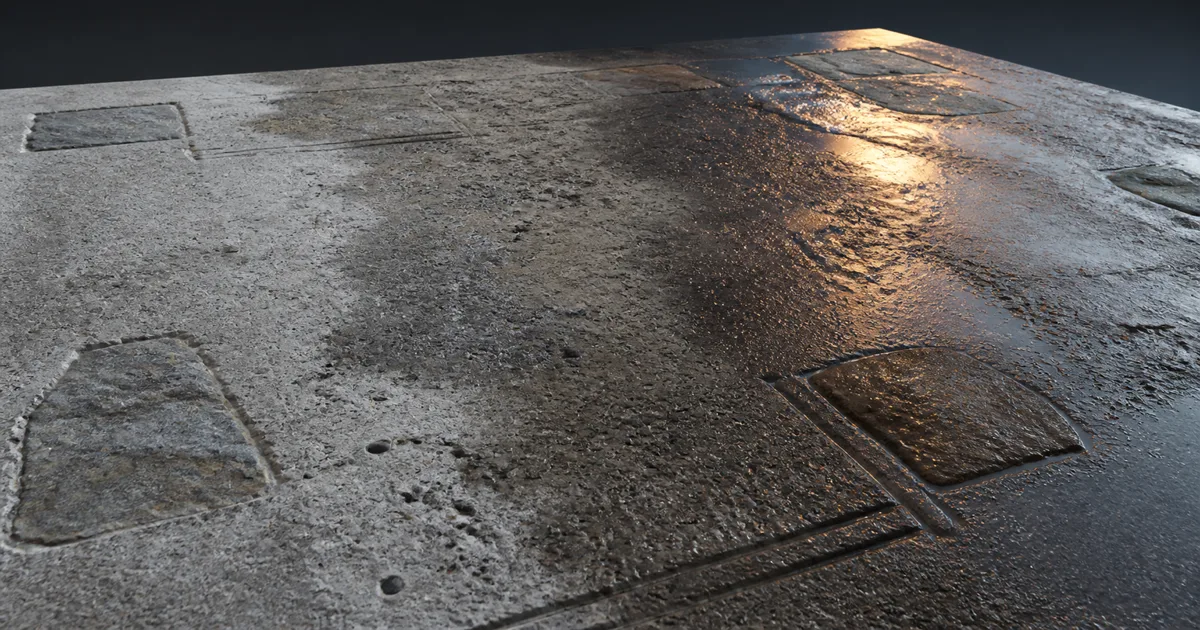
Rain does not turn the world into chrome. It edits surfaces by degree. Good wet surface materials distinguish absorbed moisture, a thin water film, and water deep enough to form a puddle. Each state changes reflection, diffuse color, microdetail, and shape in a different amount.
The usual shortcut is one noise mask connected to darker base color and lower roughness. It works in a still frame until water appears on a vertical wall, fills the tops of stones, and reflects a bright rectangle everywhere at once. A useful wet material shader needs more than a wetness slider. It needs a model for how much water arrives, where it can remain, what the substrate absorbs, and when the film becomes a separate surface.
This is an art-directable model, not fluid simulation. The goal is wet surface materials that remain coherent under moving light, weather transitions, lower mips, and actual level geometry.
Wet surface materials are state changes, not blue paint
Dry porous material scatters light through a rough air-to-solid boundary. When water enters the pores, the boundary changes and less diffuse light returns to the camera. The material often reads darker and more saturated even before visible standing water appears. A film above the surface adds a smoother dielectric interface, so reflections become tighter and the underlying micro-normal response appears flatter.
That gives PBR wetness three useful states:
| State | Base color | Roughness | Normal response | Shape cue |
|---|---|---|---|---|
| Dry | Original calibrated value | Original map | Full substrate detail | No water boundary |
| Damp | Moderately darker for porous dielectrics | Lower, still varied | Slightly reduced fine detail | Irregular absorbed edge |
| Thin film | Substrate remains visible | Low film roughness | Fine relief partly flattened | Coherent grazing reflection |
| Puddle | Dark substrate below water | Water-surface roughness | Separate broad water normal | Level surface and shoreline |
Do not apply the same darkening to every substance. Porous concrete, soil, unfinished stone, and fabric can change strongly. Painted metal, glazed tile, sealed plastic, and polished stone absorb much less; most of their wet read comes from the film and droplets. Metalness should not rise because rain arrived. Water is a dielectric, not a career change for the sidewalk.
For wet surface materials, treat darkening as a controlled approximation, not a universal multiply. If the result only reads because base color was cut in half, the reflection setup or mask needs work.
Separate dampness, water film, and puddle depth
Wet surface materials can use one scalar cheaply, but it should produce staged behavior. Remap a zero-to-one wetness value rather than blending every property linearly.
- 0.0-0.35: damp absorption. Darken eligible substrates, lower wet surface roughness modestly, and preserve most normal detail.
- 0.35-0.75: connected film. Strengthen the smooth reflection, flatten only high-frequency normals, and introduce small breakup at the moving boundary.
- 0.75-1.0: retained water. Allow a level puddle surface, broader ripple normal, depth tint, and shoreline controls where geometry supports them.
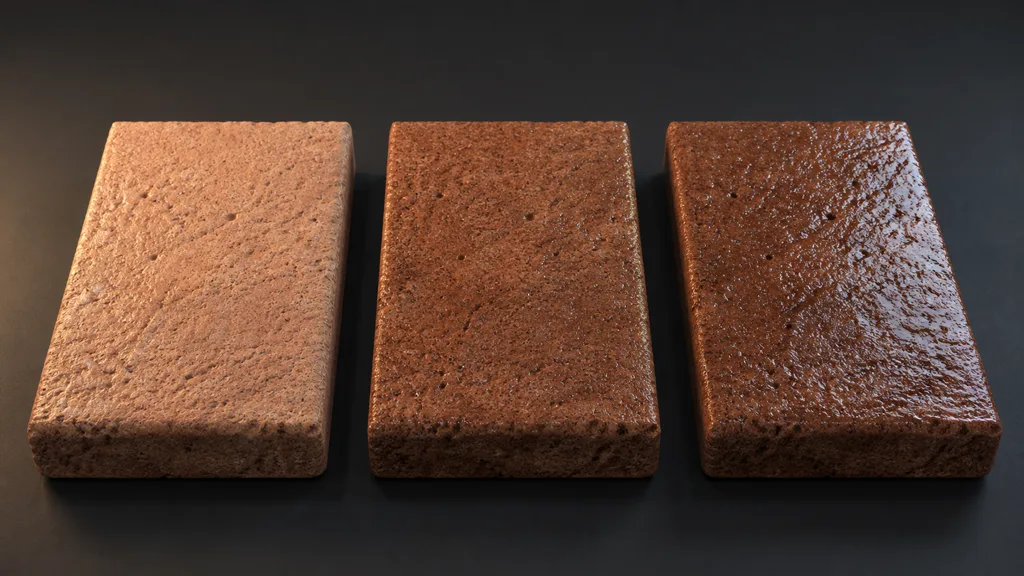
This staged response keeps wet surface materials readable during weather transitions. Dampness can spread quickly after rain begins, while connected film and puddles accumulate more slowly. During drying, exposed crowns and steep faces can lose film first while pores and low joints remain dark.
In wet surface materials, a puddle is not maximum smoothness. It has a level or gently flowing surface independent of substrate relief. Deep water should not emboss every pore, while a microscopic film should not erase centimetre-scale cracks. Split normal detail by frequency and film depth.
Build a wetness mask texture from water amount and place
A useful wetness mask texture combines two questions: how much water is available, and how suitable is this point for retaining it? Keep those inputs separate until late in the graph so artists can direct either one.
For wet surface materials, start with a global weather amount and combine it with local controls:
- Upward exposure. Horizontal faces receive and retain more rain than downward or protected surfaces.
- Height or basin data. Low points accumulate water; raised crowns dry first.
- Flow and drainage. Channels connect wet regions and prevent isolated noise islands.
- Porosity. Concrete and soil absorb differently from paint, glass, and sealed stone.
- Occlusion from rain. Roofs, overhangs, interiors, and undersides need protection data.
- Authored breakup. Vertex colors, decals, or a painted mask preserve composition and gameplay needs.
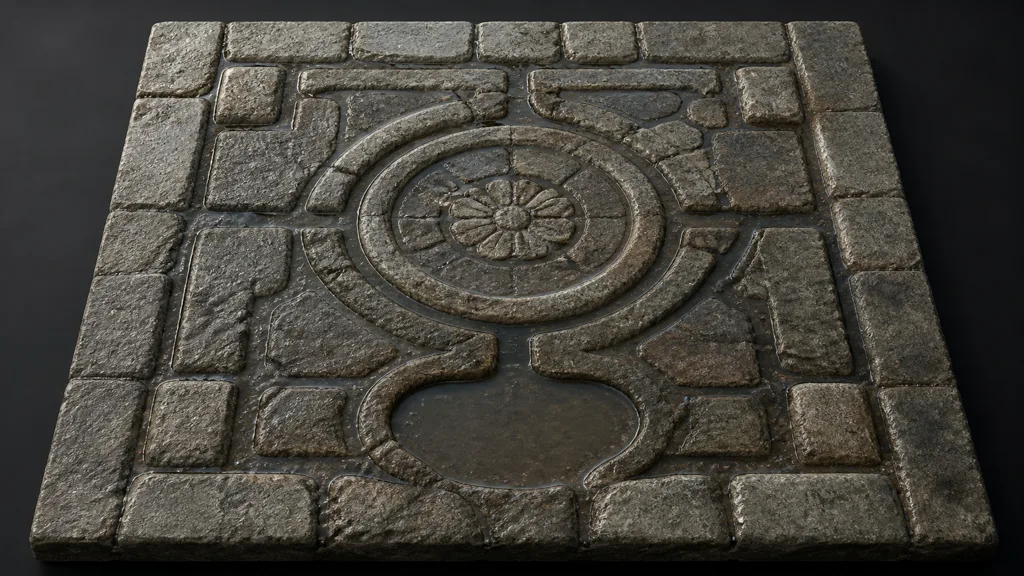
Avoid raw world-space noise as the main puddle mask texture. Noise has no opinion about gravity, so it happily places round puddles on walls and leaves dry holes at the bottom of a trench. Use it to perturb a physically sensible field, not to invent the field.
Vertex color can store retention or shelter on reusable props; slope, height, and accumulation suit large terrain. The vertex painting guide covers editable local masks, while decal textures suit art-directed puddle silhouettes.
Import every mask as linear data. A wetness mask texture is a numeric field, so sRGB decoding changes its thresholds and turns a stable shoreline into a different shape. If several scalar masks share UVs and filtering requirements, the texture channel packing guide shows how to document and pack them safely.
Author coordinated PBR changes under one mask
For wet surface materials, the mask is only the address. The response still needs to agree across these channels:
- Base color: darken porous dielectrics within a measured range.
- Roughness: move toward a film target while retaining low-frequency variation. The roughness map guide explains why reflection width carries the read.
- Normals: attenuate fine detail as film grows, preserve large relief, and add ripples only to retained water.
- Specular/F0: keep the dielectric model unless the renderer exposes a real water coat.
- AO: do not paint baked cavity shadow into the film.
- Displacement: use geometry or parallax only when depth and shoreline must survive camera motion.
Linear normal blending can shrink vectors and change energy. Use a reoriented method, then normalize; the normal map guide covers orientation and imports.
Keep film reflections connected. Equal glossy dots resemble overspray; real breakup has broad damp zones, connected streaks, then droplets. Water is a talented art director and a terrible random-number generator.
How to make a wet material that stays controllable
- Calibrate the dry substrate. Fix physical scale, base color, roughness, normals, and metalness before adding rain.
- Choose substrate behavior. Record porosity, maximum darkening, film roughness, and whether standing water is allowed.
- Create a global wetness control. Use one weather parameter for timing, but keep local retention separate.
- Build the retention mask. Combine exposure, slope, low-point data, shelter, flow, and authored masks in that order.
- Stage the response. Remap damp, film, and puddle ranges instead of driving every output with the same linear value.
- Coordinate the channels. Blend base color, roughness, normal frequency, and optional water layer from related thresholds.
- Add temporal behavior. Spread dampness, accumulate film, form puddles, and dry exposed areas at different rates.
- Pack only compatible data. Match color space, resolution, UVs, compression, and mip behavior before sharing channels.
- Validate under motion. Move lights and camera, force lower mips, change weather speed, and test awkward geometry.
This sequence makes wet surface materials inspectable rather than graphs grown around one screenshot. Save debug outputs for global amount, retention, film coverage, and puddle depth. When a wall shines, find which assumption put water there.
Make rain transitions survive time, distance, and compression
Wet surface materials should not pop when weather toggles. Accumulate the rain wetness shader state over time with separate wetting and drying rates. Dampness can lead, film can follow, and puddles can require sustained rain. Pooled water should persist after raised faces clear.
At distance, droplets disappear into mip averages. Hard thresholds can switch a blurred mask suddenly. Preserve the broad retention field and test target compression; the texture filtering guide covers unstable boundaries.
Screen-space reflections can vanish off-screen; probes may not update; ray tracing costs more. Wet surface materials still need readable roughness when the preferred path is unavailable. A smooth surface reflecting an empty environment looks black, not wet.
Use one weather state for continuity, then vary response by material. Wet surface materials share the weather; absorption and retention remain local.
Wet surface materials in Unity, Unreal Engine, and Blender
For wet surface materials Unity projects, a Shader Graph subgraph can accept dry attributes, weather amount, and retention, then output base color, smoothness, and normals. Unity’s URP Lit Shader documentation defines the inputs to match. Keep scalar data linear and use a global property to synchronize rain.
For a wet surface material Unreal Engine setup, put the response in a Material Function or Material Layer Blend. Epic’s Material Layers documentation supports per-layer masks and instance parameters. A Material Parameter Collection can drive weather; vertex color, world masks, Runtime Virtual Textures, or decals can provide retention. Blend complete attributes, not Base Color alone.
For a wet surface material Blender setup, mix dry and wet color and roughness, attenuate fine normals, and add a water normal only where film is deep enough. Blender’s Principled BSDF documentation exposes base roughness and a Coat layer with separate weight, roughness, IOR, tint, and normal. Painted masks and geometry puddles may beat a universal graph; bake masks for engine export.
Across all three, wet surface materials need the same portable contract: dry maps, amount, retention, porosity, darkening, film roughness, normal attenuation, puddle threshold, and normal orientation.
Validate wet surface materials on hostile geometry
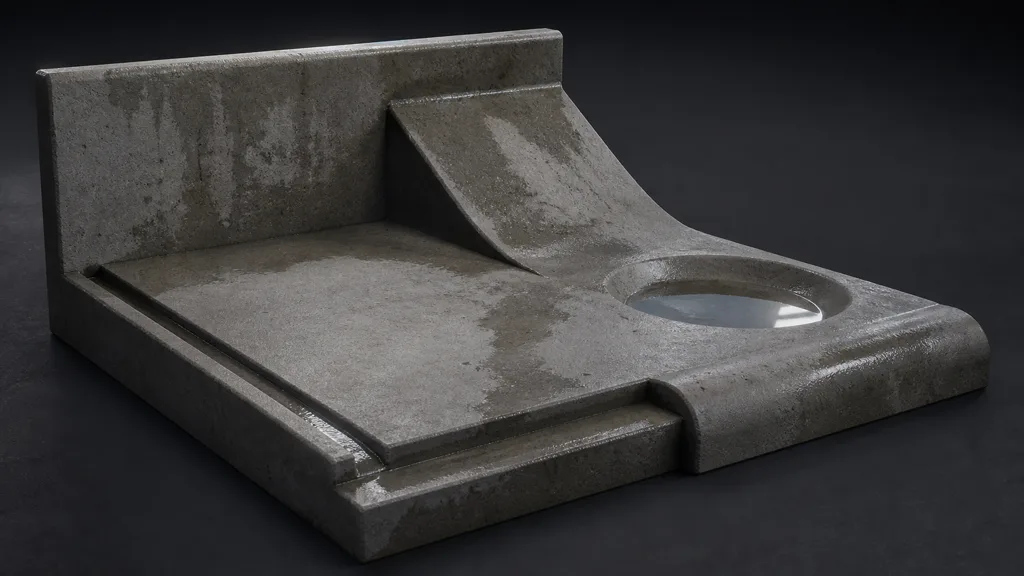
Build one range with a pad, ramp, wall, underside, step, groove, bowl, and curb. Apply the same wet ground material throughout to expose climbing water, broken drainage, flat normals, and camera-dependent transitions.
Check wet surface materials under an overcast environment, a narrow grazing light, a bright reflection card, and a dim scene. Animate the light and weather amount. Then force low mips, platform compression, lower reflection quality, and the most distant expected camera.
| Symptom | Likely cause | First useful check |
|---|---|---|
| Wet area looks metallic | Metalness or colored specular changed | Display final metalness and F0 |
| Everything turns black | Excess darkening or empty environment | Lock base color and test a reflection card |
| Water climbs walls | Noise dominates exposure and slope | View retention without breakup |
| Puddles emboss every pore | Substrate normal remains full strength | Split normal frequencies |
| Shoreline crawls | Mips, compression, or hard threshold | Force mip levels and inspect the mask |
| Rain switches on at once | One rate drives every state | Plot damp, film, and puddle values |
| Wet patches look sprayed | Breakup lacks connected hierarchy | Compare broad field before noise |
| Basin dries first | Retention or drying order is inverted | Display height and drainage terms |
The best wet material workflow 2026 ends with four captures: dry, rising rain, sustained rain, and drying. Compare them at identical exposure. If the only convincing frame is maximum rain under a perfect reflection card, the system is a demo, not weather.
FAQ
How do wet surfaces work in PBR?
Wet surface materials combine darker diffuse response on porous substrates with a smoother dielectric boundary. Thin film tightens reflections; standing water also needs a level surface, shoreline, and depth treatment.
Why do wet materials look darker?
Water entering pores reduces the diffuse light returned from many porous surfaces. Wet surface materials vary by substrate, so sealed paint and glazed tile darken less than concrete, soil, or unfinished stone.
What roughness should a wet surface use?
Wet surface materials have no single correct wet surface roughness. Dampness is moderately smoother; clean connected film can be low-roughness, with droplets, dirt, and ripples preserving variation.
Should wet surfaces change metalness?
No. Rain does not make a dielectric substrate metallic, and a water film is also dielectric. Preserve the material’s metalness classification and change roughness, reflection layering, base response, normals, and coverage instead.
How do you make a puddle mask texture?
Combine low-point or height data with upward exposure, drainage, shelter, and an authored composition mask. Add noise only as edge breakup, import the puddle mask texture as linear data, and validate it on slopes and walls.
How do I make a wet material in Unity or Unreal Engine?
Put the coordinated response in a reusable Shader Graph subgraph, Material Function, or Material Layer. Feed it global rain plus local retention, then modify base color, roughness or smoothness, and normals from staged thresholds.
Why does my wet material look like plastic?
The film may be too uniform, too smooth, or paired with excessive base-color darkening. Restore low-frequency roughness variation, connect wet regions through drainage, keep the dielectric response, and test with a moving reflection source.
Try CraftPBR
CraftPBR builds the dry substrate maps that wet surface materials need before the weather layer is added:
- Text-to-PBR generates a coordinated material set from a description of substance, scale, pores, finish, color, and wear.
- Photo-to-PBR converts a controlled surface reference into aligned base color, normal, roughness, height, AO, and metalness maps.
- Node workspace keeps tiling, levels, height, roughness, masks, and dry or damp variants editable.
- Engine export prepares normal orientation, linear scalar maps, channel packing, filenames, and target conventions.
- Free tier lets you generate and test the complete dry material before building the rain response.
- CC0 output lets you modify, blend, render, and ship generated textures without attribution.
Make the dry surface correct, then give water somewhere believable to go. Weather has enough variables without asking noise to study hydrology.