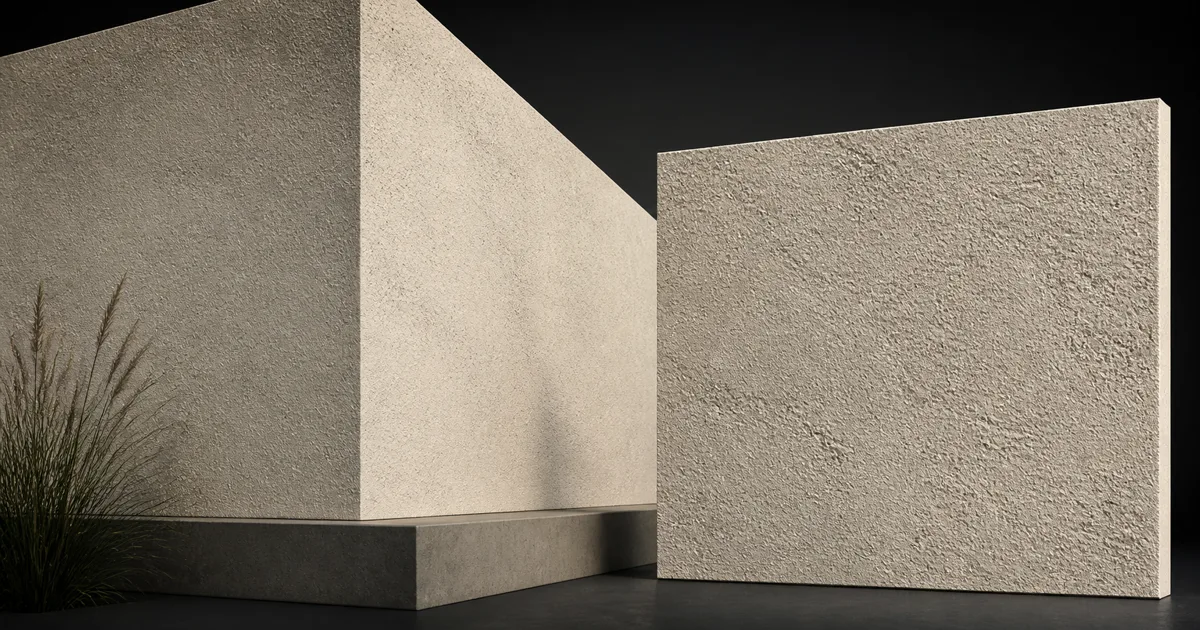
A stucco texture seamless across one preview square can still fail spectacularly across a building. The border may tile perfectly while one heroic trowel sweep repeats every three metres. Grain can be the size of breakfast cereal. Roughness can make mineral plaster behave like vinyl siding. None of those faults lives at the edge alone.
Good digital stucco starts with a finish specification, a measured scale, and a set of PBR maps that describe the same surface. Tiling is only the admission ticket. The material must also survive long walls, corners, grazing sun, mipmaps, and the ruthless judgment of an almost empty facade.
This guide builds a seamless stucco texture as an architectural material rather than a beige noise tile. The goal is quiet credibility: visible up close, stable at distance, and boring in exactly the way a dependable wall should be.
A stucco texture seamless workflow starts with the finish
“Stucco” names a family of finishes, not one universal surface. A fine sand float has dense, low relief. A coarse dash finish exposes larger aggregate. Lace and knockdown finishes create broader islands and recesses. Smooth troweled plaster carries soft compression marks rather than a field of pebbles.
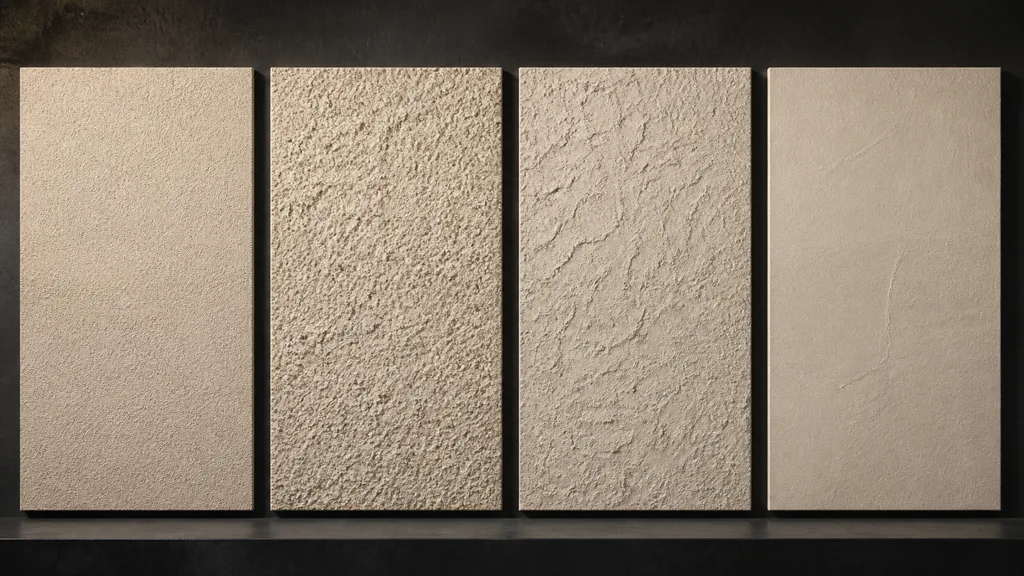
| Finish | Visible structure | Common digital mistake |
|---|---|---|
| Fine sand float | Dense small aggregate, shallow drag | Inflated grains and too much normal strength |
| Coarse aggregate | Distinct particles and voids | Uniform pebble spacing |
| Lace or knockdown | Broad raised islands over a flatter bed | Cloud noise with no tool direction |
| Smooth trowel | Compressed mineral plane with faint arcs | Polished-stone gloss or giant swirls |
Decide whether the wall is cement stucco, lime plaster, acrylic finish coat, or another render system. A mineral surface usually has porous, diffuse variation and high roughness. A polymer finish may be more uniform and slightly less absorbent. The label affects color range, aggregate, aging, and wet response.
Write one sentence before authoring: “warm lime-cement fine sand finish, 1 mm aggregate, hand-floated, exterior, recently cured.” That sentence is more useful than a folder named stucco_final_nice. It gives every later map a job.
Measure aggregate before touching the sliders
A stucco PBR texture needs a physical scale. If the source tile represents two metres, a 1 mm grain occupies roughly one two-thousandth of its width. The pixel representation depends on texture resolution, but the world-space relationship does not.
Place a scale reference beside the source: ruler, known brick, window trim, or measured sample panel. For generated material, specify aggregate size and tile coverage in the brief. Then set engine texture scale from metres per repeat, not from whether the preview sphere looks busy enough.
Work in three frequency bands:
- Micro: sand grain, pores, and tiny tool scratches that mainly affect normal and roughness.
- Meso: float passes, shallow compression, and aggregate clusters visible from a few metres.
- Macro: application drift, curing tone, and exposure variation across a wall.
The tile should contain micro and restrained meso structure. Add macro variation with a second low-frequency texture, object-space noise, vertex color, or decals. Baking one dark cloud into the base tile guarantees a stucco wall texture repeat. The wall will display it with the confidence of a hotel carpet.
Test scale on a flat wall beside a standard doorway. A sphere is useful for light response, but it cannot tell you whether a contractor apparently applied the facade with gravel and a garden rake.
Start from neutral evidence, not baked sunlight
Photography works when the sample is evenly lit, sharply focused, and viewed close to perpendicular. Overcast light, cross-polarized capture, or controlled diffuse illumination reduces directional shading. Avoid deep shadows, hot sun, wet patches, lens vignetting, and perspective convergence.
The photo-to-PBR workflow should separate surface color from illumination before map generation. A dark pit may represent albedo, occlusion, or shadow. Copying it into base color, AO, and height counts the same event three times and produces dirty, punched-out plaster.
Text generation needs an equally disciplined brief. State finish type, binder, aggregate size, relief depth, age, color range, and absence of landmarks. Ask for orthographic, evenly lit material evidence rather than a dramatic wall photograph. A cinematic shadow is attractive until it repeats sixteen times and follows the camera nowhere.
Before making the tileable stucco texture, remove non-stationary features: outlet shadows, corner gradients, cracks that cross half the frame, single dark stains, leaves, fasteners, and repair patches. Keep plausible small irregularity. Sterilizing every variation leaves procedural oatmeal; keeping every accident creates a detective story repeated on a grid.
Build one coherent stucco PBR texture set
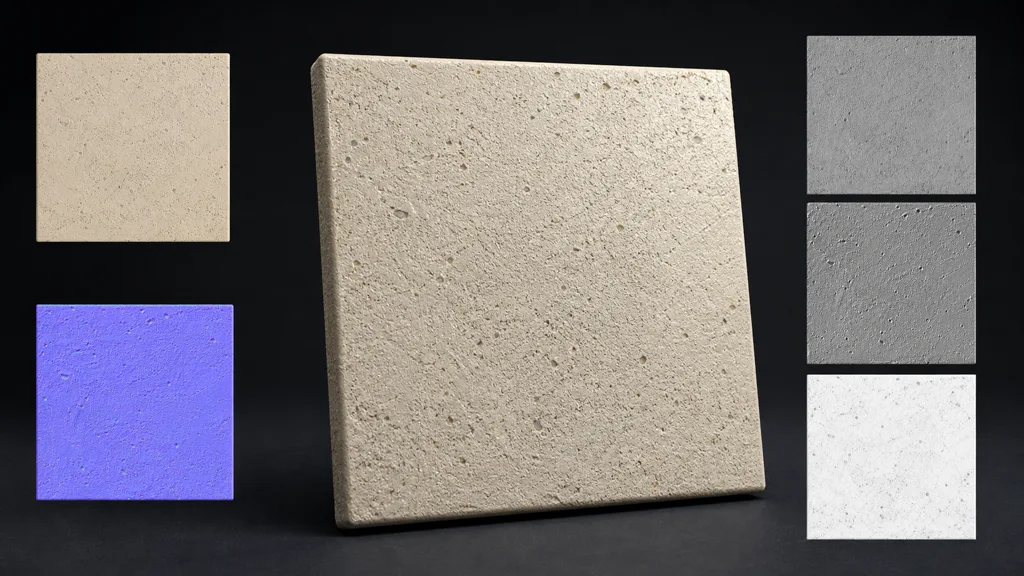
Every map in a stucco texture seamless set must describe the same grains, voids, and trowel marks:
- Base color holds pigment and aggregate tone without directional light or black cavities.
- Normal describes small slopes around grains and shallow tool marks. Keep strength modest; stucco is rough, not furry.
- Height stores larger relief relationships for parallax, displacement, or authoring.
- Roughness stays high but not flat; compression, aggregate, dust, and dampness change it differently.
- AO adds only local occlusion that runtime geometry cannot resolve.
- Metalness remains black. Stucco is a dielectric even when sunlight makes it sparkle.
A useful stucco roughness map varies by cause. Dense compressed areas may be slightly smoother. Porous patches and loose aggregate may be rougher. Wetness can darken color and lower roughness together, but that belongs in a controlled weather layer rather than random gray freckles.
Check map alignment by exaggerating one channel at a time. A pit should indent in height, turn normals inward, and receive only plausible occlusion. Five attractive images do not become a material merely by sharing a filename prefix.
Keep scalar maps linear. Base color normally imports as sRGB; roughness, height, AO, metalness, and packed masks normally do not. The sRGB versus linear guide covers that boundary, while the normal-map guide explains tangent orientation.
How to make a seamless stucco texture in nine passes
A reliable how to make a seamless stucco texture workflow is iterative:
- Specify the finish. Record binder, color, aggregate size, application method, age, and use.
- Prepare neutral source data. Remove lighting gradients, perspective, debris, and unique features.
- Set real scale. Define metres per tile and verify aggregate against architecture.
- Offset the borders. Move both seam pairs into the centre for inspection.
- Repair causes. Continue grains, pores, and trowel flow without cloning landmarks.
- Generate aligned PBR maps. Derive every channel from the repaired structure.
- Run a tiled contact sheet. Inspect at least 4 × 4 copies for seams and patterns.
- Add macro variation separately. Use a larger-scale signal with lower contrast.
- Validate in the renderer. Check walls, corners, curves, mips, compression, and grazing light.
Use shared masks for seam repair or regenerate maps from the repaired master. Editing each border independently can make color seamless while the normal contains a ridge and roughness contains a stripe.
Mirror and radial blends often hide an edge by creating symmetry. Symmetry is simply a more diplomatic repeat. Prefer content-aware continuation, procedural wrapping, or controlled patch blending, then inspect both axes. The seamless texture guide covers border diagnosis in more depth.
Remove repetition without erasing the finish
A rough stucco texture seamless at its borders may still tile visibly because the eye tracks landmarks: a dark aggregate cluster, curved float stroke, diagonal groove, or unusually empty patch. Find those features with a 6 × 6 wall preview, not a single square.
Reduce the strongest landmarks in the source. Then add broad variation outside the base tile. A low-contrast tint can shift warm and cool zones. A slow roughness modifier can suggest curing or exposure. Object-space masks can place subtle dirt below sills or dampness near grade. Those events should follow architecture, not UV repetition.
Random tile rotation is risky for directional finishes and tangent-space normals. Rotating color without rotating normal vectors breaks lighting. Stochastic tiling can help broad non-directional surfaces, but it adds samples and can soften characteristic tool marks. Often the cleanest answer is a quiet base tile, one macro signal, and a few authored facade events.
Do not use contrast as camouflage. Crushing base color may hide a patch in shade while turning the exterior stucco texture into soot under daylight. Validate neutral material first, then add weathering with masks tied to water, gravity, shelter, and repair history.
Stucco texture setup in Unity, Unreal Engine, and Blender
For a stucco texture for Unity, use a Lit shader and set tiling from measured coverage. Import normal data correctly, keep packed scalar maps linear, and inspect smoothness placement because Unity workflows often store smoothness rather than roughness. Add macro tint at low contrast, and make sure lightmaps are not being mistaken for material blotches.
For a stucco texture for Unreal Engine, connect Base Color, Normal, Roughness, and optional AO through a material instance with real-world UV scale. Disable sRGB on roughness and packed masks. World-aligned variation can break repetition across modular walls, but it must preserve normal handling and should not make every building share the same stain coordinates.
For a stucco material Blender setup, Principled BSDF needs base color, roughness, and a Non-Color normal texture through a Normal Map node. Use height through Bump for look development or true displacement when silhouette and renderer settings justify it. Test on an actual facade before baking or export.
Across engines, inspect the lowest useful mip. Fine grain can disappear cleanly, turn into sparkle, or collapse into a darker average depending on normal strength, roughness filtering, compression, and resolution. The texture filtering guide helps diagnose distance shimmer without sanding all character out of the source.
Validate the wall, not only the swatch
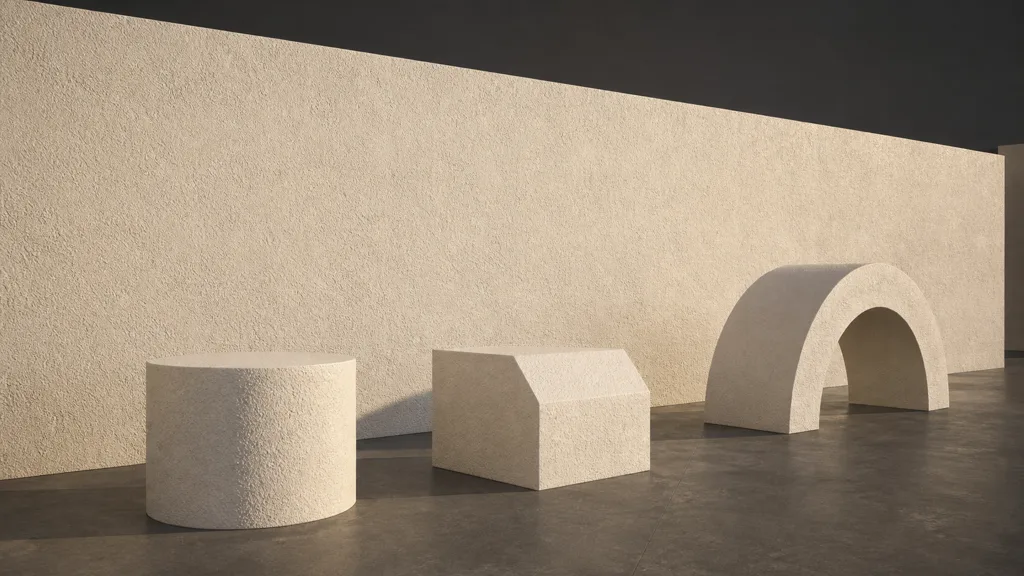
A proper stucco texture seamless validation scene includes a long wall, outside corner, curved form, bevel, and shallow recess. Use frontal diffuse light, small grazing light, broad environment light, and camera motion. Each reveals a different failure class.
Frontal light exposes color repetition. Grazing light exposes normal seams and exaggerated relief. Curves reveal tangent problems. Corners reveal scale discontinuities. Distance reveals unstable grain and poor mips. A broad empty wall reveals everything else because there is nowhere for the material to hide.
- Does aggregate size remain plausible beside doors, windows, and trim?
- Can you identify the tile boundary in color, normal, roughness, or height?
- Does a 6 × 6 repeat form crosses, rows, circles, or diagonal chains?
- Do corners keep continuous scale and believable application direction?
- Does roughness remain mineral under both soft and hard light?
- Do fine grains fade into a stable average instead of sparkling in motion?
- Does weathering follow architecture rather than the UV square?
The best stucco texture workflow 2026 records finish type, aggregate size, metres per tile, map list, height range, normal convention, roughness range, color spaces, compression, macro scale, and facade test shots. That prevents one artist's “subtle sand finish” from becoming another artist's lunar landscape.
FAQ
How do you make a stucco texture seamless?
Clean a neutral source, define real scale, offset its borders into the centre, and repair grains and tool flow across both axes. Generate every PBR map from the repaired structure, then test a large tiled wall for landmarks as well as edge seams.
What maps does a stucco PBR texture need?
Most real-time stucco materials need base color, normal, and roughness. Height or displacement and AO are optional depending on viewing distance, geometry, renderer, and budget; metalness should remain black.
How large should stucco texture grains be?
Match the specified finish or a measured sample. Fine finishes often contain roughly millimetre-scale aggregate, while coarse finishes can be several millimetres; validate beside known architecture.
Why does my seamless stucco texture still repeat?
Perfect borders do not remove internal landmarks. Large trowel arcs, dark clusters, empty patches, and baked lighting repeat as a grid, so reduce them in the base tile and add broad variation separately.
Should a stucco roughness map be white?
Stucco is generally rough, but a flat white map removes useful response and may exceed the plausible range. Keep a high average with restrained variation caused by compression, aggregate, porosity, dust, curing, or wetness.
Should stucco height use displacement or a normal map?
Use normals or bump for fine grain and shallow tool marks. Use parallax or displacement only when larger relief affects depth, grazing views, or silhouette enough to justify the cost and mesh density.
How do you stop stucco textures shimmering at distance?
Reduce excessive high-frequency normal strength, preserve useful roughness in mips, use appropriate texture filtering and compression, and inspect the actual lowest mips. Stable distance response matters more than microscopic detail that exists for one close screenshot.
Try CraftPBR
CraftPBR turns a material brief or controlled photo into the coordinated source set a stucco texture seamless workflow needs:
- Text-to-PBR generates aligned base color, normal, roughness, height, AO, and metalness from a finish description.
- Photo-to-PBR converts a neutral stucco sample into editable material data instead of preserving baked light.
- Node workspace keeps scale, levels, seams, normal strength, roughness, height, and macro masks adjustable.
- Engine export prepares normal orientation, linear scalar data, channel packing, filenames, and target conventions.
- Free tier lets you generate and test a full stucco set on a large wall before production.
- CC0 output lets you modify, combine, bake, render, and ship generated textures without attribution.
Make the grain honest, the tile forgettable, and the wall large enough to tell the truth.