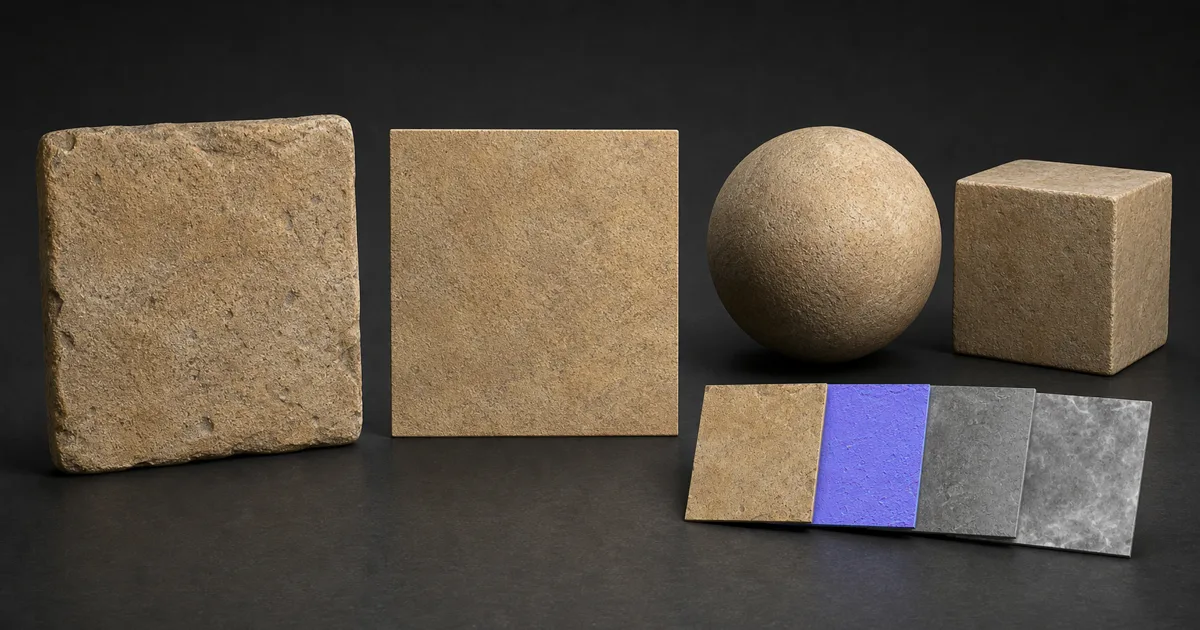
A photo to PBR texture workflow converts one captured appearance into several maps that can react correctly under new lighting. That means separating base colour, relief, reflection spread, cavities, and material class from the shadows and highlights already present in the photograph. Copying the image into a shader is easy. Recovering the material that existed in front of the camera is the useful part.
The process suits stone, plaster, wood, soil, fabric, painted metal, and other surfaces that can be photographed as a reasonably flat patch. It is less suitable for transparent objects, deep undercuts, glossy mirrors, or anything whose character depends on a full 3D silhouette. This guide covers controlled capture, map creation, delighting, tiling, scale, validation, and engine export without pretending that a grayscale button has studied material science.
What a photograph mixes together
A photograph stores colour after light, lens, exposure, white balance, tone mapping, and compression have all made suggestions. A PBR shader needs different evidence:
- Albedo or base colour contains pigment and substance colour without cast shadows or specular glare.
- Normal changes the apparent surface direction for small relief.
- Height or displacement represents elevation when actual depth or parallax matters.
- Roughness controls whether reflections are tight or broad.
- Ambient occlusion describes limited indirect light in tight cavities.
- Metalness distinguishes conductive bare metal from dielectric material such as paint, rust, stone, and wood.
One dark pixel in a source photo might be black paint, a hole, a cast shadow, a wet patch, or low exposure. Those causes belong in different maps. A useful photo to PBR generator interprets the cause instead of assigning every dark pixel the same job.
This is why a material set must be judged as a relationship. A chipped painted panel should expose a new colour in albedo, a new finish in roughness, a metalness change where bare steel appears, and some relief if the coating has thickness. Blindly deriving every map from luminance gives you six files that agree numerically and disagree physically.
Capture a source the renderer can trust
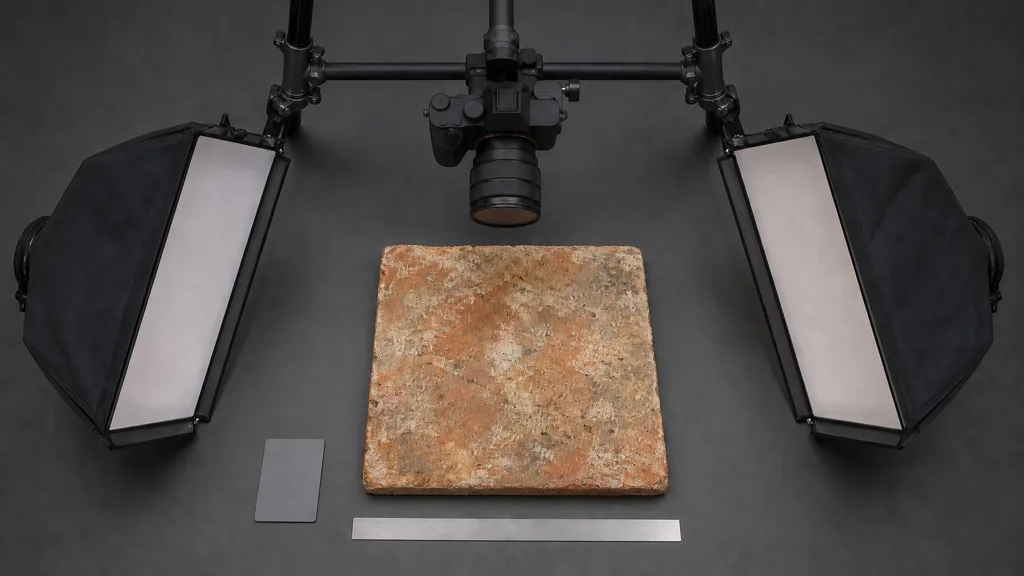
The best photo to PBR texture starts with even illumination, a perpendicular camera, and recorded scale. Fill the frame with the surface while leaving enough overlap to correct perspective and crop. Shoot RAW when possible so white balance, exposure, and highlight recovery remain adjustable.
Use two broad diffused lights at opposing angles. For glossy or coated surfaces, cross-polarization is especially valuable: place linear polarizing film over the lights, fit a circular polarizer to the lens, and rotate it until glare is minimized. Capture a cross-polarized frame for colour and a parallel-polarized frame if you also want specular evidence. A phone camera will happily bake a cloudy window into limestone and leave without filing a change request.
Include a neutral grey card or colour reference in a separate calibration frame. Add a ruler or record the width of the photographed area. Physical size decides whether a pore reads as fine plaster or a crater field.
Before conversion:
- Correct lens distortion and perspective.
- Set neutral white balance and recover clipped-looking highlights where the RAW data allows.
- Remove broad vignetting and exposure gradients.
- Crop objects, borders, loose debris, and shadows unrelated to the surface.
- Preserve a high-bit-depth master before resizing or compression.
Avoid hard sunlight, depth of field, motion blur, heavy denoising, and sharpening halos. The goal is not an attractive material photograph. It is a source whose errors are predictable.
Photo to PBR texture workflow: build aligned maps
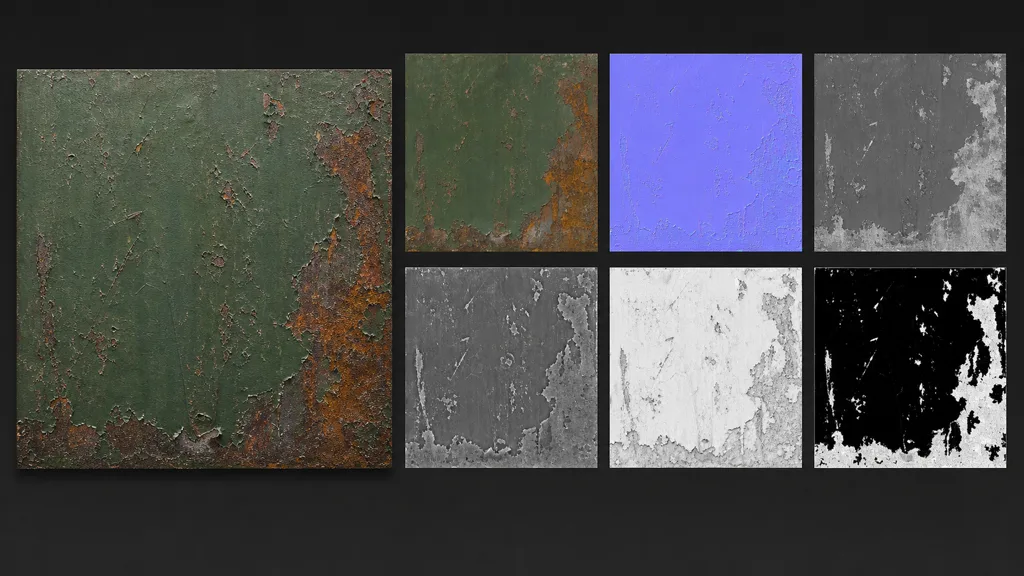
Use the following process to convert photo to PBR texture maps:
- Define the material layers. Identify substrate, coating, dirt, oxidation, moisture, and wear. State the physical size of the crop.
- Recover lighting-neutral albedo. Remove cast shadows, form shading, highlights, and cavity darkening while preserving real colour changes.
- Estimate broad height first. Establish joints, chips, dents, and raised deposits before adding fine pores. Large structure gives the normal map a sensible foundation.
- Derive the normal map. Convert height gradients into tangent-space normals, then reduce noise that would shimmer after mipmapping.
- Author roughness by finish. Use masks for polished, dusty, wet, varnished, corroded, or exposed regions. Do not copy albedo brightness.
- Build AO from geometry. Keep it restrained and limited to real cavities. It should support indirect shadowing, not redraw the source lighting.
- Assign metalness by substance. Bare metal is metallic; paint, rust, dust, and most contamination are dielectric.
- Lock registration. Inspect a few distinctive features across every map and correct drift before tiling or export.
For an image to PBR texture maps workflow, generate the related outputs together or use shared masks in a node graph. A rust boundary may influence several maps for different reasons. Shared alignment keeps the boundary fixed while independent controls keep each response physically appropriate.
AI can infer missing material context, particularly when a source contains several finishes. Deterministic controls are still needed for value range, scale, seam repair, polarity, and art direction. Regeneration is exploration; a repeatable node operation is a production decision.
Delight albedo without erasing the material
Delighting removes illumination from base colour. Start with low-frequency gradients: broad brightening from a window, a soft cast shadow, or lens falloff. Correct those before small local defects, because a global imbalance becomes painfully obvious when the texture repeats.
Separate what the surface is from how it was lit. A dark mineral inclusion stays. A shadow that crosses several unrelated grains leaves. Rust colour stays; white glare from a polished edge leaves. Cavity darkness belongs in AO, while the actual dirt inside the cavity may still belong in albedo.
Do not flatten every slow colour change. Weathering, fading, mineral distribution, and stains can be real. Compare the corrected map with references under neutral light, then render it without normal, AO, or roughness. If the original capture direction is still readable, more delighting is needed. If the surface has become a uniform paint chip, less delighting was needed.
The AI albedo map generator guide covers lighting removal in detail. For a complete photo to PBR material, the important extra check is whether removed evidence has been assigned to another map when appropriate rather than simply discarded.
Make the material tile and preserve scale
Edge continuity is only the first half of a tileable material. Offset the image by half its width and height, repair the central seams, then test a grid at least four by four. Remove isolated cracks, stains, knots, or stones that repeat like a misplaced stamp.
Keep every map synchronized while repairing seams. If you clone an albedo edge without updating height and roughness, the colour wraps while the lighting response breaks at the boundary. Shared masks or node-based transforms prevent that quiet mismatch.
Next, restore physical scale. If a 60 cm source crop becomes a 2K texture, the texture represents about 34 pixels per centimetre. In the engine, set UV scale so those 60 cm cover the same world distance. Arbitrary tiling can turn gravel into boulders even when every map is technically excellent.
For broad surfaces, add macro variation separately in the shader. A quiet tile plus low-frequency world-space tint, roughness variation, decals, or vertex blending usually looks more natural than one texture containing a memorable stain. The seamless tileable textures guide explains why edge repair and repetition control are different jobs.
Validate the material, not the thumbnails
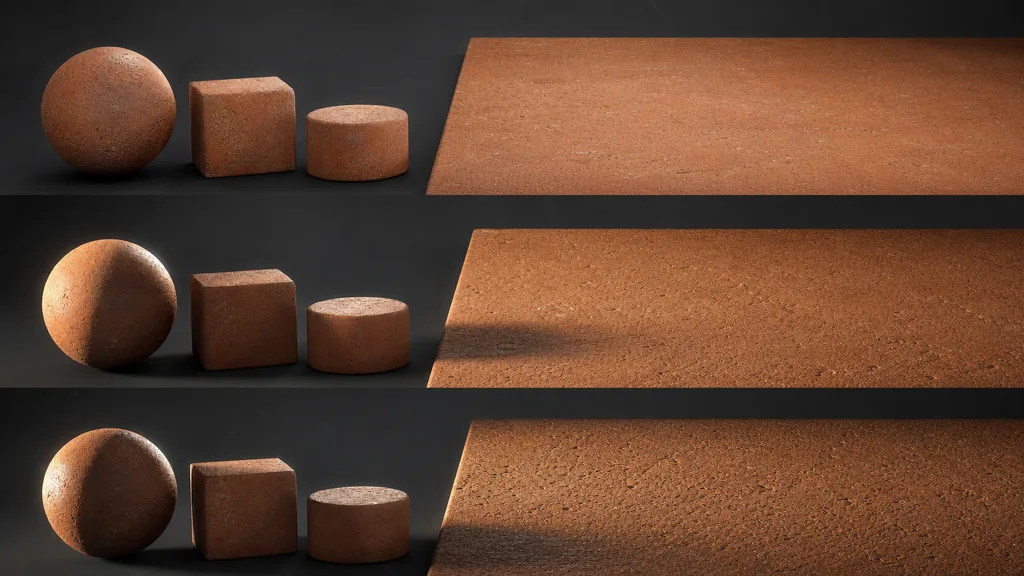
An exported map set can look convincing in a folder and fail immediately in motion. Test the photo to PBR texture on a sphere, cube, cylinder, and large plane.
- Rotate a small bright light to expose baked highlights, reversed roughness, and noisy normals.
- Switch between neutral, warm, and cool environments to reveal colour casts left by the capture.
- Disable maps one at a time to find which channel causes a suspicious feature.
- View close up and at production distance; fine detail should not sparkle or crawl.
- Test a large repeated plane for seams, gradients, and recognizable landmarks.
- Compare the object with a real-size reference so relief and texel density remain plausible.
Check engine compression after import, not just the source files. Normal compression, channel packing, mipmaps, and colour-space flags can change the result. Keep unpacked master maps as the authority and treat packed textures as delivery files.
A good photo to PBR material no longer depends on the light used during capture. New light should produce new shadows and highlights while the recorded substance remains consistent.
Export for Unity, Unreal, and Blender
Albedo is normally sampled as sRGB. Normal, roughness, height, AO, and metalness are data maps and should normally use linear or non-colour sampling. Export tangent-space normals in the convention expected by the target renderer, and keep enough bit depth in height when banding would affect displacement.
For a photo to PBR texture for Unity, import base colour with sRGB enabled. Mark the normal texture as a Normal map. URP and HDRP workflows often use smoothness rather than roughness, so invert roughness once during export and pack it where the selected shader expects it.
For a photo to PBR texture for Unreal, use a DirectX normal convention, disable sRGB on data maps, and connect base colour, normal, roughness, AO, and metalness to their matching inputs. If using an ORM texture, pack AO in red, roughness in green, and metalness in blue.
For a photo to PBR texture for Blender, set the base-colour image to sRGB and scalar or normal textures to Non-Color. Feed the normal through a Normal Map node and connect roughness directly to Principled BSDF Roughness. Keep the master roughness uninverted.
Name files by substance and channel rather than by the software that happened to export them. Six months later, terracotta_roughness_master is useful; final_v7_use_this_one is an accusation.
Try CraftPBR
CraftPBR turns a photo to PBR texture into an editable material rather than a sealed result:
- Text-to-PBR can create a complete material when capture is unavailable.
- Photo-to-PBR separates a surface photograph into coordinated albedo, normal, roughness, height, AO, and metalness maps.
- Node workspace keeps delighting, seam repair, range correction, masking, and material mixing adjustable.
- Engine export prepares naming, normal convention, colour space, and packed channels for Unity, Unreal, Blender, Godot, and Three.js.
- Free tier lets you test the workflow on a real source before committing to it.
- CC0 output means generated materials can be used, modified, and shipped without attribution.
Turn a photo into a PBR material with CraftPBR →
The camera provides evidence. CraftPBR helps turn that evidence into maps a renderer can cross-examine.