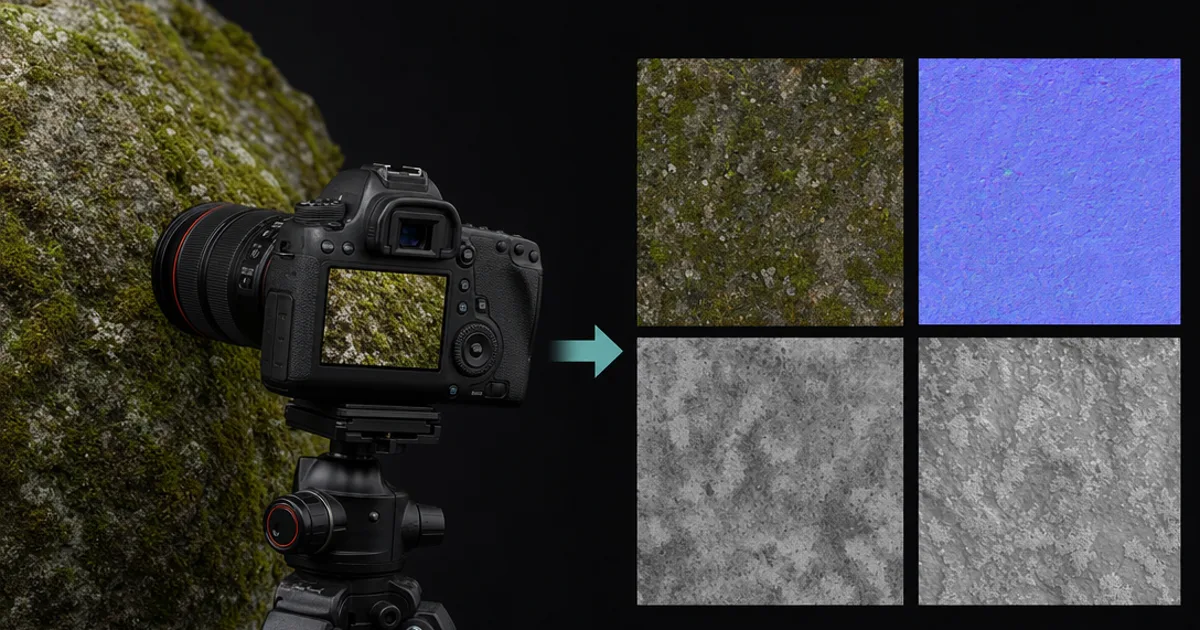
Walk through almost any modern AAA environment and a large share of what you are looking at was photographed, not hand-painted. The shift to scanned textures — real surfaces captured into PBR maps — is one of the quieter revolutions in game and film art, and it changed what “realistic” even means. It also comes with a set of trade-offs nobody mentions until your pristine 8K scan refuses to tile. Here is how scanning works, where it shines, and where a generated texture quietly wins.
What a scanned texture actually is
A scan is a measurement of a surface rather than an interpretation of one. Instead of an artist deciding how rough a stone is, a camera records it, and software solves for the maps that reproduce it: base colour with the lighting stripped out, a normal that carries every real bump, a roughness that varies exactly where the stone is worn, and often a height map for the deep detail. Because it is measured, a good scan has a kind of irregularity — the asymmetry of real wear — that hand-authored and even generated materials work hard to imitate.
How a surface gets captured
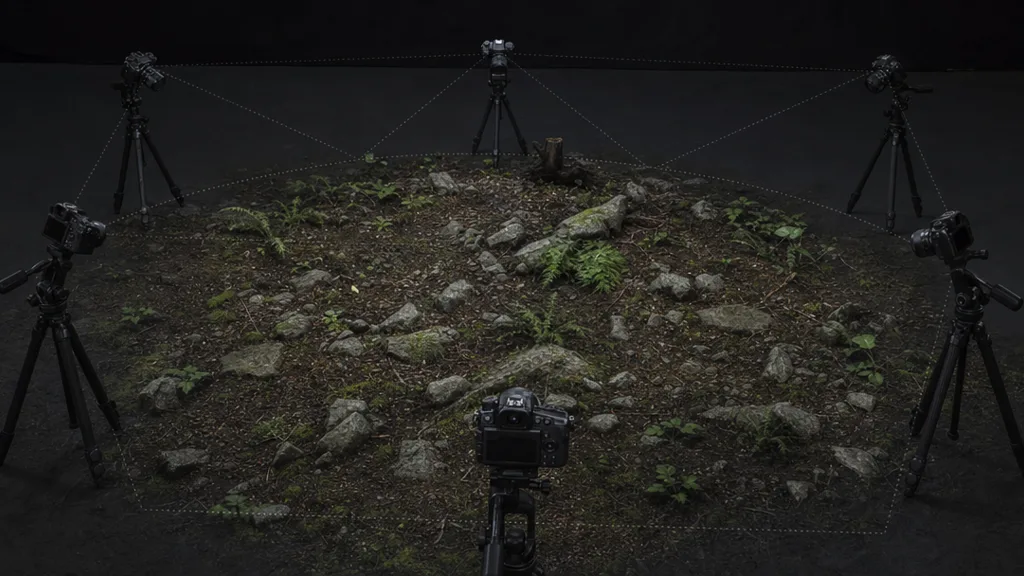
There are two families. Flat scanning photographs a patch of ground or wall under even light with a polarising filter on both the lens and the lights — the polariser kills specular reflection, which is what lets the software separate true colour from shine. Photogrammetry takes dozens of overlapping photos of a rock or a wall from many angles, rebuilds a high-poly mesh from the parallax, and bakes that geometry down into maps. Both end the same way: delighting, the step that removes any baked shadow so the material lights correctly in your scene rather than carrying the sun of the day it was shot.
Scan, generate, or paint — three ways to the same maps
It helps to see scanning as one of three sources, each with an honest cost:
- Scan — perfect fidelity to a real surface, but only surfaces you can physically shoot, and you inherit the shoot’s lighting and resolution. Heavy files, real gear.
- Generate — any surface you can describe, seamless by default, produced in seconds; an interpretation, not a measurement. See text to texture AI.
- Hand-author — total artistic control, and the only real option for stylised or fantastical materials, at the cost of the most time and skill.
Most serious pipelines mix all three: scans for the hero ground and walls, generation for the long tail of surfaces and for anything that cannot be scanned, and hand-authoring for the stylised pieces.
Where scans quietly let you down
The fidelity is real, but so is the baggage. Three things catch people out. First, scans are not seamless — a scan is a specific patch, so its edges do not tile until you make them, usually with a seam editor. Second, lighting can survive delighting — a mediocre delight leaves soft shadows baked into the colour, and they resurface as ghost darkening under your own lights. Third, resolution and storage — an 8K scan set with five maps is a lot of memory for a surface that might be twenty metres from the camera. A scan is not automatically the right call just because it is the most accurate.
Scanning without the rig
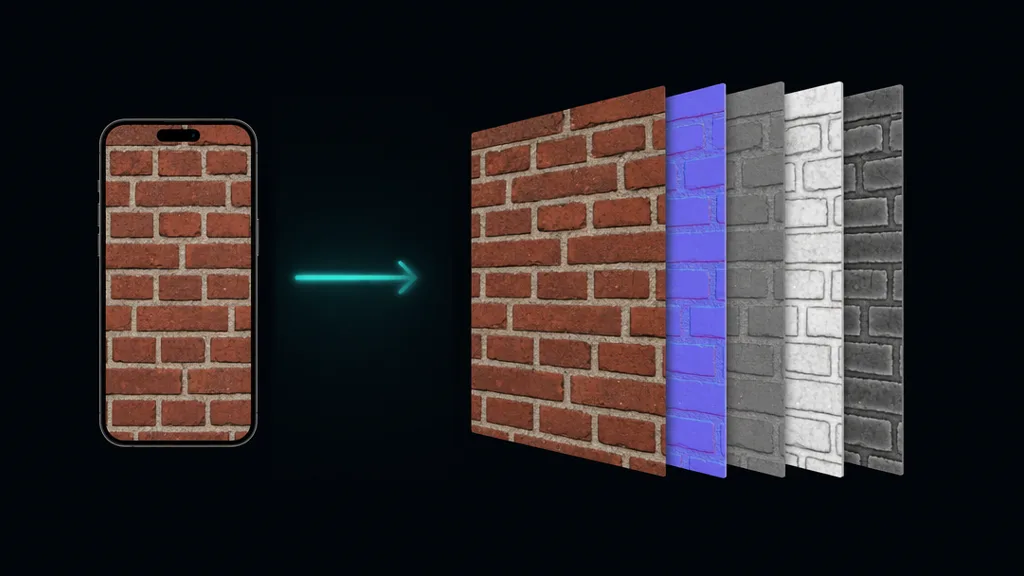
You do not need a studio to borrow the core idea. A single flat, evenly lit photo of a surface, run through a photo-to-PBR tool, produces the same kind of maps a scan would — perspective corrected, delit, and split into colour, normal, roughness, AO, and height. It is a lighter, faster form of scanning: the fidelity ceiling is lower than a full polarised capture, but for most props and background surfaces the difference never reaches the screen. And because the tool wraps the edges, you skip the seamless problem that a raw scan hands you.
When to scan and when to generate
A rough rule: scan when the exact real surface is the art — a specific cliff for a location, a signature hero material the camera lives on. Generate when you need breadth, speed, seamlessness, or a surface that does not exist to be photographed. And reach for photo-to-PBR when you have a real reference in front of you but no reason to haul out a rig. The three are not rivals so much as different tools for different distances from the camera.
Try CraftPBR
- Photo-to-PBR — a flat photo becomes a full, seamless PBR material
- Text-to-PBR — describe any surface, scanned or not, and generate it
- Free tools — seam editor, normal map, height map
- Engine export — Unity, Unreal, Blender, Godot, Three.js
- CC0 license — everything you make is yours