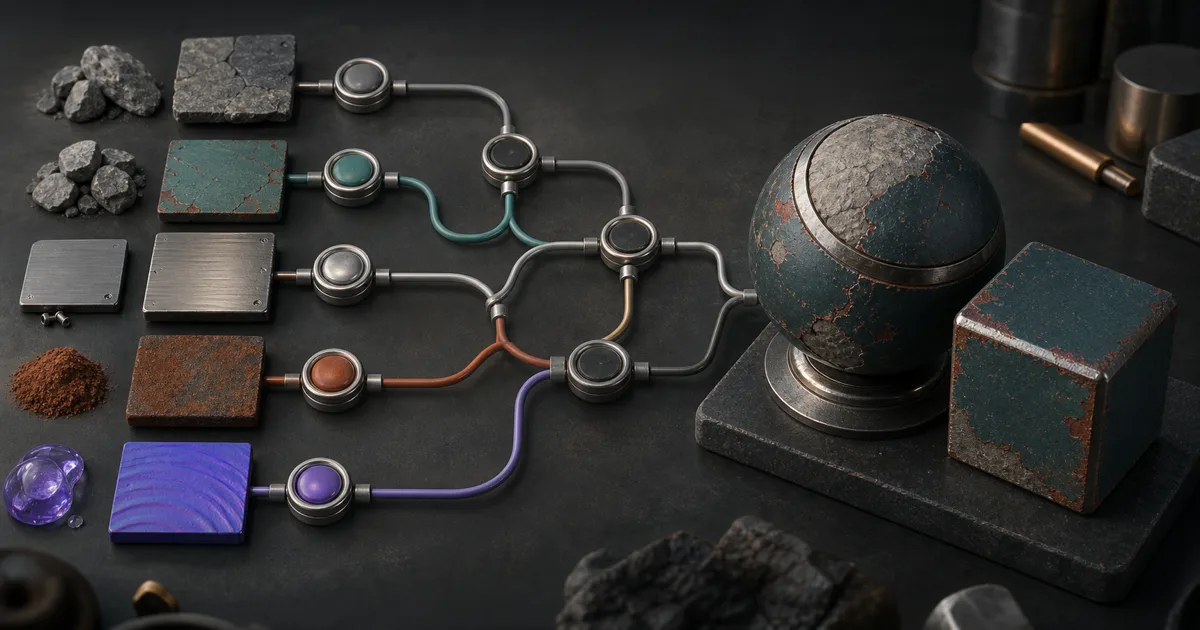
Open a node-based material editor online and the empty canvas offers an alarming amount of freedom. Add a noise. Warp it. Blend three more noises into the first noise. Colorize the result. Duplicate the branch because the roughness needs something similar. Forty minutes later, the material looks acceptable and the graph resembles a metropolitan rail map designed during a power cut.
The remedy is not fewer nodes by decree. It is a clearer contract: decide which PBR maps must leave the graph, build a small set of shared physical signals, and let each output interpret those signals appropriately. This guide shows how to structure an online node based material editor around that contract, keep it responsive in a browser, and export a surface that still behaves after the flattering preview sphere is gone.
Start a node-based material editor online from the outputs
Before adding a generator, create or list the outputs the target renderer needs. Most metallic-roughness materials use base colour, normal, roughness, metalness, ambient occlusion, and sometimes height. Each map describes a different property, but every map must describe the same surface at the same coordinates.
| Output | What it should describe | Common graph mistake |
|---|---|---|
| Base colour | Lighting-neutral surface colour | Baking highlights, shadows, or AO into it |
| Normal | Fine changes to shading direction | Deriving it from a different pattern than height |
| Roughness | Reflection spread across the surface | Treating brighter pixels as “more shiny” |
| Metalness | Metal versus dielectric regions | Painting vague grey values across ordinary dirt or paint |
| AO | Restrained local occlusion | Using it as a general grime or contrast layer |
| Height | Relative surface relief | Inventing deep relief that the normal map does not support |
This output-first approach turns a PBR node editor online into an engineering diagram. You can trace any suspicious pixel back to the signals that produced it. If a chip is metallic in one branch but painted in another, the disagreement has an address.
Set the physical scale now as well. Scale determines the useful frequency of pores, scratches, joints, and edge wear. A graph can generate infinite detail; the camera cannot see most of it, and the texture budget would prefer not to store it.
Build the graph as a stack of material decisions
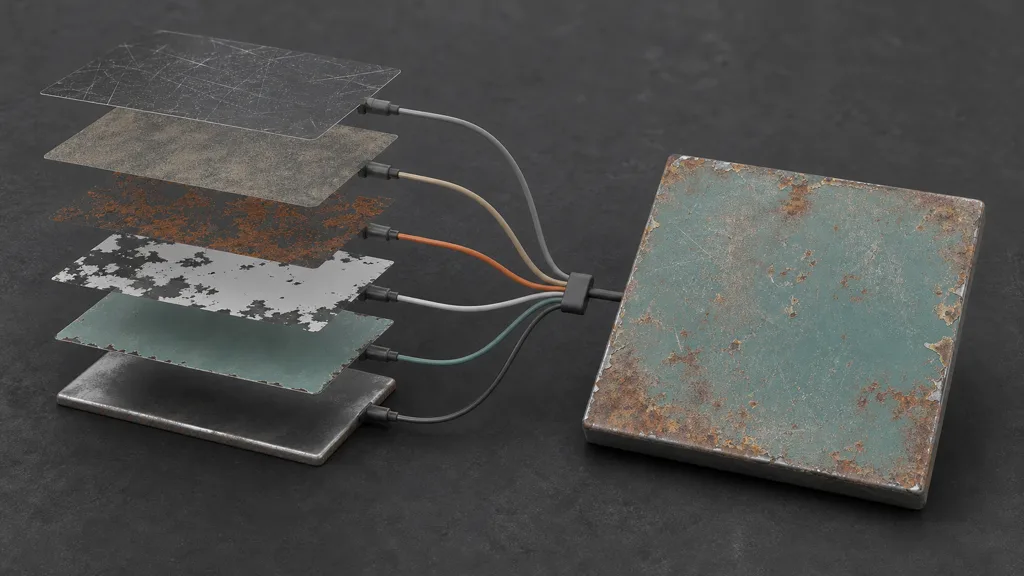
A dependable node based PBR workflow can be divided into five regions:
- Structure: large forms such as boards, stone joints, panels, or woven bands.
- Surface variation: mid-frequency grain, pores, dents, and uneven deposits.
- Material regions: masks that decide where metal, paint, stone, mortar, moss, or exposed substrate exists.
- Finish and wear: scratches, dust, oxidation, polish, moisture, and edge damage.
- Outputs: compact branches that translate shared signals into the required maps.
Arrange the graph in one direction. Use frames for those regions and expose only controls that express an art decision: tile scale, crack width, paint coverage, rust amount, dust level, and roughness range. A parameter named Noise 12 Contrast is not an art control. It is a confession preserved for the next person.
An AI texture workspace can provide a generated starting surface or reference, but it should enter the same structure. Treat generation as one source node, then remove baked light, repair borders, derive shared masks, and validate the resulting map family. Generation changes how quickly you get evidence; it does not repeal the output contract.
Make masks own the material boundaries
In a visual material editor, masks should carry meaning. A paint-coverage mask decides where paint exists. Its inverse can expose metal. A rust mask should be limited by exposed metal, cavities, moisture direction, or deliberate art direction. A dust mask can favor upward-facing and recessed areas. When the same mask informs several outputs, the surface stays coherent during iteration.
For a painted steel panel, use one chip mask to:
- reveal darker or oxidized steel in base colour;
- switch metalness from dielectric paint to metallic substrate;
- raise roughness around damaged, oxidized areas;
- introduce a small height break at the paint edge;
- support matching normal detail from that height transition.
Do not copy the mask and tune each duplicate until it is almost the same. “Almost” is how a metallic fleck appears where the base colour still shows intact paint. Route one semantic mask to deliberate transforms instead. This is the practical core of a non destructive material workflow: revise the chip once, and every dependent map updates.
Preview masks directly, check their value range, and test them at tile boundaries. A handsome composite can hide a broken mask; black and white tells the truth faster.
Keep PBR outputs coherent from shared signals
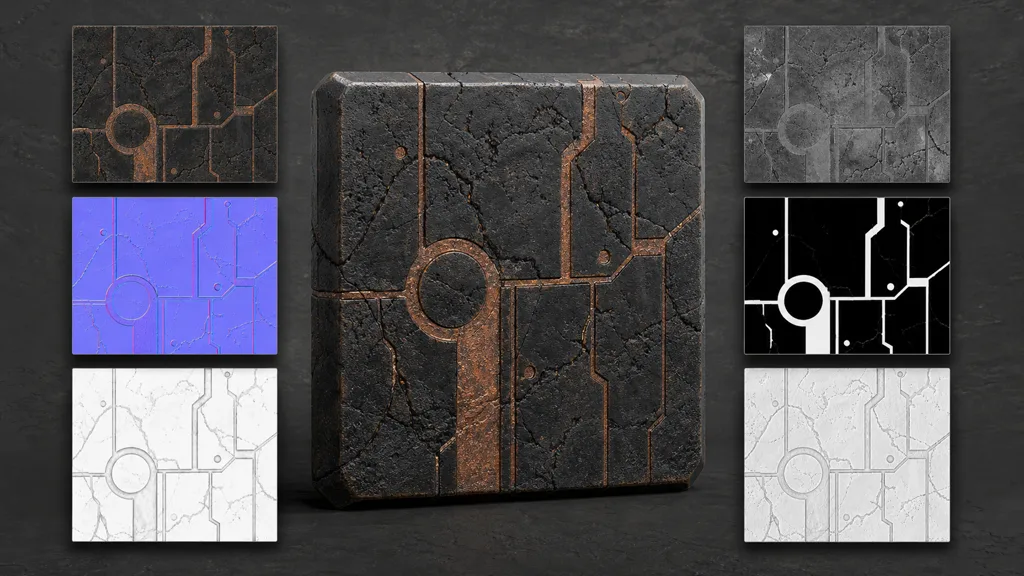
When people ask how to make PBR materials with nodes, the difficult part is not producing six images. It is making those images agree. Height and normal should come from the same relief hierarchy. Base colour and roughness should respond to the same material regions without becoming identical. Metalness should follow material identity, not general brightness.
Use a small set of named shared signals:
macro_heightfor slabs, joints, or large chips;micro_heightfor pores and fine scratches;material_idfor stone, paint, metal, or mortar regions;wear_maskfor exposed and abraded areas;deposit_maskfor dust, moss, rust, or moisture effects.
Combine macro and micro height with controlled ranges, then derive the normal from that relief. Build roughness from plausible base values plus restrained variation; do not invert the colour map. Multiply deposits by eligible material regions so rust does not colonize stone because a noise happened to like the corner.
Preview each output in isolation and as part of the complete material. In a material graph editor online, solo previews are test points for value compression, inverted masks, mismatched scale, and accidental colour-space conversions.
Budget a browser based material editor deliberately
A browser based material editor trades installation and machine-specific setup for immediate access, but the browser still has memory, GPU, storage, and recovery limits. Large graphs become expensive when several branches repeatedly evaluate 4K noises, blurs, warps, and normal conversions.
Work at 512 or 1024 pixels while shaping the material. Increase resolution only for export checks, and inspect whether the extra samples reveal real detail rather than finer static. Reuse expensive intermediates instead of recalculating similar noises. Disable branches irrelevant to the current preview, especially height processing and large-radius filters.
Save named milestones such as structure, wear, and export-ready. Confirm how the web based texture editor stores projects, and export a portable copy before clearing site data or changing browsers.
Export PBR textures from a node editor for the target engine
Before export, define resolution, bit depth, file format, normal orientation, channel packing, and colour space. These choices belong to the destination, not to the preview. Keep every output at identical dimensions and crop.
| Target | Typical handoff to verify |
|---|---|
| Unity | Metallic workflow; smoothness may occupy metallic alpha; normal imported as a normal map |
| Unreal Engine | DirectX-style normal orientation; AO, roughness, and metalness are often packed as ORM |
| Blender | Base colour as sRGB; normal, roughness, metalness, height, and AO as non-colour data |
| Godot | Separate maps or ORM according to the material; verify normal orientation and import settings |
| Three.js | Explicit colour spaces, correct UVs, useful lighting, and a web-sized delivery format |
Name files by material and role: painted-steel_basecolor, painted-steel_normal, and painted-steel_roughness survive handoffs better than output1. Record packed-channel order in the asset notes.
For deeper setup, use the guides for Unity PBR textures, the Unreal Engine texture workflow, Blender PBR materials, Godot PBR textures, or Three.js materials.
Validate the material outside the graph preview
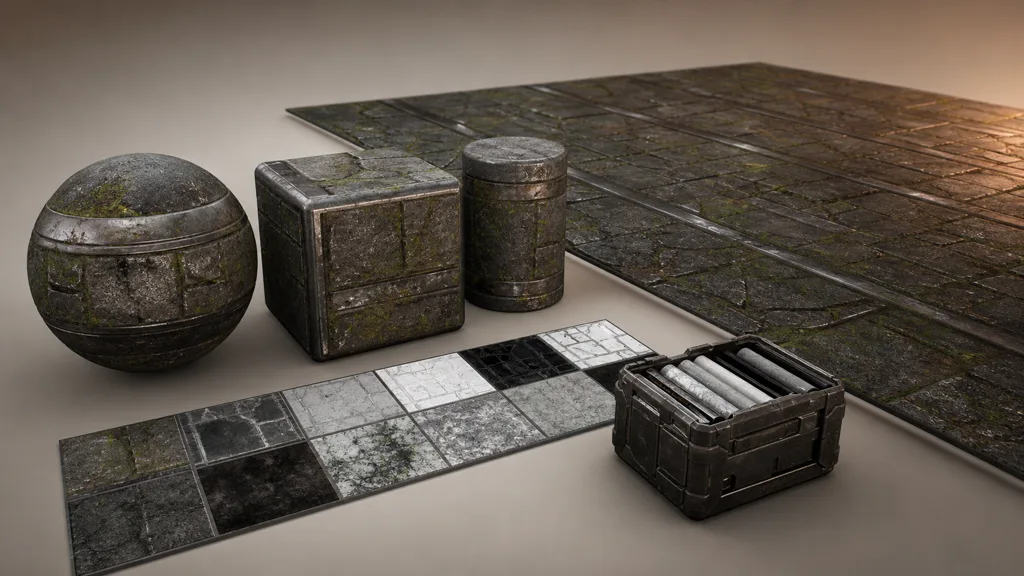
The best node based material editor 2026 still cannot guarantee that engine import settings are correct. Test the exported material on a sphere, bevelled cube, cylinder, and large plane. The sphere reveals reflection spread, the cube exposes edges and tangent changes, the cylinder catches directional problems, and the plane shows seams and repetition.
- Check a large repeated plane for border seams and memorable landmarks.
- Move a neutral light and confirm roughness changes reflection spread rather than darkening the surface.
- Inspect dents under grazing light and flip only the normal map’s green channel if the target convention requires it.
- Confirm paint is dielectric and exposed metal is metallic.
- Compare the material at intended world scale and camera distance.
- Inspect texture memory, channel packing, and compression in the target build.
- Reopen the saved graph and reproduce one export to prove the source remains usable.
When a problem appears, return to the earliest shared signal that can explain it. Fix a repeating crack in structure, not separately in six output branches. A well-built node-based material editor online makes corrections propagate; that is the advantage you were drawing all those wires to obtain.
Keep the graph readable enough to reuse
Group a useful function—brick bond, edge wear, woven pattern, channel packer—behind a small set of parameters and a predictable output. A group should hide detail while preserving the art decision, not require a committee to rename Multiply.
Use consistent colors for structure, masks, material regions, and outputs. Keep wires short, add reroutes where branches cross, and comment on physical assumptions such as “white means exposed metal.”
For a node based material editor for game developers, expose a random seed, scale, wear amount, and palette within approved limits. A modular wall set benefits from siblings; it does not benefit from one panel becoming volcanic glass because the seed had ambitions.
Nodes are not automatically the answer. Direct editing can be faster for a one-use crop or unique decal. Choose a graph when repeatability, variation, or multi-map coherence repays the setup cost.
FAQ
What is a node-based material editor online?
A node-based material editor online is a browser tool that builds textures or materials by connecting generators, transforms, masks, blends, and outputs in a visual graph. The graph preserves how the result was made, so upstream changes can update several PBR maps together.
Can I make PBR materials in a browser?
Yes. A capable online editor can generate or process base colour, normal, roughness, metalness, AO, and height maps without a desktop installation. Browser memory and GPU limits still matter, so draft at moderate resolution and verify large exports carefully.
How do I make PBR materials with nodes?
Start from the required outputs, create shared structure and material-region masks, then derive each map from those common signals. Keep base colour free of lighting, derive normals from the approved height hierarchy, and assign roughness and metalness by physical material behavior.
Are node-based material editors non-destructive?
They are non-destructive when the source graph remains editable and outputs are derived from shared upstream controls. Duplicated masks, baked intermediate files, or manual paint added only to one output can reintroduce destructive dependencies.
What resolution should I use in an online material editor?
Use 512 or 1024 pixels for most graph construction, then test the intended delivery resolution before export. Choose final size from camera distance, surface coverage, memory budget, and visible detail rather than assuming 4K is inherently better.
How do I export PBR textures from a node editor?
Export every map at the same dimensions and crop, use clear role-based filenames, and choose normal orientation and channel packing for the target engine. Treat base colour as colour data and normal, roughness, metalness, AO, and height as physical data during import.
Is a node editor better than painting textures directly?
It is better when you need repeatable patterns, controlled variations, non-destructive revisions, or several coherent PBR outputs. Direct painting is often faster for unique decals, one-off corrections, and authored details whose value comes from exact placement.
Try CraftPBR
CraftPBR combines generation and an editable node-based material editor online in one material workflow:
- Text-to-PBR turns a physical surface description into a coordinated material starting point.
- Photo-to-PBR converts a controlled surface photo into aligned material maps.
- Node workspace keeps tiling, masks, levels, layers, and variations editable after generation.
- Engine export prepares the map set for common renderer conventions and clear handoff.
- Free tier lets you build and test a complete material before committing it to production.
- CC0 output allows generated materials to be used, modified, and shipped without attribution.
Keep the surface logic in the graph and the surprises out of the engine import.