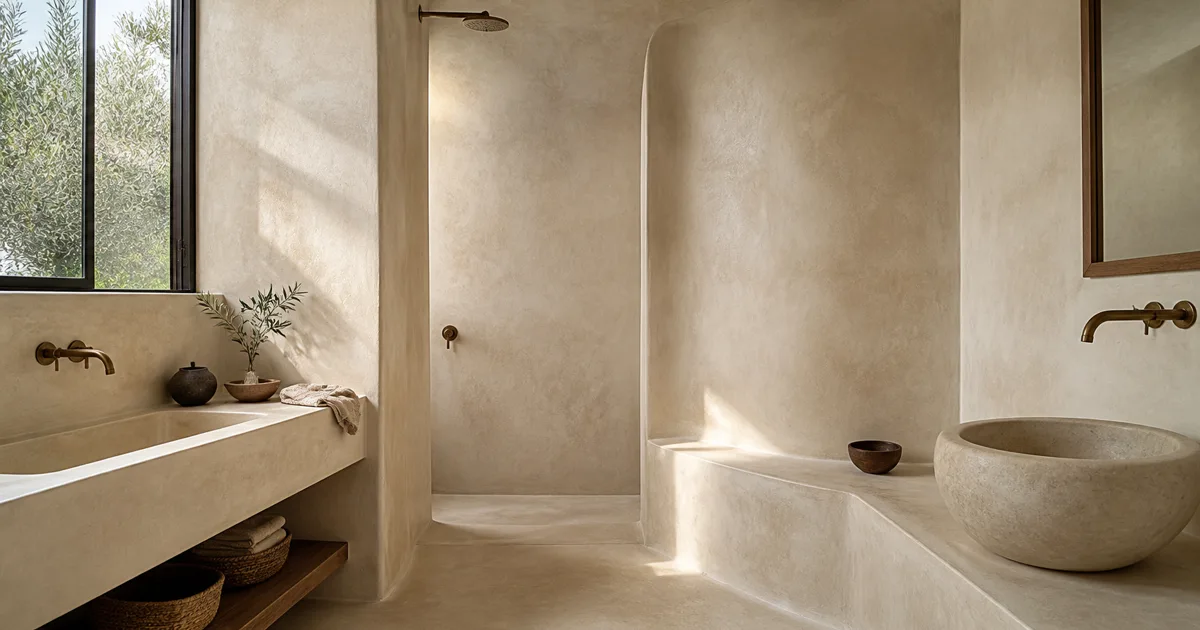
A tadelakt texture seamless enough for a wide bathroom wall cannot be a beige noise map with the roughness turned down. Tadelakt is polished lime plaster: broad hand-worked variation sits beneath a compressed, softly reflective surface. The visual identity comes from scale, overlapping tool pressure, mineral color, and restrained relief. Miss that hierarchy and the result becomes plastic, marble, or a particularly expensive omelette.
The useful digital version is a tadelakt PBR material with a quiet tile, coherent maps, and a second layer of large-scale variation. That separation lets the plaster cover curved showers, walls, benches, columns, and archviz interiors without exposing a repeating stamp. It also keeps wet response and art direction editable instead of baking every decision into one photograph.
A tadelakt texture seamless workflow starts with material logic
Traditional tadelakt is a lime-based plaster that is compacted, polished, and treated with soap to produce a water-resistant finish. The interaction between fresh lime and soap contributes to the finished surface; it is not simply clear varnish painted over generic stucco. Mike Wye’s tadelakt guidance notes describe the lime base, compression, and soap treatment behind the real craft.
For a digital Moroccan plaster texture, translate those causes into visible signals:
- lime and pigment create a mineral base color with gentle clouding;
- repeated trowel and stone pressure creates overlapping broad marks;
- compression reduces roughness in irregular zones;
- small pores remain, but deep cavities are uncommon on a finished surface;
- rounded corners and continuous junctions reinforce the monolithic installation;
- water darkens the color and tightens reflections where the surface is damp.
Corners belong to geometry. Drainage, joints, water streaks, repair patches, and room-scale application passes belong to masks, decals, or a second mapping layer. The seamless tile should contain repeatable material character, not a complete bathroom autobiography.
A polished lime plaster texture is dielectric, so metalness stays at zero. Its sheen comes from lower roughness and compression, not metallic reflection. If the material turns gold when the pigment becomes ochre, check metalness before blaming the lighting.
Build trowel variation at three useful scales
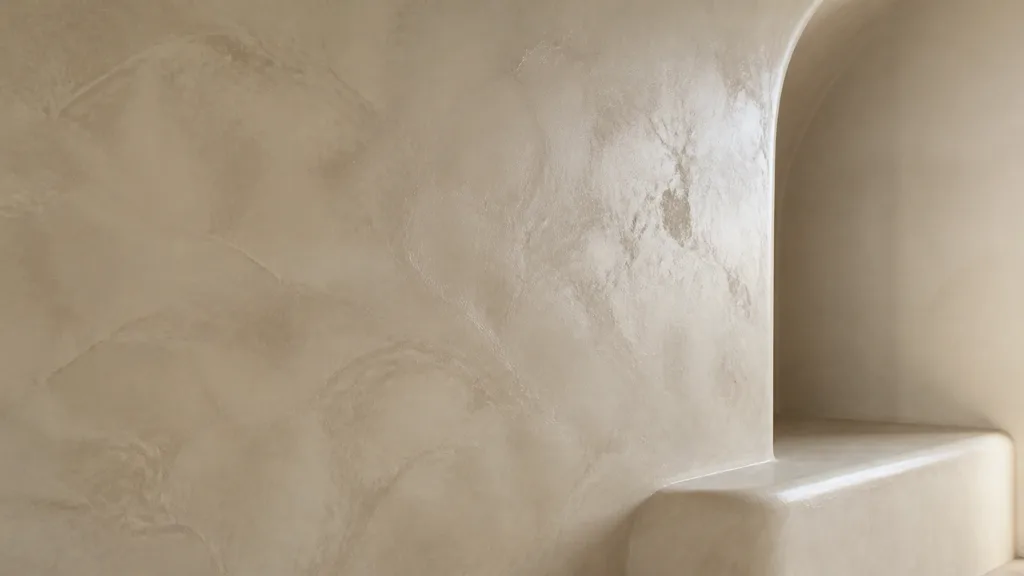
A convincing tadelakt wall texture usually contains three frequency bands:
| Scale | What it represents | Where it should appear |
|---|---|---|
| Broad | Application zones, pigment drift, uneven compression | Macro mask or secondary world-space texture |
| Medium | Overlapping trowel passes and polished patches | Seamless base color and roughness tile |
| Fine | Mineral pores, tiny scratches, subtle surface tooth | Normal and roughness detail, filtered with distance |
Start with broad scale. Real trowel variation is measured in hand spans, not grains of sand. Create soft asymmetrical fields whose edges overlap rather than isolated circular daubs. Keep contrast low. A plasterer is shaping one continuous coat, not stamping camouflage onto a wall.
Add medium compression marks whose direction changes without repeating perfect arcs. Let some disappear into neighboring fields. At normal room distance, the seamless tadelakt texture should organize the highlight without announcing a pattern.
Fine pores help close shots but should not make the normal resemble lunar terrain. Test at the nearest approved camera, then let mipmaps retire unstable detail. The texture resolution guide explains why more source pixels do not automatically create more useful surface information.
Make every tadelakt PBR material map agree
The maps in a tadelakt PBR material describe one surface, so their features should be related without becoming identical copies.
| Map | Useful content | Common mistake |
|---|---|---|
| Base color | Mineral pigment, soft lime clouding, subtle application variation | Baked highlights, shadows, or dramatic marble veins |
| Normal | Fine pores, shallow tool pressure, restrained undulation | Deep stucco ridges that break the polished silhouette |
| Roughness | Compression, polish, wear, and damp response | Inverted grayscale albedo or one glossy value |
| Height | Very low-amplitude broad and medium relief | Centimetre-deep displacement from color changes |
| AO | Minimal local occlusion in genuine pores | Darkening every trowel overlap like grout |
| Metalness | Black | Treating warm pigment as metal |
Keep base color in sRGB. Import normal, roughness, height, AO, and masks as linear data. A light trowel patch can be slightly more compressed and smoother, but it should not acquire an unrelated ridge in the normal map.
Build the tadelakt roughness map from physical events: stone compression, soap polishing, fine pores, handling, cleaning, and water. Do not desaturate the color and walk away. The roughness map guide covers reflection width in detail.
Let the tadelakt roughness map carry finish and water
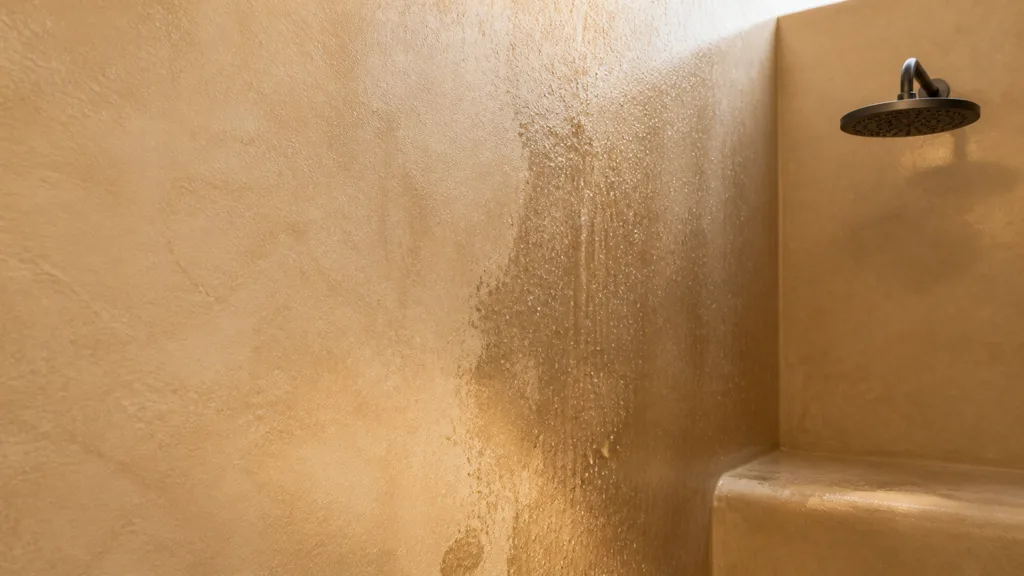
The dry finish should sit between chalky plaster and a hard glossy coating. Use irregular satin response with smoother compressed patches, then inspect a large moving area light across the wall. A tiny point light can hide broad roughness errors; a long reflection is less diplomatic.
For a tadelakt texture for bathrooms, keep the base material dry and layer water as a separate state. A wet mask can:
- darken base color modestly;
- lower roughness without forcing it to zero;
- add isolated droplets or thin flows in the normal map;
- collect near shower zones, ledges, and lower surfaces;
- fade according to drainage, recent use, and scene needs.
Do not bake permanent water trails into the seamless tile. The same streak on four walls looks less like moisture and more like a barcode with plumbing ambitions. Use decals, vertex paint, world-space masks, or simulation data for localized wetness.
Digital material authoring is not a construction specification. A believable render does not prove a real assembly is waterproof or correctly prepared. Follow the plaster manufacturer’s system, substrate, curing, and maintenance guidance for physical work. The shader’s insurance policy is fictional.
How to make tadelakt texture seamless without flattening it
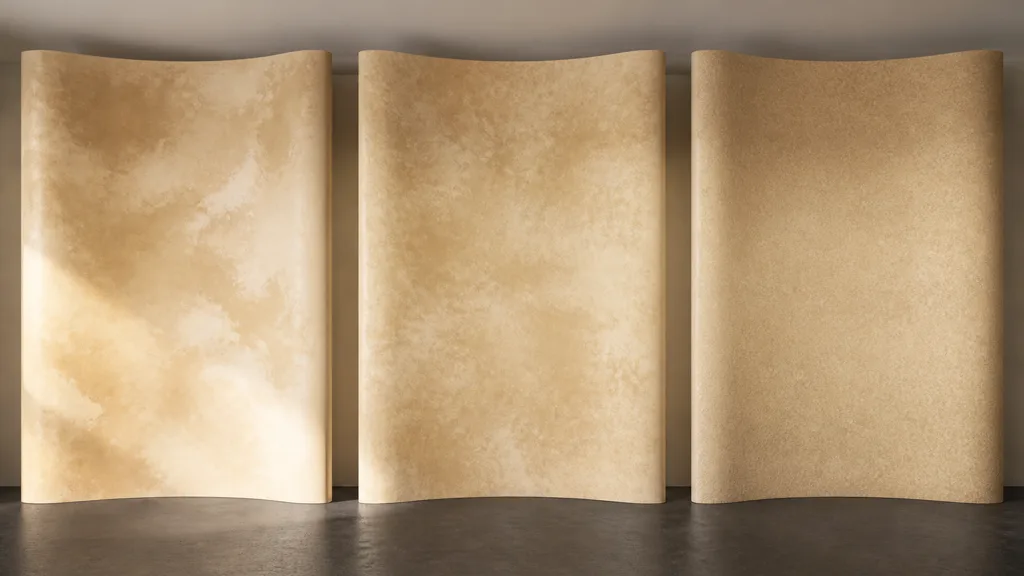
Use this sequence for how to make tadelakt texture seamless while preserving hand-worked character:
- Choose a real reference and state. Decide on pigment, finish, age, dryness, and whether the surface is polished, worn, or actively wet.
- Set physical scale. Measure how much wall the tile covers and how large the trowel passes should appear.
- Build broad color fields. Create soft mineral variation without memorable blobs, directional lighting, or room-scale stains.
- Add overlapping compression. Introduce medium trowel pressure into color and roughness with related masks.
- Author restrained relief. Put shallow undulation and pores into height or normal while keeping the plaster compressed.
- Heal every map edge. Repair color, normal, roughness, height, and AO boundaries together.
- Separate macro and wet layers. Add room-scale variation, water, repairs, and use-specific marks outside the base tile.
- Validate on curved architecture. Test a wide wall, rounded corner, niche, bench, and grazing light at final camera distances.
An edge can wrap perfectly while one pale crescent repeats every metre. The seamless texture guide covers boundary repair; tadelakt also needs feature-distribution control inside the tile.
When using a photograph, remove perspective, lighting gradients, fixtures, corners, and unique damage before tiling. Photo-derived height and roughness need extra skepticism because illumination is not geometry.
Break repetition across large plaster architecture
Use the base tile for medium and fine structure, then add low-frequency variation at a larger scale. This keeps the tadelakt texture seamless while avoiding the wallpaper effect.
- a second low-frequency color and roughness texture in world space;
- two rotations or mirrored variants blended by a soft mask;
- per-object hue and roughness offsets within one pigment family;
- vertex-painted compression or wear on hero architecture;
- decals for repairs, damp patches, lime bloom, and local damage;
- triplanar projection for complex static forms when UV seams are difficult to hide.
Do not randomize every tile independently. Tadelakt is continuous plaster, so hard transitions between variants are worse than repetition. Blend slowly, keep normal intensity consistent, and preserve shared color direction.
Curved corners are useful tests. A continuous Moroccan plaster texture should cross the radius without a UV density jump. Use rounded geometry for the silhouette; a normal map cannot turn a square corner into hand-finished plaster.
If you ask why does tadelakt texture look like plastic, check uniform low roughness, over-smooth normals, missing mineral variation, and highlights that ignore compression. Plastic is not merely shiny; it is consistently shiny.
Set up tadelakt texture in Unity, Unreal Engine, and Blender
For a tadelakt texture Unity material, tile the base set at measured scale and multiply it by low-frequency world-space or second-UV variation. Import base color as sRGB and normal as a Normal Map; keep roughness-derived data linear. Unity pipelines commonly expose smoothness, so invert roughness during export or in the shader. Use decals or vertex masks for wet zones.
For a tadelakt texture Unreal Engine material, separate base tile, macro variation, and wetness into material functions or clearly named groups. Feed roughness directly, keep metalness at zero, and validate normal convention and packed channels. A Material Instance should change pigment, scale, polish, and wetness without making every wall a new shader.
For a tadelakt texture Blender setup, connect base color and roughness to Principled BSDF, and the normal through a Normal Map node. Mark data maps as Non-Color; Blender’s Normal Map documentation confirms tangent normal images should use the same UV map and Non-Color mode. Test with a large Area Light and curved geometry.
Across engines, inspect the polished lime plaster texture in motion. Long satin highlights expose seams, roughness discontinuities, compression blocks, and mip shimmer. The texture filtering guide covers stable fine detail at grazing angles.
For the best tadelakt texture 2026 workflow, keep unpacked masters, export per destination, and judge the packaged build or final render scene. A thumbnail sphere is useful for triage. It is not where bathrooms happen.
FAQ
What is a tadelakt texture?
A tadelakt texture represents polished lime plaster with mineral color variation, shallow trowel marks, fine pores, and irregular satin roughness. A production-ready version usually combines a seamless base tile with separate macro variation and optional wetness masks.
How do I make a tadelakt texture seamless?
Remove lighting and unique architectural features, establish real scale, build broad and medium variation, then offset and repair every PBR map together. After the edge is clean, test repeated coverage for memorable internal shapes and add large-scale variation outside the tile.
What PBR maps does tadelakt need?
Use base color, roughness, and normal as the core set, with subtle height and minimal AO when justified. Metalness remains zero because tadelakt is a mineral dielectric surface, not a metal.
Why does my tadelakt texture look like plastic?
The roughness is probably too low and uniform, or the surface lacks broad mineral and compression variation. Add cause-based roughness changes, restrained pores, and overlapping trowel zones, then test under a large grazing light.
Is tadelakt waterproof?
Traditional tadelakt is polished and soap-treated to create a water-resistant finish, but suitability depends on the full physical system, substrate, application, curing, and maintenance. For real construction, follow the selected manufacturer’s specification rather than treating a rendered material as building guidance.
Should tadelakt have a strong normal map?
Usually no. Finished tadelakt is compressed and polished, so the normal map should describe shallow undulation and fine pores rather than deep stucco ridges. Put large rounded forms into geometry and validate the normal under grazing light.
How do I stop a tadelakt wall texture from repeating?
Keep distinctive room-scale events out of the base tile, then blend a low-frequency world-space mask over the seamless material. Soft variant blending, vertex paint, and localized decals can add uniqueness without breaking continuous plaster.
Try CraftPBR
CraftPBR helps keep a tadelakt texture seamless by providing editable material logic instead of one flattened beige image:
- Text-to-PBR generates aligned plaster maps from a description of pigment, compression, pore scale, polish, and age.
- Photo-to-PBR converts a controlled plaster photograph into coordinated base color, normal, roughness, height, AO, and metalness.
- Node workspace keeps tiling, levels, trowel masks, macro variation, and wetness layers editable.
- Engine export prepares color and data handling, normal orientation, channel packing, and map names for common targets.
- Free tier lets you build and architectural-test a complete PBR set before final delivery.
- CC0 output lets you modify, render, and ship generated materials without attribution.
Create a seamless tadelakt PBR material →
The goal is a wall that looks hand-finished, not hand-copied and pasted.