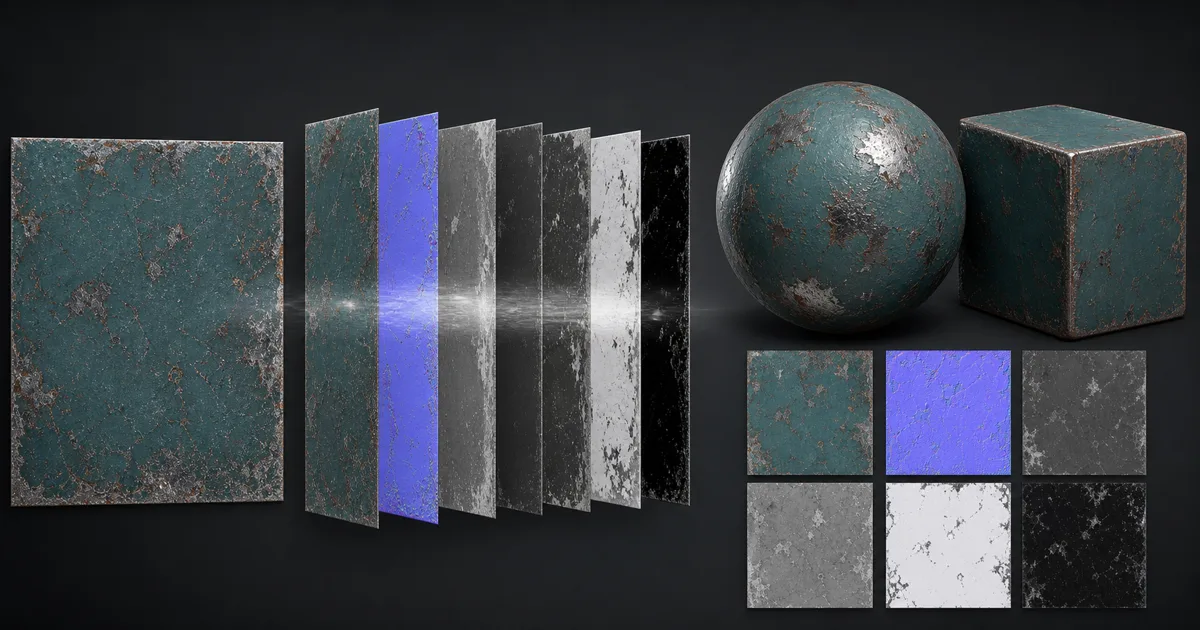
A JPEG is not a material. It is a stack of guesses about colour, lighting, depth, finish, and camera response compressed into three channels. An image to PBR material workflow takes those mixed signals and turns them into albedo, normal, height, roughness, ambient occlusion, and metalness maps that can respond to new geometry and light.
The source might be a photograph, concept painting, generated image, scan, catalogue crop, or old diffuse texture. Each contains different evidence and different traps. This guide explains how to diagnose that evidence, build a coherent map set, repair projection and repetition, validate the result, and export it without asking one grayscale conversion to perform six unrelated jobs.
Start by identifying what the image actually knows
Before you convert an image to a PBR material, classify the source. A front-facing surface photograph contains useful local texture but also captured illumination. A clean albedo image has less lighting contamination but no direct depth or finish data. Concept art may describe the material clearly while bending perspective and inventing highlights. A product photograph usually shows form rather than a flat repeatable patch.
Ask five questions:
- Is the surface approximately flat, or does its identity depend on 3D shape?
- Is the view close to perpendicular, with enough area to crop a usable patch?
- Which dark and bright regions are substance changes, and which are lighting?
- Is the real-world scale known or at least inferable?
- Does the image show one material layer or several coatings, deposits, and exposed substrates?
A single image to PBR material conversion cannot recover hidden geometry or measure roughness directly. It estimates. That is not a flaw unique to AI; the missing information never reached the pixels. The practical goal is a physically plausible interpretation that survives relighting, not forensic reconstruction from a thumbnail that has been through three social platforms and a screenshot.
Flat opaque materials such as stone, plaster, wood, soil, fabric, brick, and painted metal are strong candidates. Glass, liquids, mirrors, deep fur, foliage silhouettes, and objects with large undercuts usually need dedicated shaders, opacity, multiple views, or geometry. Knowing when the source is underqualified is part of the workflow.
Choose a source image that reduces ambiguity
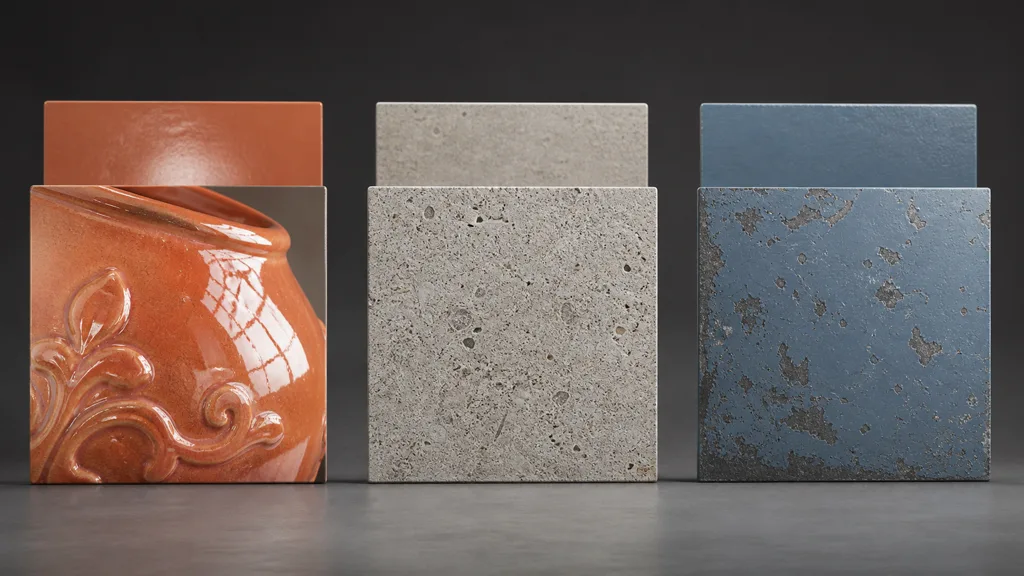
The best reference image to PBR material source is sharp, high resolution, evenly exposed, front-facing, and free of clipped highlights. It contains a broad representative patch without borders, objects, dramatic depth of field, or a memorable feature that will repeat every metre.
For photographs, correct lens distortion and perspective before material generation. Flatten broad illumination gradients, neutralize white balance, and repair obvious glare. The photo to PBR texture guide covers controlled capture; the distinction here is that an image-based workflow may begin with imagery you did not shoot and cannot recapture.
For generated art or concept references, preserve the material idea while removing scene cues. Crop away silhouettes, cast shadows, contact shadows, reflected environments, edge lighting, and painted depth. If the source shows a mossy wall receding into space, first rectify a local section into a square patch. Perspective should not become height, and a painted sunbeam should not receive its own roughness value.
For an old diffuse texture, find out whether it already contains baked AO and directional light. Many legacy assets were authored to look finished without a modern shader. Feeding them directly to an image based PBR material generator can produce double shadowing and strangely polished cavities. Delight the image first, or be prepared to remove those signals from the generated maps.
Record physical scale. If the crop represents 50 centimetres, keep that number with the material. A crack that is convincing on a wall becomes a canyon when mapped onto a coffee cup. Pixels are famously relaxed about units.
How to turn an image into a PBR material
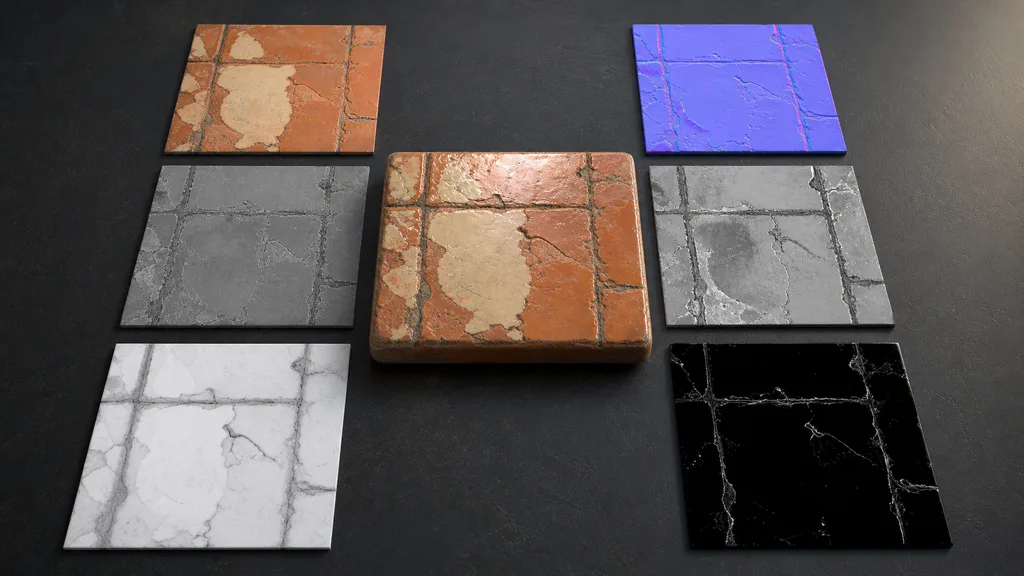
Use this sequence to create a PBR material from an image:
- Describe the physical layers. Name the substrate, coating, wear, dirt, moisture, oxidation, and approximate size. “Blue painted steel with chipped edges and dry rust” gives the conversion a material model; “blue texture” gives it a colour.
- Recover albedo. Remove highlights, cast shadows, form shading, and cavity darkness while keeping actual pigment, stains, and substance boundaries.
- Build broad height. Establish joints, chips, dents, raised deposits, and cracks before adding pores. Fine image noise should not become microscopic mountain ranges.
- Create the normal map. Derive tangent-space direction from height or generate it as part of the coordinated set. Check whether the target renderer expects OpenGL or DirectX orientation.
- Author roughness by finish. Polished wear, dust, glaze, oil, raw stone, and paint each deserve values for physical reasons. Do not map dark albedo to smoothness by reflex.
- Restrict AO to cavities. Ambient occlusion should reinforce limited indirect light in creases and contacts, not redraw the source shadow.
- Assign metalness by substance. Bare metal is metallic. Paint, rust, dust, stone, and wood are dielectric, even when they sit on metal.
- Lock registration and scale. Compare distinctive features across all maps, then set the physical size before tiling or export.
An AI image to PBR material tool is most useful at the interpretation stage: separating a dark oil smear from dark paint, or recognizing that a chipped coating changes several maps at once. Deterministic node controls remain valuable afterward for ranges, masks, polarity, seams, and export. Generation makes a proposal. Production needs knobs.
Keep the maps coherent without copying them
Coherence means related features line up for related reasons. If paint chips expose steel, the same boundary may change albedo, roughness, metalness, normal, and height. The values should not be identical, but the location should agree. Shared masks and a node workspace are ideal because one boundary can drive several independently tuned responses.
Watch for four common failures in an image to PBR material set:
- Every map copies luminance. Pale paint becomes rough, dark pigment becomes deep, and black print becomes metal. Break the correlation and author by material class.
- Lighting survives in several channels. A highlight becomes pale albedo, low roughness, and raised height. Remove it from the source or correct each contaminated map.
- The map set drifts. A crack moves between height and normal, or a chip changes shape in metalness. Reuse shared masks or regenerate the maps together.
- All frequencies appear everywhere. Camera noise enters normal, roughness, and height at full strength. Assign macro form, medium defects, and microdetail only where each contributes.
Test questionable regions with maps disabled one at a time. A suspicious dark groove may belong in height and AO but not albedo. A printed stripe may belong only in albedo. The AI roughness map generator guide goes deeper on finish inference, while the AI albedo map generator guide covers lighting-neutral colour.
Make a 2D reference survive UVs and repetition
An attractive reference can still be a poor production texture. Correct perspective, then decide whether the material should tile, project once, or be used as a detail layer. A hero prop may use a unique image; a wall or terrain needs edge continuity and controlled repetition.
For a tileable image to PBR material, offset every map by half its width and height, repair the central seams, and keep edits registered across the set. Test at least a four-by-four grid. Remove standout stones, knots, stains, or cracks that create an obvious rhythm. Edge continuity hides the boundary; it does not hide the repeated landmark.
Projection matters too. Planar projection works for flat surfaces but stretches around corners. Triplanar mapping can hide UV seams on rock and terrain, though it costs shader work and may soften directional features. Conventional UVs give the most control for props. Choose the mapping method before spending an afternoon fixing a seam that the final shader will never use.
Restore real scale after tiling. If a 2K map covers one metre, that scale should remain consistent across a sphere, wall, and prop unless art direction deliberately changes it. Add macro variation separately with decals, vertex colour, world-space tint, or a second low-frequency mask. One quiet repeatable tile plus controlled variation is usually more useful than a giant texture with one unforgettable stain.
Validate the image to PBR material under new light
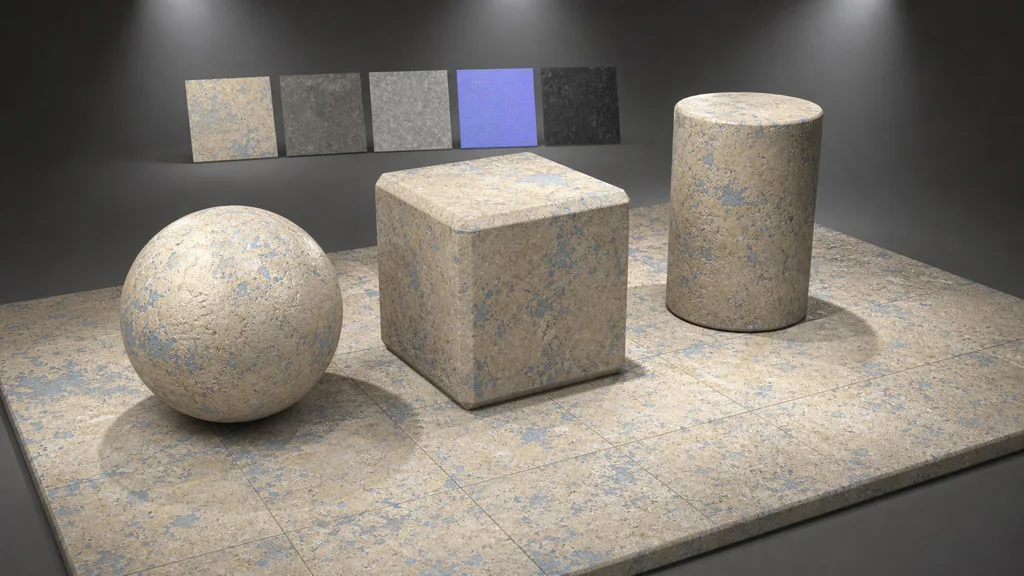
Never approve the maps as thumbnails. Apply the image to PBR material to a sphere, beveled cube, cylinder, and large plane. Rotate a small bright light, swap environment maps, and view from both inspection distance and the intended gameplay camera.
- A moving highlight should reveal plausible roughness without exposing a fixed highlight from the source.
- Relief should respond consistently from every direction; inverted normals or baked shadows fail immediately.
- The large plane should show no edge seam, broad gradient, or repeating landmark.
- The material scale should remain believable on different shapes.
- Fine normal and roughness detail should not sparkle after mipmapping.
- Compression and channel packing should not create blocks, banding, or cross-channel contamination.
Temporarily replace albedo with neutral grey to inspect roughness and relief without colour distraction. Then disable normal, AO, and height to inspect albedo alone. If the original light direction remains readable, the set still contains captured illumination.
The best image to PBR material workflow in 2026 is not the one that produces the busiest set of maps. It is the one that remains convincing when the renderer changes the question.
Export for Unity, Unreal, and Blender
Keep an unpacked master for every map. Albedo is normally sRGB; normal, roughness, height, AO, and metalness are data maps and should use linear or non-colour sampling.
For an image to PBR material for Unity, import base colour with sRGB enabled and mark the normal texture as a Normal map. URP and HDRP Lit shaders often expect smoothness, the inverse of roughness, commonly packed into an alpha channel. Invert during export and document the convention rather than changing the master.
For an image to PBR material for Unreal, use a DirectX normal map, disable sRGB for data textures, and connect the channels to their matching material inputs. ORM packing conventionally stores AO in red, roughness in green, and metalness in blue. Inspect the packed import because compression can change values that looked correct as separate files.
For an image to PBR material for Blender, set base colour to sRGB and the other textures to Non-Color. Send the normal through a Normal Map node, connect roughness directly to Principled BSDF, and use height through Bump or Displacement according to the render setup. Blender commonly uses the OpenGL normal convention.
Use clear channel names and include physical size in the material metadata. painted_steel_roughness will still make sense next season. gray_final_3 has chosen mystery as a file format.
Try CraftPBR
CraftPBR turns an image to PBR material into an editable production workflow:
- Text-to-PBR creates a coordinated material when a useful reference image does not exist.
- Photo-to-PBR interprets a surface image into aligned albedo, normal, roughness, height, AO, and metalness.
- Node workspace keeps masks, ranges, tiling, blending, and corrections adjustable instead of baking every decision into one export.
- Engine export prepares map names, colour spaces, normal conventions, and packed channels for Unity, Unreal, Blender, Godot, and Three.js.
- Free tier lets you test a real reference before choosing a production route.
- CC0 output means generated materials can be used, modified, and shipped without attribution.
Convert an image into a PBR material with CraftPBR →
The source image gets one vote. Physics gets the final review.