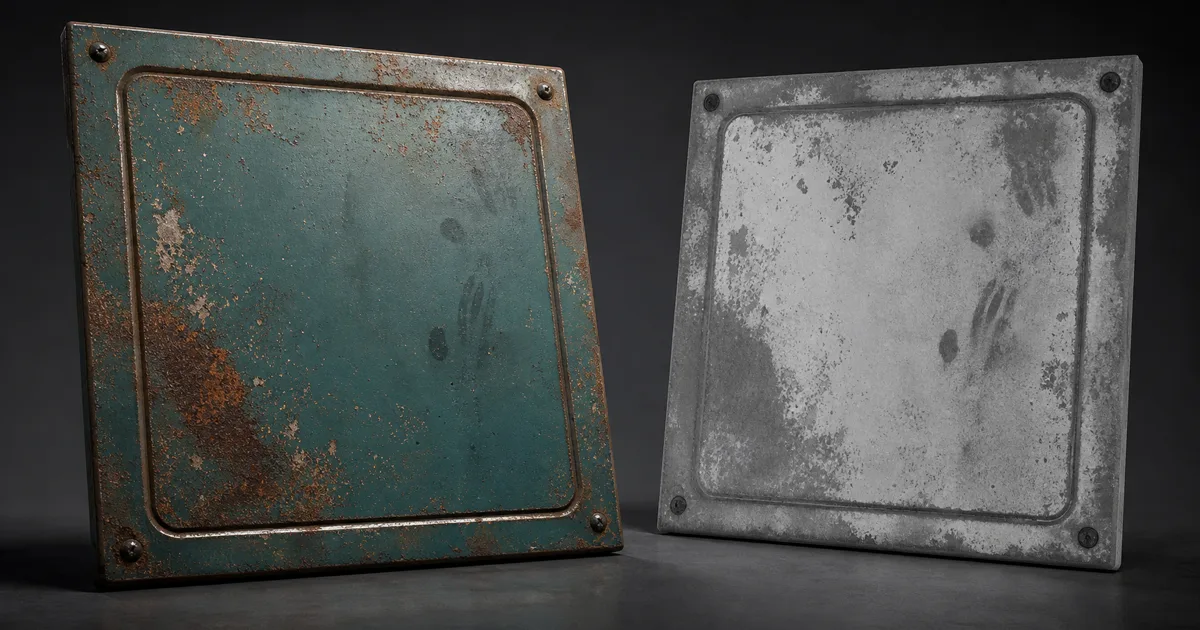
A photograph knows what a surface looked like under one light. An AI roughness map generator has the harder job: predicting how every part of that surface should reflect under any light. That difference is why a quick grayscale conversion often produces a map that looks busy but behaves badly. Dark pixels are not automatically smooth, bright pixels are not automatically rough, and the sunlit side of a brick is not made from a different substance than the shaded side.
This guide covers how to generate a roughness map with AI, prepare a useful source, judge the result in a renderer, correct the common failures, and export it without letting colour management quietly sandblast the material.
What an AI roughness map generator has to infer
A roughness map stores reflection spread. Darker values produce tighter, sharper reflections; lighter values scatter the reflection into a broad matte response. If that definition is new, start with the roughness map guide. The interesting problem here is not the definition but the inference.
An RGB photo mixes several signals together: material colour, illumination, shadow, surface relief, dirt, wear, camera exposure, and sometimes a heroic amount of phone sharpening. An AI roughness map generator must separate the signals that suggest microsurface finish from those that merely changed the captured brightness.
Consider a painted steel door. Exposed polished edges may be darker in roughness because handling has smoothed them. Powdery oxidation may be lighter because it scatters reflections. A dark oil smear can also be smoother, while a dark painted stripe might have exactly the same roughness as the surrounding paint. The pixels look similar. Their physical causes do not.
That is where an AI-generated roughness map can beat a luminance conversion: it can use material context. It should recognize wax, dust, bare metal, glaze, porous stone, fibres, and moisture as different surface states rather than treating the image like a referendum on brightness.
Prepare a photo to roughness map source
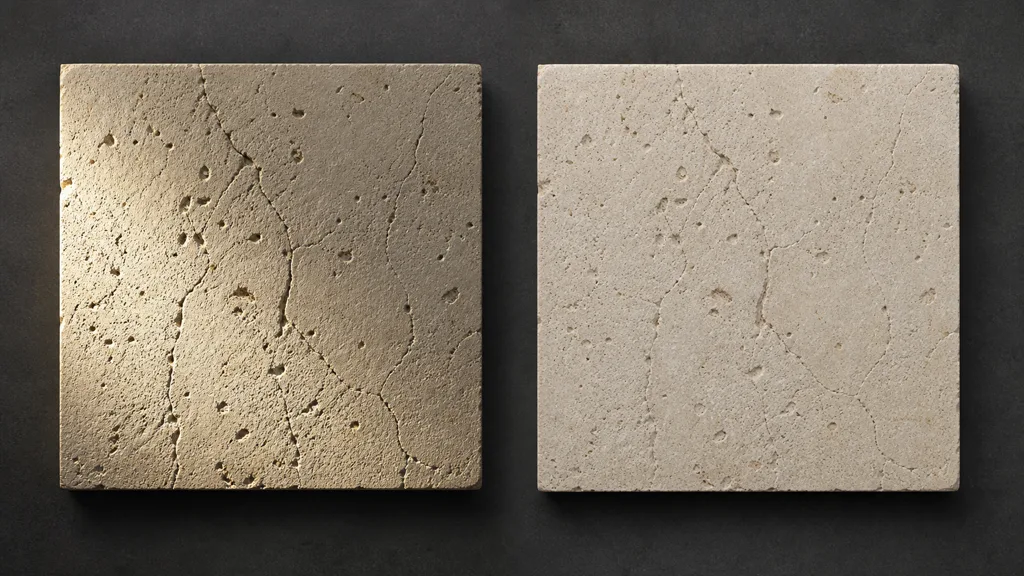
The source does not need to be beautiful. It needs to be legible and boring in useful ways. For a photo to roughness map workflow, capture the surface straight on with soft, even light. Avoid clipped highlights, deep cast shadows, strong perspective, depth of field, and automatic filters. A dramatic photograph is excellent at selling masonry and terrible at describing it.
If you only have an existing image, remove or reduce lighting before generation:
- Correct white balance and exposure without crushing either end of the histogram.
- Flatten large gradients caused by a lamp, window, or camera vignette.
- Repair specular hotspots that have clipped to white.
- Crop away borders, grout from unrelated tiles, and objects resting on the surface.
- Correct perspective so repeated features keep a consistent scale.
- Decide the real-world size represented by the crop.
Scale matters because the same pattern can imply radically different finishes. Fine pores on fired ceramic may barely affect roughness; identical shapes read as craters when the crop represents a concrete wall. Tell the generator whether it is seeing a 20 cm tile, a two-metre slab, or a close-up the size of a postage stamp.
For an image to roughness map conversion from albedo, use a lighting-neutral base colour when possible. Albedo has already had much of the illumination removed, which gives the model fewer false clues. It still cannot be copied directly: wood grain colour, printed ink, and mineral variation may change albedo without changing finish.
How to generate a roughness map with AI
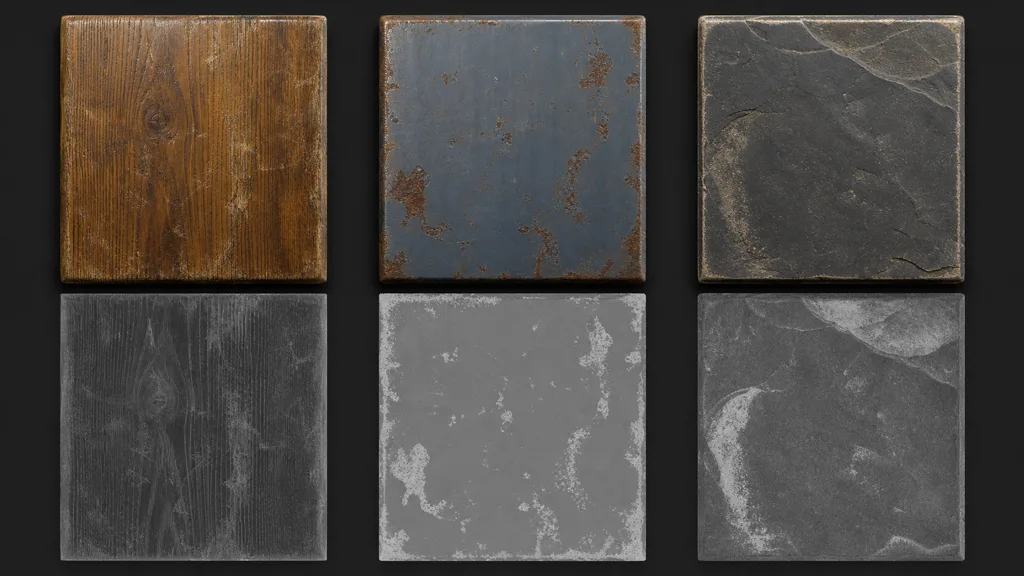
Use this five-step workflow whether the AI roughness map generator starts from a photo, albedo, or complete PBR material.
- Name the material and finish. State the substrate, coating, age, and surface condition: “sealed oak with worn satin varnish,” not merely “brown wood.”
- Describe finish boundaries. Call out polished edges, dusty recesses, oily handling marks, peeled coating, wet patches, or exposed substrate. These are the areas where roughness should change for a physical reason.
- Set scale and tiling expectations. Give an approximate physical size and request an even, tile-friendly distribution when the material will repeat.
- Generate roughness with the related maps. If possible, create albedo, normal, height, AO, and roughness as one coordinated set. A lone automatic roughness map generator has less evidence and more freedom to improvise.
- Keep an editable source. Export the grayscale map, but also retain masks or node controls for the important surface states. Art direction has a habit of arriving after the first export.
A useful prompt describes matter, not the desired screenshot: “weathered green painted steel, satin paint, smooth exposed edges, matte rust blooms, faint oily fingerprints, no baked lighting, 50 cm square.” The result should place roughness variation where the material changes, not wherever the photo happens to be dark.
CraftPBR can generate the full set from text or a photograph, then expose the maps in a node workspace for deterministic correction. That combination matters. Generation gets the regions roughly right; controls let you decide whether “roughly” survives review.
Validate the AI-generated roughness map under moving light
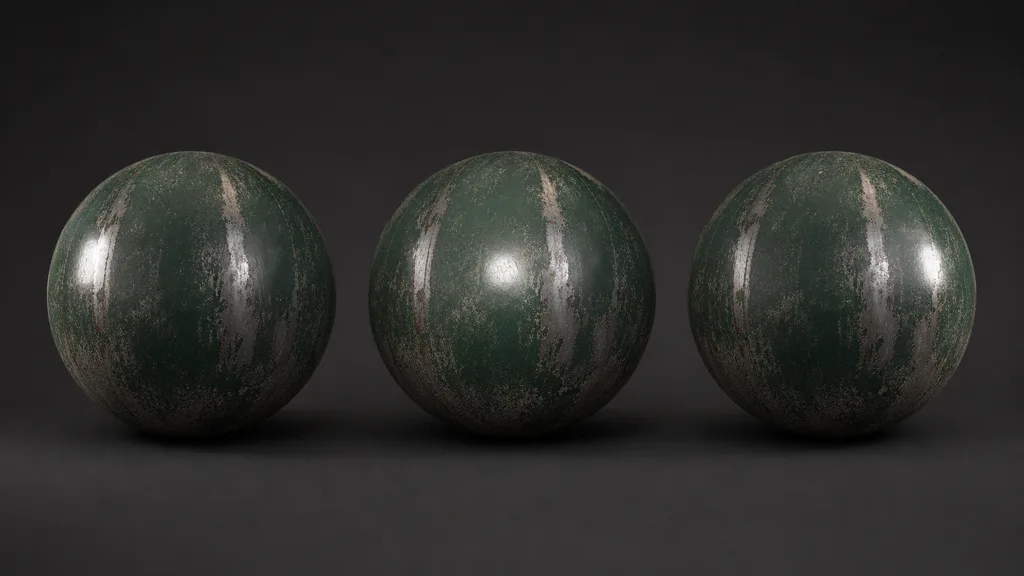
Do not judge roughness by staring at the grayscale file. Judge the reflection it produces. Load the material onto a sphere and a flat plane, use a neutral environment, and move a small bright light across the surface. The highlight should widen over rough regions and tighten over smooth ones while staying attached to plausible material features.
- Light sweep: rotate a directional or area light. Baked shadows in the source will stay fixed and reveal themselves.
- Neutral material test: temporarily use a mid-grey albedo. This removes colour as a distraction and makes the reflection structure obvious.
- Range check: inspect the histogram. Pure black and white should be rare unless the material genuinely includes a mirror or extremely diffuse powder.
- Distance check: view from the intended camera distance. Pixel-level variation can become noisy shimmer after mipmapping.
- Map agreement: compare roughness with albedo, normal, and height. Shared features should align when physics says they should, not because one map was blindly copied.
The best AI roughness map generator in 2026 is therefore not the one with the most intricate grayscale thumbnail. It is the one whose output survives a moving highlight. A map can contain exquisite detail and still be physically illiterate. Tiny random contrast is not realism; sometimes it is just confetti wearing sensible shoes.
Fix the failures AI generators repeat
The roughness map copies albedo. Dark mortar becomes glossy, pale paint becomes matte, and every printed mark alters the reflection. Break the direct correlation. Use material-state masks and preserve only colour features that imply a finish change.
Lighting is baked into the map. One side is consistently smoother because the source contained a highlight or shadow. Delight the source, regenerate, or remove the broad gradient with a low-frequency correction.
The range is too wide. Black pits and white plateaus make the surface look wet beside chalk. Compress levels toward a believable band, then reintroduce only justified extremes.
Microdetail is too strong. High-frequency noise turns into glitter during motion and can fight the normal map. Blur or reduce the finest roughness layer, check mipmaps, and let normal detail carry the smaller relief.
Features disagree across maps. Scratches are rough in one place and raised somewhere else. Regenerate the maps as a coordinated set or build shared masks in a node graph. Our AI PBR material generator guide explains how to inspect coherence across the whole set.
The polarity is reversed. Roughness uses white for rough and black for smooth. Glossiness or smoothness uses the opposite convention. Invert once, label the file clearly, and avoid the classic pipeline ritual of inverting it again three folders later.
When a simple converter is enough
AI is useful when the source requires material judgment. It is unnecessary when the task is a controlled technical conversion. Use the free roughness map generator when you already know luminance is a good starting mask and only need grayscale, contrast, and inversion. Examples include stylized assets, hand-authored masks, measured images with controlled capture, or a quick prototype where you will tune the output manually.
Use an AI roughness map generator when the image contains several materials, coatings, wear states, or lighting artifacts that should not map directly from brightness. AI is also more useful when you want roughness coordinated with normal, height, AO, and metalness rather than produced as an isolated guess.
Neither route removes the need to render-test. A deterministic converter can faithfully execute a bad assumption, while AI can make a confident new one. Computers contain multitudes.
Export for Unity, Unreal, and Blender
The exported roughness map is grayscale data, so disable sRGB or colour processing in every renderer. Save a full-quality linear source before channel packing.
For an AI roughness map generator for Unreal, import the roughness texture with sRGB disabled and connect it to Roughness. If you pack ORM, place ambient occlusion in red, roughness in green, and metalness in blue. Compression settings should treat the file as masks, not colour.
For an AI roughness map generator for Unity, check the shader workflow. URP and HDRP Lit shaders commonly use smoothness, which is the inverse of roughness, often packed into the alpha channel of the metallic or mask map. Invert the source once during export and document the convention.
For an AI roughness map generator for Blender, set the Image Texture node to Non-Color and connect it to Principled BSDF Roughness. Keep the source uninverted. If the material looks uniformly dull, verify colour space before repainting the map; the checkbox is cheaper than a new texture pass.
Across engines, test the packed output after export. Channel packing, compression, and colour settings can all change a correct source. Keep the unpacked grayscale map as the authority and consider the runtime texture a delivery format. The PBR workflow guide covers how the other maps travel with it.
Try CraftPBR
CraftPBR turns the AI roughness map generator into one part of a complete material workflow:
- Text-to-PBR creates coordinated maps from a physical material description.
- Photo-to-PBR interprets a captured surface instead of merely desaturating it.
- Node workspace lets you compress ranges, mix masks, correct polarity, and keep edits repeatable.
- Engine export handles map naming, normal conventions, and packed outputs for Unity, Unreal, Blender, Godot, and Three.js.
- Free tier lets you test the workflow before choosing a production route.
- CC0 output means generated materials can be used, modified, and shipped without attribution.
An AI-generated roughness map should not merely resemble technical art. It should make the material behave correctly when the light moves. That is the whole audition.