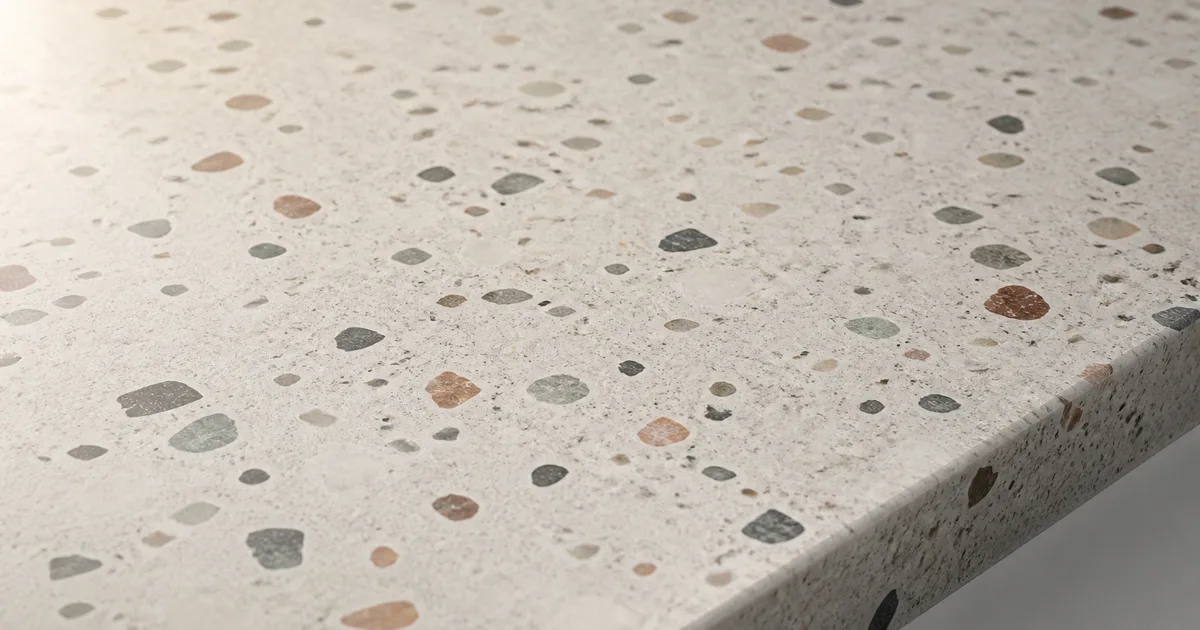
A terrazzo texture seamless enough for an architectural sample can still fail across a hotel floor, station concourse, or game environment. The borders join, yet one rust chip returns in ranks. The aggregate floats above the binder. Every fragment catches the same highlight. Technically tileable, visually organized by an accountant.
Terrazzo is a composite rather than decorative confetti. Marble, granite, glass, or recycled aggregate is mixed into cement or resin, cured, ground flat, filled, and polished or honed. A convincing seamless terrazzo texture must preserve that construction: chips are cut through by grinding, pores belong mainly to the binder, roughness depends on finish and maintenance, and the distribution stays credible beyond a single square.
Specify the terrazzo before placing aggregate
“Terrazzo” describes a family of surfaces. Traditional cementitious terrazzo commonly has a mineral binder, visible pinholes, and a honed or polished finish. Epoxy terrazzo can use thinner pours, saturated binders, glass inclusions, and tighter finishing. Precast tiles introduce real joints and module dimensions; monolithic pours use divider strips, control joints, or room boundaries.
Write a short material specification before generating or scanning anything:
- Binder: Portland cement, pigmented cement, epoxy, or another resin system.
- Aggregate: marble, granite, quartz, glass, shell, recycled material, or a controlled mix.
- Size distribution: micro chips, mixed aggregate, large Venetian-style fragments, or graded bands.
- Coverage: dense, balanced, or sparse, expressed as an area ratio rather than “more stones.”
- Finish: ground, honed, polished, sealed, waxed, worn, or recently cleaned.
- Installation: monolithic pour, precast slab, tile, stair tread, worktop, or wall panel.
- Physical scale: the represented width of one texture tile and the final texel density.
That last number controls every other decision. If the image represents 1.5 metres but the engine maps it across 4 metres, a 25 mm chip becomes a 67 mm geological event. A ruler beside a real reference is more valuable than another hour of color grading.
Set terrazzo aggregate scale and distribution
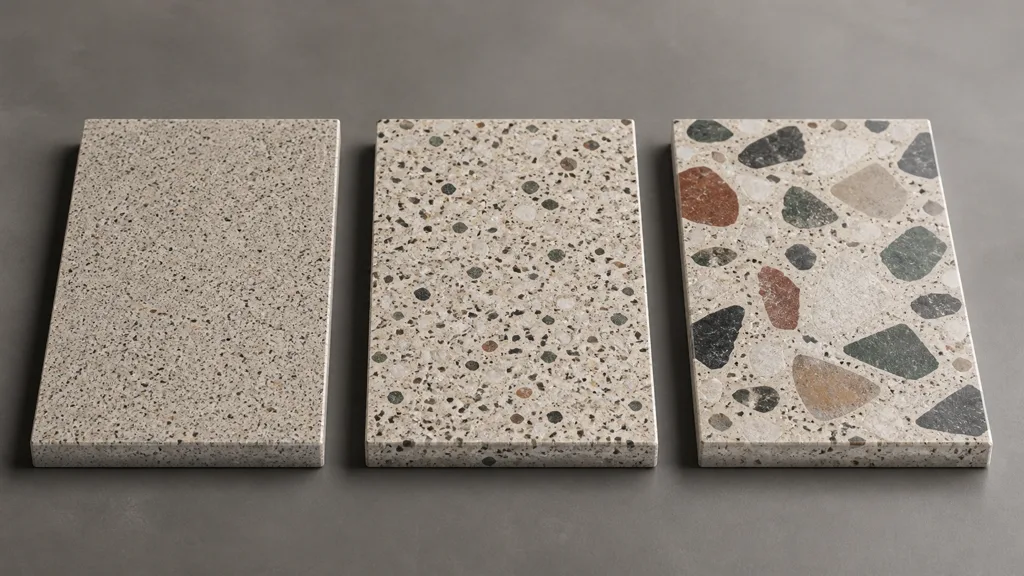
Terrazzo aggregate scale determines the visual frequency of the whole surface. Fine aggregate creates a quiet, nearly continuous field. Mixed sizes feel natural because smaller fragments occupy gaps between larger ones. Large fragments become graphic landmarks and therefore expose repetition fastest.
Treat aggregate placement as a distribution problem with constraints:
- Establish a believable minimum and maximum chip size in millimetres.
- Use several size bands rather than uniform random scaling.
- Vary rotation and silhouette without stretching fragments into noodles.
- Keep local density uneven within limits, so the surface breathes without forming bald patches.
- Prevent overlaps that make one chip appear pasted over another.
- Reserve a few distinctive fragments, then verify that none dominates the repeated field.
Natural broken aggregate has chipped, angular outlines, but grinding reveals flat cross-sections. The pieces should sit flush with the surrounding matrix in base color. Large positive height around every chip makes the material resemble stones dropped into icing. Very shallow boundary relief, small pits, and occasional imperfect filling can exist; the bulk surface remains planar because it was ground that way on purpose.
Build a terrazzo PBR material by physical cause
A terrazzo PBR material benefits from separating binder and aggregate masks early. The two regions may differ in color, porosity, micro-normal, and response to polishing, but both are usually dielectric. Ordinary marble, cement, glass, and stone aggregate should keep metalness at zero. A brass divider strip is metallic because it is a separate material, not because it lives near an expensive floor.
| Map | What it should describe | Common mistake |
|---|---|---|
| Base color | Binder pigment, chip mineral color, subtle staining | Baking lamp gradients or dark contact shadows into color |
| Roughness | Finish, porosity, polishing, wear, residue, repairs | Giving every chip one shared gray value |
| Normal | Fine pores, shallow chips, hairline grinding marks | Embossing every aggregate boundary strongly |
| Height | Restrained pits, filled voids, damaged edges | Turning a ground surface into exposed gravel |
| AO | Only small stable cavities that lighting cannot resolve | Painting halos around all aggregate |
Keep base color free of capture lighting. Cross-polarized photography helps when documenting a real floor, while a flatbed scan can work for a removable sample. Capture more area than the final crop, record scale, and avoid perspective. The photo-to-PBR workflow covers source cleanup; the scanned textures guide covers neutral capture and reconstruction.
Author a terrazzo roughness map that explains the finish
A good terrazzo roughness map answers how the surface was ground, sealed, polished, worn, and cleaned. It does not simply invert base color. Dark chips are not automatically smoother, and pale binder is not automatically rougher.
Begin with the chosen finish. A polished floor produces tighter reflections, but still has micro-scratches, small pores, and slight differences between mineral families. A honed floor spreads highlights more broadly. An old circulation path can become smoother from abrasion or duller from embedded residue depending on material, maintenance, and traffic. Wetness is a temporary layer with its own boundaries and should not be baked into the permanent surface.
Build roughness at three scales:
- Micro: pores, grinding scratches, fine mineral structure.
- Meso: chip-to-binder response and filled pinholes.
- Macro: traffic lanes, cleaning passes, sealer variation, repairs, and dull patches.
Keep the ranges close enough to read as one finished composite. If every chip is mirror-smooth against chalky cement, the floor fragments under motion. Validate with a long area light at a grazing angle. Rotate the light and camera; a roughness map that only works from one still is an illustration, not material data.
Make a terrazzo texture seamless beyond the border
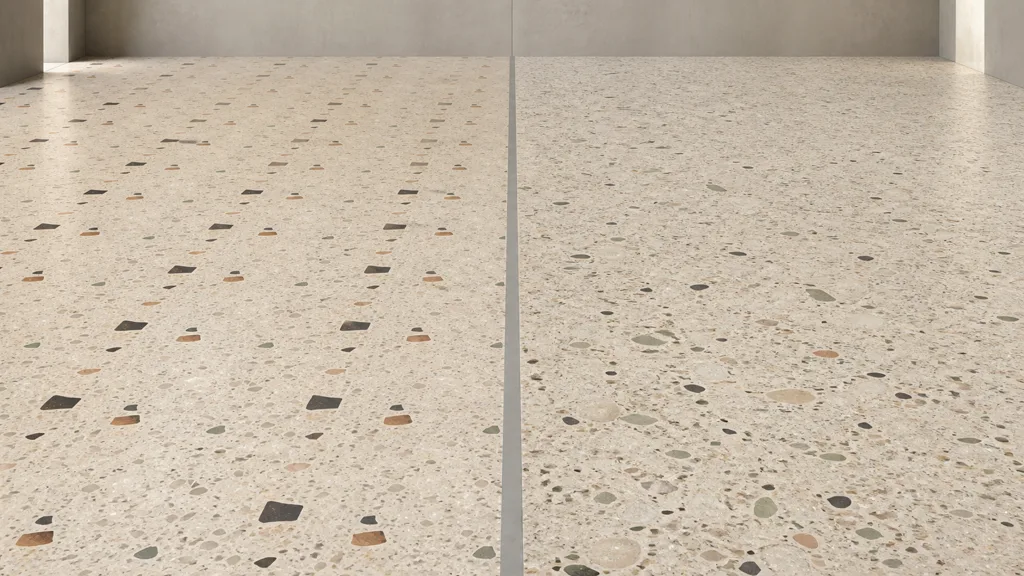
To answer how to make terrazzo texture seamless, offset every aligned map by half its width and height, then repair the central crosses. Continue chip silhouettes and binder values across the join. Edit base color, roughness, normal, height, and masks together so a fragment does not cross in color while its surface response stops at the old edge.
Then tile the result at least 6×6. Border errors are only one class of failure. Large chips, dark clusters, empty binder islands, repeated scratches, and broad color clouds create a second grid inside the tile. This is why a terrazzo floor texture seamless in a material preview can become conspicuous in a corridor.
Use several tactics together:
- Replace memorable chips near the tile centre as well as the borders.
- Distribute large fragments more evenly without making a lattice.
- Remove directional gradients that repeat as bright squares.
- Prepare two or three compatible variants with the same scale and finish.
- Blend variants using world-space masks, vertex color, or room boundaries.
- Add sparse decals for repairs, stains, joints, and local wear above the base material.
Stochastic or hex tiling can reduce obvious repetition, but it may scramble aggregate at cell boundaries or alter color statistics. Test normals and roughness, not just base color. A shader that hides repeats by turning the floor into oatmeal has technically changed the subject.
A production pass for tileable terrazzo texture
Use this sequence to keep the maps coherent:
- Write the material specification. Choose binder, aggregate families, size range, density, finish, installation, and represented tile width.
- Capture or generate neutral source data. Remove lighting, perspective, and unique contamination before map creation.
- Build binder and aggregate masks. Preserve editable controls for chip family, scale band, and coverage.
- Create the base color. Keep mineral variation inside chips and broad binder variation restrained.
- Author roughness by finish. Combine microstructure, material-region differences, and causal wear.
- Add restrained normal and height. Describe pores, scratches, pinholes, and damage without raising every chip.
- Repair the tile as one map set. Offset, heal, and inspect all channels with identical coordinates.
- Remove landmarks in a large repeat. Check 6×6 tiles from above and through a moving gameplay camera.
- Add installation layers separately. Place strips, joints, cracks, repairs, and wear at room scale.
- Validate and export. Test different geometry, lights, mips, compression, and engine conventions.
Terrazzo texture in Unity, Unreal Engine, and Blender
For a terrazzo texture Unity material, use an opaque Lit shader and keep the surface nonmetallic. Unity’s URP Lit graph exposes Base Color, tangent-space Normal, Metallic, and Smoothness. Invert a roughness texture for a smoothness workflow, verify channel packing, and disable sRGB on numeric packed maps. Keep tiling derived from the represented metres per texture, not from how busy the inspector preview looks.
A terrazzo material Unreal Engine setup connects base color, roughness, normal, and optional AO to the matching material inputs, with Metallic set to 0 for cement and stone. Use material instances for tile scale, finish range, and compatible variants. Epic’s physically based materials reference notes that roughness carries spatial reflection variation; do not push Specular down to erase a highlight that is merely too sharp.
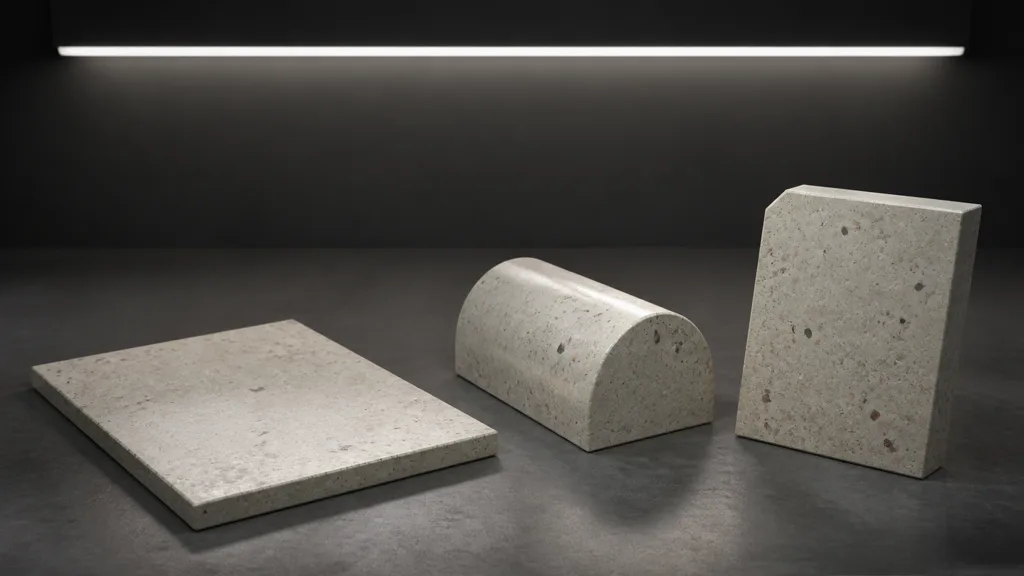
For a terrazzo material Blender setup, connect color to Principled BSDF Base Color, roughness as linear data, and the normal texture through a Normal Map node set to Non-Color data. Blender’s Normal Map documentation requires the tangent-space map and image texture to use the matching UV map. Test a flat plane, a rounded edge, and a large floor under an area light in the render engine you intend to deliver.
Diagnose why a terrazzo texture repeats or looks fake
| Symptom | Likely cause | Useful fix |
|---|---|---|
| Obvious rows of the same chips | Memorable landmarks repeat inside the tile | Replace large fragments and inspect a 6×6 field |
| Aggregate looks raised | Height or normal exaggerates every boundary | Flatten chips and reserve relief for pores and damage |
| Floor looks like plastic | Roughness is too uniform or finish is too smooth | Add causal micro and macro variation; broaden the highlight |
| Surface looks like gravel | Excess depth and dark AO surround fragments | Remove boundary halos and reduce height sharply |
| Chips change size between rooms | UV scale is arbitrary | Define metres per tile and standardize it in the master material |
| Distant floor flickers | Fine chips alias in mips or compression | Inspect the mip chain, reduce contrast, and use suitable filtering |
| Seams appear only in reflections | Roughness or normal borders do not match | Repair all maps together, not base color alone |
| Joints repeat implausibly | Installation detail is baked into the base tile | Move joints and strips to geometry, trims, or decals |
When asking why does terrazzo texture repeat, begin with an unlit base-color view from above, then restore roughness, normals, and lighting one layer at a time. A distinctive color cluster can reveal the tile in diffuse light; a repeated polished patch may appear only when the camera moves. Both are repetition, just with different witnesses.
Try CraftPBR
CraftPBR helps turn a physical specification or controlled reference into a coordinated terrazzo texture seamless across large surfaces:
- Text-to-PBR generates a complete material from a description of binder, aggregate, chip scale, density, color, and finish.
- Photo-to-PBR converts a controlled floor or sample image into aligned material maps.
- Node workspace keeps aggregate masks, scale bands, roughness, tile cleanup, and compatible variants editable.
- Engine export prepares normal orientation, roughness or smoothness, channel packing, filenames, and destination-specific files.
- Free tier lets you create and test a complete terrazzo PBR set before assigning it across a project.
- CC0 output lets you modify, render, and ship generated textures without attribution.
Make the aggregate worth noticing. Make its repetition impossible to remember.