
A specular map looks deceptively simple: an image that tells a shader how reflective each texel should be. That shorthand is also why old material libraries contain white plastic, gray copper, and floors that behave like polite mirrors. The map is not a photograph of a highlight. It is a field of surface reflectance values.
In a specular/glossiness workflow, an RGB specular map describes the color and strength of reflection when the surface faces the viewer. Roughness or glossiness describes how widely that reflected energy spreads. Those jobs must remain separate. A sharper highlight is not automatically a stronger boundary reflection, and a dim highlight may only be broad enough to hide in the lighting.
Most current game pipelines default to metalness/roughness because it is compact and harder to misuse. A PBR specular map still matters when importing legacy assets, matching scan or film pipelines, authoring explicit conductor reflectance, or targeting a shader that exposes specular color directly.
What a specular map stores
A specular map stores face-on reflectance, commonly called F0. Face-on means the view follows the surface normal. Fresnel behavior then raises reflection toward grazing angles; the texture does not need to paint bright rims around every object. The renderer computes that view dependence.
For ordinary dielectrics such as stone, plastic, ceramic, wood, paint, and water, F0 is low and usually close to neutral. A common IOR near 1.5 produces about four percent face-on reflectance. In an eight-bit preview this can look surprisingly dark. That is correct: the familiar bright highlight also depends on light intensity, exposure, roughness, Fresnel, and the environment.
Bare conductors behave differently. Their reflection can be strong and colored, while the diffuse contribution is effectively absent. Copper therefore uses warm colored reflectance; aluminum is bright and near neutral. Oxide, paint, dust, fingerprints, and grime above that metal are dielectric layers, not dimmer metal selected with a soft brush.
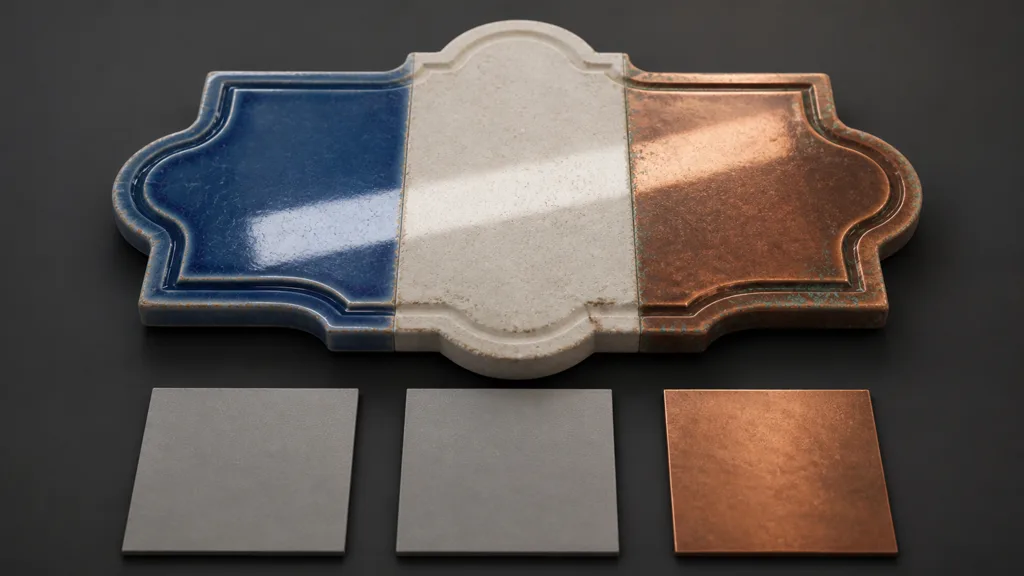
A good specular color map therefore describes material identity and boundaries. It should not contain the photographed softbox, cast shadow, ambient occlusion, or a highlight copied from base color. Those belong to the lighting result, not the asset.
Specular map vs roughness map: strength is not width
The most useful distinction is compact: a specular map vs roughness map comparison is reflection strength and color versus reflection spread. Roughness changes the microfacet distribution. Low roughness produces a tight, readable reflection; high roughness spreads the same energy across a broader area until it may look faint.
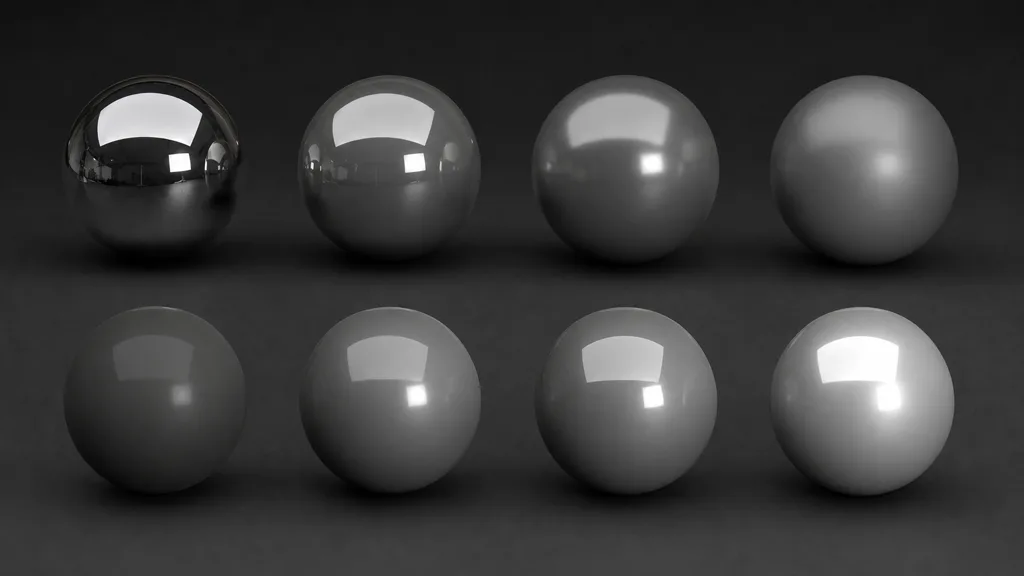
This is why lowering specular reflection map values to make chalk matte is usually the wrong fix. Chalk still has a surface boundary; its high roughness spreads the reflection. Likewise, raising reflectance does not polish wood. Polish is primarily a roughness or coat decision.
Glossiness stores the inverse convention: high gloss means low roughness. Some pipelines place glossiness in the alpha channel of the RGB specular map. Record that packing rule in the material name or export preset. An unlabeled alpha channel is a small archaeological site waiting for the next artist.
When a PBR specular map is worth the RGB cost
The metalness workflow derives dielectric reflectance from a standard value and conductor reflectance from base color wherever metalness is one. That fits most real-time assets and often reduces an RGB texture to a grayscale mask. Read the PBR workflow guide before converting a whole project.
Keep a full PBR specular map when the renderer expects it, when a source library is already calibrated for specular/glossiness, or when explicit colored F0 is important. It can also be useful for unusual dielectrics, gemstones, measured materials, and offline pipelines where direct reflectance control is part of the asset contract.
Do not choose it merely because “more control” sounds reassuring. RGB freedom makes physically impossible values easy. If every painted surface needs hand-tuned reflectance color, the pipeline may be spending three channels to reproduce a constant.
| Asset need | Better default | Reason |
|---|---|---|
| Standard game props | Metalness/roughness | Compact, portable, predictable dielectric F0 |
| Legacy spec/gloss library | Preserve or carefully convert | Avoid lossy bulk reinterpretation |
| Measured conductor color | Either calibrated workflow | Both can represent it when configured correctly |
| Mixed unusual dielectrics | Specular or IOR-aware shader | Direct face-on reflectance can be meaningful |
| Unknown engine target | Metalness/roughness | Broader real-time interchange support |
How to make a specular map without painting light
- Confirm the shader. Determine whether it expects RGB specular color, a scalar specular level, IOR, or metalness. Similar socket names can encode different ranges.
- Classify the surface. Separate dielectric, bare conductor, coating, corrosion, dirt, and transition regions from material evidence rather than brightness.
- Set dielectric F0. Use measured IOR or a trusted calibrated reference. Keep most common dielectrics low and close to neutral.
- Set conductor color. Use measured reflectance for exposed metal and remove diffuse contribution according to the shader model.
- Author roughness separately. Put polish, fingerprints, sanding, pores, and microscratches in roughness unless they truly change the substance at the boundary.
- Handle layers honestly. Painted metal is paint until the coating breaks. Rust is a dielectric corrosion product. Use masks with deliberate boundaries.
- Export to contract. Apply documented color space, packing, compression, and bit depth. Never infer channel meaning from appearance.
- Validate in motion. Rotate the environment or light while holding roughness and exposure fixed, then repeat while holding specular constant.
When converting metalness assets, do not paste base color into the specular map across the whole texture. Only bare metal contributes its colored base response to conductor reflectance. Dielectric regions need low neutral F0 and retain diffuse color. Boundary masks must agree or the asset grows colored plastic fringes.
Specular map setup in Unity, Unreal Engine, and Blender
For a specular map Unity material, URP Lit supports Metallic or Specular workflow modes, and the current Lit Shader Graph also exposes Specular mode. Connect RGB reflectance to the documented specular input and place smoothness where that shader expects it. Unity’s URP Lit Shader Graph reference defines the workflow switch. Test imported maps in a linear-light project under a reflection probe; a missing environment can make correct values look broken.
For a specular map Unreal Engine asset, do not plug a legacy RGB map blindly into Default Lit’s scalar Specular input. Epic’s PBR material documentation says the default 0.5 represents roughly four percent reflectance and suits most materials; surface variation normally belongs in Roughness. Convert legacy spec/gloss data to metal/rough, build a deliberate custom path, or use Substrate’s F0 model where its production tradeoffs fit.
For a specular map Blender workflow, Principled BSDF is the portable metallic default. Blender also documents a Specular BSDF for an explicit facing-reflectivity workflow in EEVEE, though its feature set and energy behavior differ. Start with the Specular BSDF manual, keep diffuse black for conductors, and validate the export target before building a library around a renderer-specific node.
Across engines, name both convention and packing: panel_specGloss communicates more than panel_spec. The sRGB vs linear textures guide covers why color and scalar channels need explicit import rules.
Validate specular maps with shapes, motion, and fixed exposure
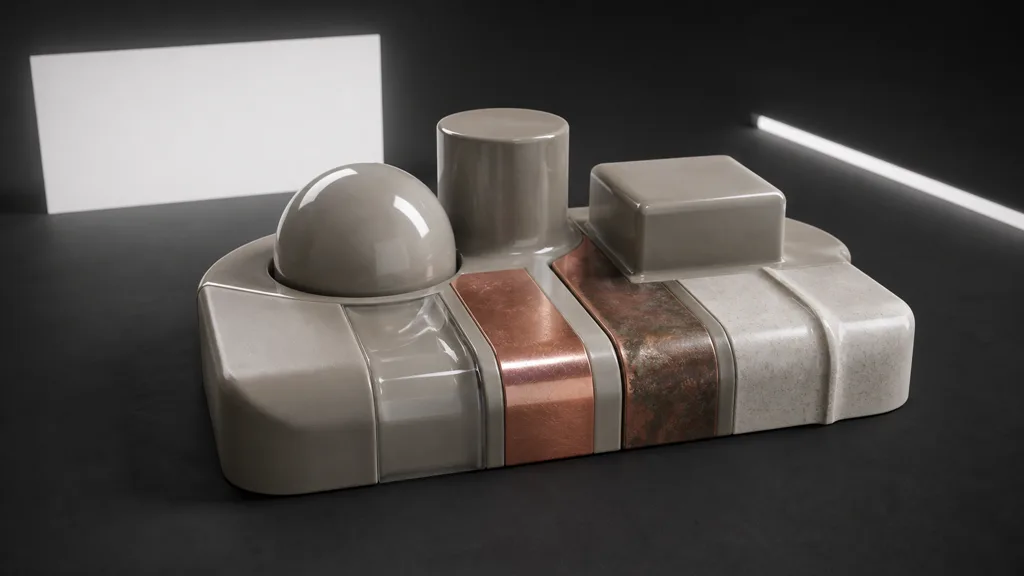
Test a specular map on a sphere, beveled box, cylinder, groove, and flat patch. Use a neutral environment plus one broad reflection card. Move the light and camera. A baked highlight remains stuck; a real reflection travels across normals and changes with view angle.
Lock exposure while comparing materials. Automatic exposure can make a weak reflection look strong by brightening the whole frame. Then lock roughness to compare F0, and lock F0 to compare roughness. Changing both sliders while diagnosing one symptom is less a test than a negotiation.
| Symptom | Likely cause | First check |
|---|---|---|
| Plastic looks metallic | Dielectric F0 too bright or saturated | View RGB specular values with roughness fixed |
| Metal looks gray | Conductor reflectance lost or diffuse left active | Inspect metal region and shader workflow |
| Matte surface has no boundary reflection | Specular reduced instead of roughness raised | Restore F0 and widen the lobe |
| Reflection color follows painted albedo | Base color copied into specular | Separate coating from bare metal |
| Asset flips gloss in another tool | Roughness/glossiness polarity mismatch | Test a black-to-white ramp |
| Map looks different after import | Color space, compression, or alpha packing changed | Compare sampled values numerically |
The best specular map workflow 2026 is not the one with the most sliders. It is the one whose reflectance meaning survives authoring tool, export preset, engine import, lighting, and another artist opening the file six months later.
FAQ
What is a specular map?
A specular map stores the color and strength of face-on surface reflection. In a specular/glossiness PBR workflow it is usually RGB: dielectrics are low and nearly neutral, while bare metals can use bright colored reflectance.
What color should a specular map be?
Most nonmetals should be dark and close to neutral because their face-on reflectance is low. Bare metals use brighter material-specific colors; coatings, rust, dirt, and oxide above metal return to dielectric values.
What is the difference between a specular map and a roughness map?
A specular map controls reflection strength and color. A roughness map controls how sharp or broad that reflection appears, so lowering roughness is not equivalent to increasing reflectance.
Does Unreal Engine use a specular map?
Default Lit exposes scalar Specular, but Epic advises keeping its default for most materials and putting surface variation in Roughness. It is not a direct legacy RGB specular map slot; convert the data or build an explicit F0 path.
How do I use a specular map in Unity?
Choose Specular workflow in a compatible URP Lit material or Shader Graph, connect RGB reflectance to Specular, and provide smoothness in the expected channel. Confirm packing for the exact shader and render-pipeline version.
Should a specular map be sRGB or linear?
Treat RGB specular color according to the target shader’s documented color convention, while glossiness or roughness channels remain numeric data. Follow the importer and shader contract, then verify sampled values with a known test texture.
Why does my specular map make everything look metallic?
Dielectric regions are likely too bright or saturated, or the shader expects metalness instead. Check workflow mode first, hold roughness constant, and inspect the specular map color values under neutral light.
Try CraftPBR
CraftPBR produces coherent source maps before a target shader converts them into metalness or specular map conventions:
- Text-to-PBR generates a coordinated material set from substance, finish, scale, wear, and surface detail.
- Photo-to-PBR separates captured color from lighting and derives aligned normal, roughness, height, AO, and metalness maps.
- Node workspace keeps levels, tiling, roughness, masks, and material boundaries editable.
- Engine export prepares normal orientation, scalar color space, channel packing, filenames, and target conventions.
- Free tier lets you generate and validate a complete material before committing a library.
- CC0 output lets you modify, convert, render, and ship generated textures without attribution.
Choose the workflow once, document it, and let reflections move with the lights. Painted highlights have already had their turn.