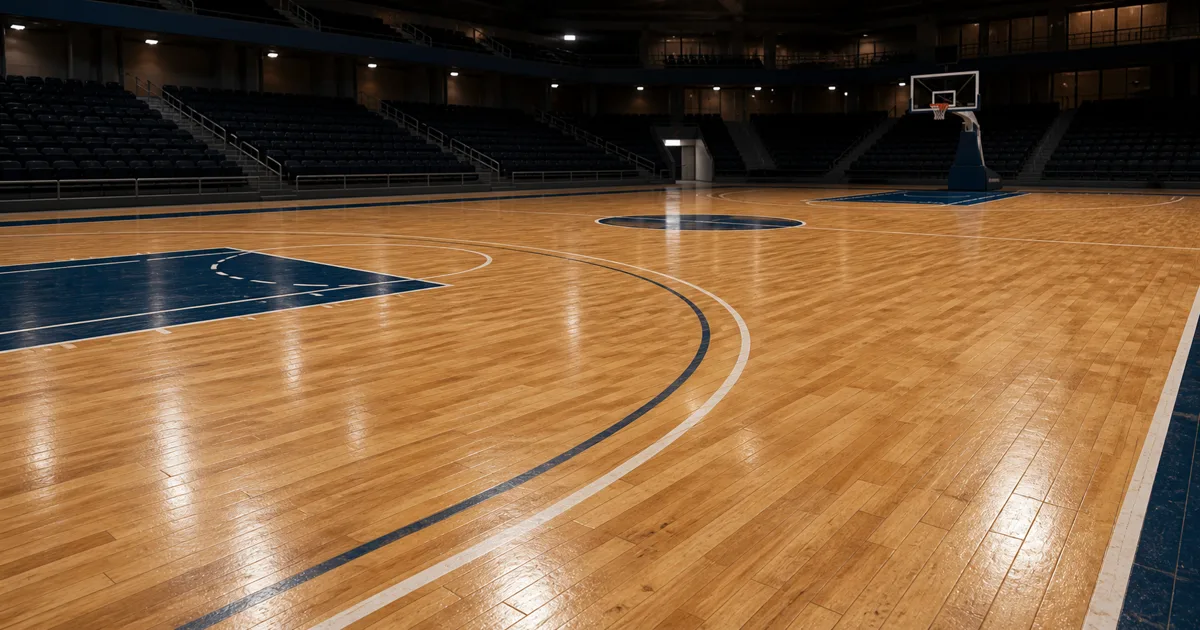
A basketball court texture has to sell three materials at once: maple boards, painted graphics, and the clear finish covering both. Flatten those into one photograph and the court may look acceptable from the rafters, yet fall apart the moment the camera drops to player height. The boards repeat, the lines wobble, and every scuff appears at regular intervals like a very organized maintenance complaint.
The useful approach is to treat a basketball floor texture as a layered surface system. Build a repeatable wood base, place court geometry independently, then add finish response and localized wear. That structure keeps the material editable, lets you swap league layouts without repainting the wood, and produces PBR maps that agree under moving arena lights.
A basketball court texture is three surfaces, not one image
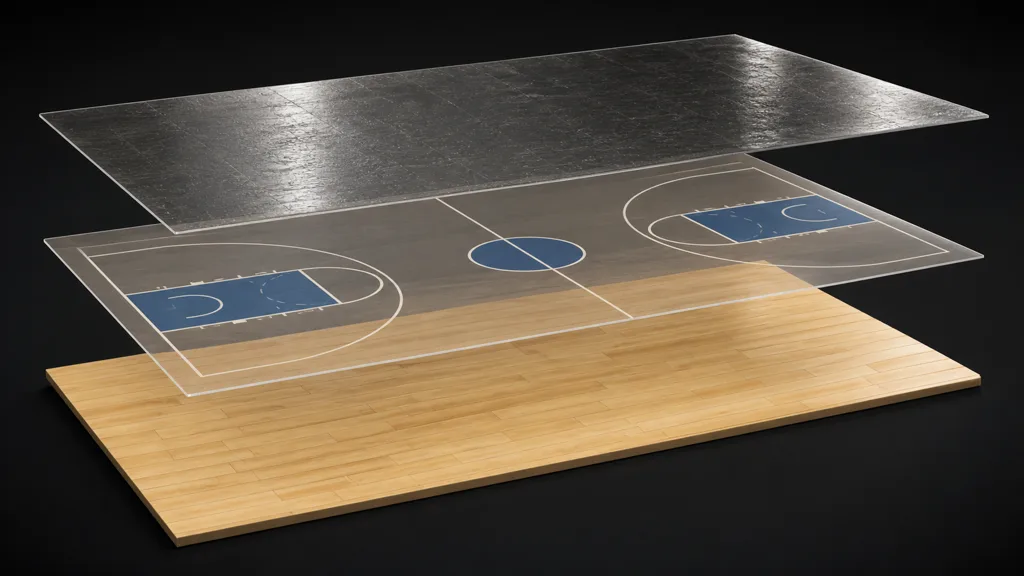
The basketball court PBR material becomes easier to reason about when split into three responsibilities:
- Maple base: board color, grain, end joints, tiny height variation, and restrained board-to-board roughness.
- Paint layer: sidelines, key, arcs, center circle, boundary colors, and any custom graphics. These are unique geometry or masks, not part of the repeating wood tile.
- Finish and wear: clear finish, fine scratches, rubber scuffs, traffic dulling, and recent refinishing. This layer controls most of the moving highlight.
This basketball court texture architecture also keeps art direction changes local: changing the line color does not disturb the wood, and adding wear does not require a new court-layout image.
The important word is independent. A repeating seamless basketball court texture should not contain a full three-point arc. A court marking is several metres wide and exists once in a known place; the wood pattern needs to repeat across the entire floor. Asking one UV tile to do both jobs guarantees either visible repetition or needlessly huge textures.
Use a trim, spline, vector mask, decal, or second UV set for line geometry. Keep the wood base tileable. Put broad, unique wear in a vertex mask, macro mask, or world-space layer. The material now scales to a school gym, professional arena, half court, or fictional layout without rebuilding every pixel.
Build the maple basketball court texture at real scale
Most indoor courts use narrow hardwood strips with staggered end joints. The exact species and board dimensions vary, so measure the reference you are matching rather than treating wood floor as a unit. For a plausible maple basketball court texture, establish three scales before adding detail:
- Board width and length range.
- Court dimensions and line width for the ruleset.
- Texel density at the closest approved camera.
Create several board color families instead of randomizing every plank independently. Real installed flooring is selected, sanded, and finished as one surface; it has variation, but not the visual range of a salvage yard. Keep grain direction aligned along each strip, vary end-joint positions, and avoid placing a dark knot in every tile. One memorable knot can turn a seamless material into a floor with a built-in tracking marker.
A basketball court texture is especially sensitive to scale because uninterrupted floor area gives the eye a long ruler. Validate the board width before polishing microdetail.
Base color should describe wood pigment without baked reflections. Normal or height should carry shallow seams and grain, not deep trenches between boards. A court floor is sanded level; if the normal map makes every plank edge catch like beveled decking, the players appear to be competing on a washboard.
The seamless wood texture guide covers edge healing and repetition control. For a court, keep the tile plain enough to repeat, then use a low-frequency variation mask across the whole floor to break uniformity without moving the actual board pattern.
Keep basketball court markings out of the repeating wood
A basketball court markings texture needs accurate geometry more than painterly charm. Start from the dimensions for the league or venue, construct the lines as vectors or curves, and rasterize only at the delivery stage. This keeps arcs circular, widths consistent, and intersections clean.
Place lines with a dedicated UV set on a court-sized mesh, project them as decals, or generate masks from procedural shapes. Each method separates layout from the repeating basketball court wood floor texture. It also allows alternate configurations—basketball, volleyball, futsal, practice lanes—to share one maple material.
This basketball court texture split also makes line resolution independent from wood resolution, which is useful when distant boards can use modest mips but broadcast-close arcs must remain clean.
Paint is not a glowing sticker floating above the finish. On a maintained court, colored areas and line paint sit beneath the clear topcoat. Their base color changes sharply, but the clear reflection can continue across the boundary. Add only a very small height or normal transition at a painted edge if the reference supports it. A thick ridge reads like tape.
Large logos deserve their own asset and licensing review. For generic or commercial scenes, unbranded geometry is safer and more reusable. The center circle does not become lonely when it lacks a fictional eagle rendered in suspiciously familiar typography.
Make the basketball court roughness map carry the finish
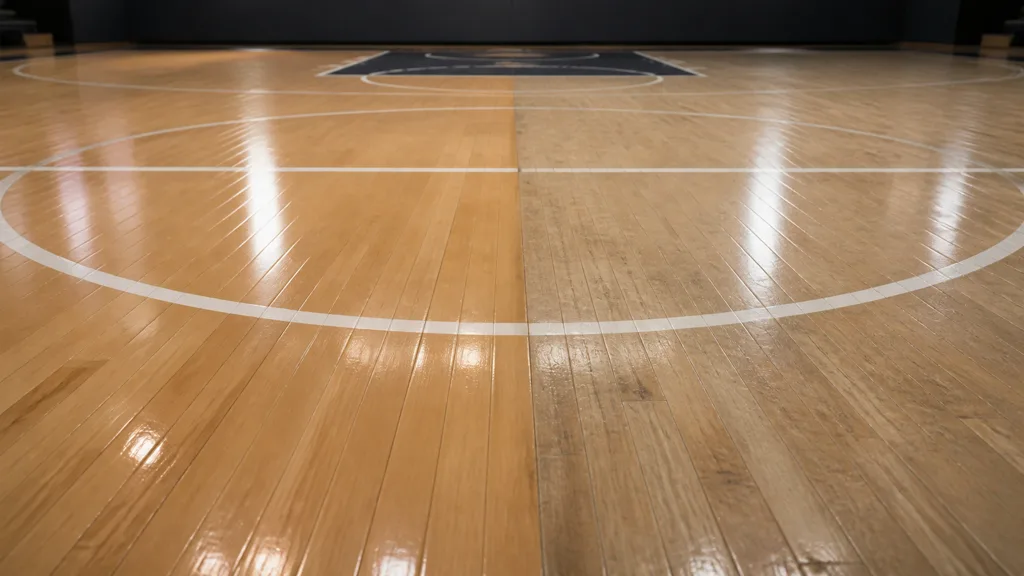
The basketball court roughness map is where the surface becomes a court rather than a wood sample. A modern sports floor is usually finished, reflective, and smooth, but not a perfect mirror. Keep the base response in a plausible satin-to-gloss range, then layer subtle changes:
- lower roughness on newly refinished or heavily polished regions;
- slightly higher roughness where traffic and cleaning have dulled the coating;
- fine directional scratches visible mainly in grazing reflections;
- scattered rubber scuffs with their own color and roughness response;
- mild dust or residue near edges, bleachers, and low-traffic zones.
Avoid converting the albedo to grayscale and calling it roughness. Dark grain is not automatically smoother, and a white line is not automatically more matte. The roughness map guide explains why this channel is material behavior rather than brightness homework.
Keep metalness at zero for wood, paint, rubber marks, and clear finish. Use AO sparingly; an open floor does not contain much broad self-occlusion. Board seams can contribute a faint contact cue, but a dark outline around every plank turns clean maple into illustrated parquet.
Add wear where basketball actually happens
Uniform grunge is efficient and wrong. Players pivot, stop, and change direction in specific zones. Maintenance crews refinish broad areas. Portable equipment creates localized marks. Seating edges collect dust while active lanes remain polished.
For believable wear, author masks by cause:
- Pivot and lane wear: soft accumulations around keys, free-throw areas, and common approach paths.
- Rubber scuffs: short arcs and streaks with varied direction, density, and age.
- Fine scratches: dense microdetail that affects roughness more than base color.
- Cleaning variation: broad passes or overlapping zones, kept extremely subtle.
- Edge grime: restrained dust near walls or bleachers, not a dark procedural border around the entire mesh.
Unique wear should not live inside the seamless tile. Use decals or macro masks so one shoe mark does not reappear every metre. Keep each family adjustable: a televised arena may be pristine, a community gym more worn, and an abandoned court substantially dirtier. Those are material states, not reasons to maintain three unrelated shaders.
A basketball court texture with cause-based wear reads as used even when the marks remain subtle. Random dirt merely reads as a material generator reaching its quota.
How to make a basketball court texture step by step
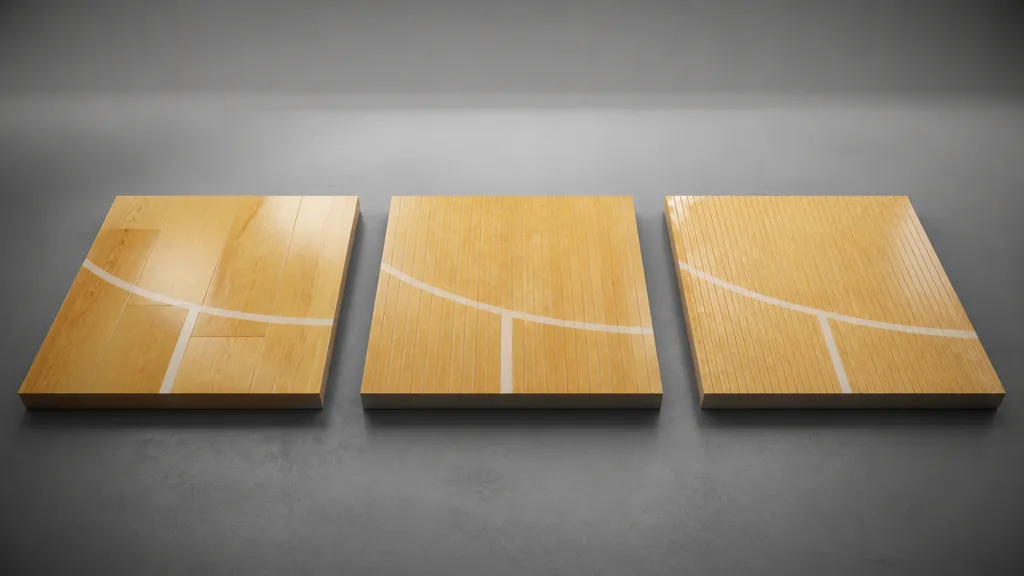
Use this production sequence for how to make a basketball court texture without tangling the repeatable and unique parts:
- Choose a ruleset and measure it. Record court size, line widths, arcs, key dimensions, and board scale from a reliable plan or venue reference.
- Build the tileable maple. Create varied boards, staggered joints, aligned grain, and a subtle normal and roughness response.
- Validate physical scale. Apply the material to a correctly sized floor and inspect it from player, broadcast, and overview cameras.
- Construct markings separately. Use vector shapes, curves, decals, or a dedicated court UV rather than baking them into the wood tile.
- Add the finish layer. Establish a coherent clearcoat or low roughness response across both wood and paint.
- Place wear by cause. Add traffic dulling, scratches, rubber marks, and edge residue with non-repeating masks.
- Export coherent maps. Keep base color in sRGB; normal, roughness, AO, and masks as linear data. Pack only for the target engine.
- Test under motion. Move a low camera across long highlights and check line aliasing, board repetition, mip behavior, and texture memory.
If you are asking why does my basketball court texture look fake, the fastest diagnosis is usually scale, reflection, or repetition. Oversized planks make the arena look miniature. Uniform mirror gloss makes the floor look wet. Unique marks inside the tile expose the repeat. Fix those three before adding another scratch generator.
Set up a basketball court texture in Unity, Unreal, and Blender
For a basketball court texture Unity setup, tile the maple on the floor mesh and place the court layout with decals, a second UV mask, or separate thin geometry. Use a Lit shader appropriate to the render pipeline, import base color as sRGB, import normal as a Normal Map, and keep roughness-like data linear. Unity commonly expects smoothness rather than roughness, so invert or pack during export rather than damaging the master map.
For a basketball court texture Unreal Engine material, use TextureCoordinate scaling for the wood, a court-sized mask or decals for lines, and separate scalar controls for finish and wear. Pack roughness, metalness, and AO only when the channel plan is documented. A low-angle camera plus moving rectangular lights will reveal incorrect normals and roughness faster than the default material sphere.
For a basketball court texture Blender workflow, connect base color to Principled BSDF Base Color, normal through a Normal Map node, and roughness as Non-Color data. Use separate mapping for the repeating boards and unique court mask. If the finish needs a distinct coated response, Principled BSDF’s coat controls can represent it more cleanly than simply pushing the whole floor toward zero roughness.
Across all three, use mipmaps and anisotropic filtering because long floor views are a worst-case angle for texture sampling. The texture filtering guide covers the moving-camera failure. For the best basketball court texture 2026 workflow, validate at final output resolution with the lighting and camera height the audience will actually see.
The final basketball court texture should survive a low tracking shot, a wide broadcast view, and a hard cut between them without changing apparent scale or finish.
FAQ
How do I make a basketball court texture look realistic?
Separate the repeating maple, unique court markings, and finish or wear into independent layers. Match real board and line scale, keep reflections satin rather than mirror-wet, and validate the floor from a moving player-height camera.
Should basketball court lines be decals or part of the texture?
Use decals, vector-derived masks, separate geometry, or a dedicated court UV for the lines. Baking full court geometry into the repeating wood tile creates impossible repetition and makes layout changes expensive.
What PBR maps does a basketball court need?
Use base color, normal, and roughness as the core set, with optional AO and height kept subtle. Metalness should remain zero because maple, paint, rubber scuffs, and clear floor finish are dielectric materials.
Why does my basketball court floor look wet?
The roughness is probably too low and too uniform, or the normal map is failing to break up long reflections. Raise roughness into a plausible finished-wood range and add restrained finish variation rather than darkening the base color alone.
How do I stop a basketball floor texture from repeating?
Use multiple board variations and staggered joints in the tile, then add broad non-repeating color and roughness masks across the full court. Keep memorable knots, scuffs, logos, and stains out of the tile and place them separately.
What resolution should a basketball court texture be?
Choose resolution from texel density and the closest camera, not the court’s real-world size alone. A tileable wood material can remain modest while the unique line mask uses the resolution needed to keep arcs and edges clean at the final output.
Should a basketball court roughness map use sRGB?
No. Roughness is numeric material data and should be imported as linear or Non-Color. Applying an sRGB curve changes the reflection response and can make the finished floor unexpectedly glossy or dull.
Try CraftPBR
CraftPBR gives a basketball court texture a coherent material source before you add unique court geometry:
- Text-to-PBR generates aligned maple, finish, paint, or rubber surface maps from a physical description.
- Photo-to-PBR converts a controlled floor photograph into coordinated base color, normal, roughness, height, AO, and metalness.
- Node workspace keeps tiling, board variation, levels, masks, finish, and wear editable.
- Engine export prepares color/data handling, normal orientation, channel packing, and map names for common targets.
- Free tier lets you build and camera-test the full material before committing to final resolution.
- CC0 output lets you modify, render, and ship generated materials without attribution.
Create a court-ready PBR material →
Make the wood repeat quietly. Give the game the memorable moves.