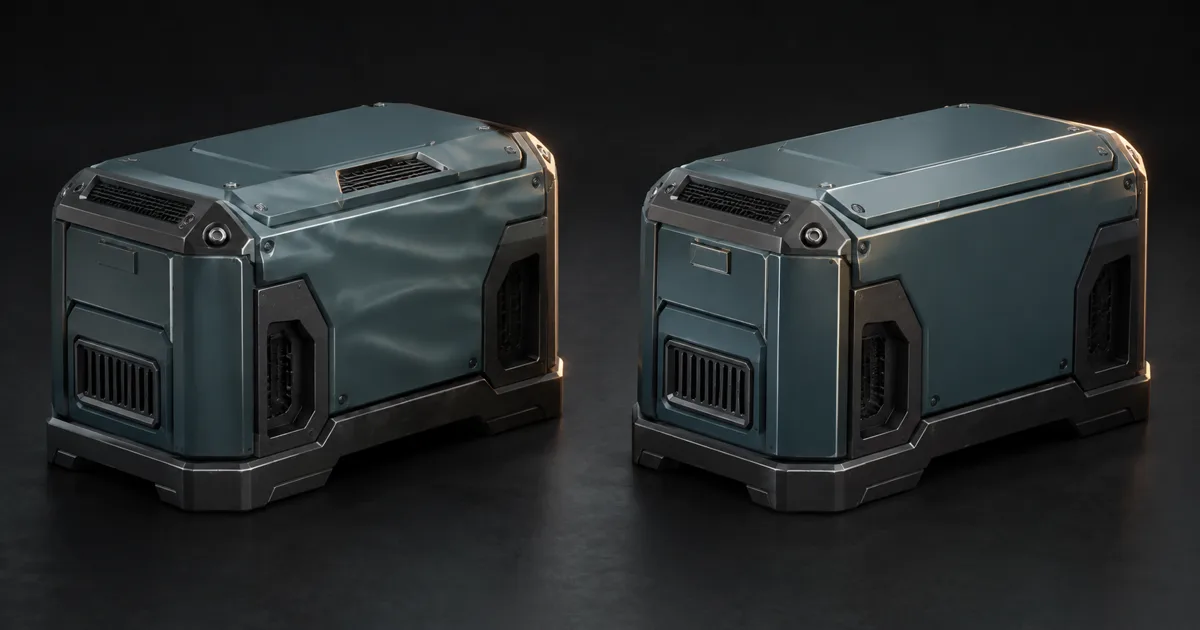
Weighted normals fix a strangely expensive-looking defect with almost no glamour: a large flat panel reflects light as if someone pressed a thumb into it. Geometry says the surface is planar. The shading normal has been pulled toward every narrow bevel and tiny neighboring face, so the reflection disagrees.
The usual response is more support loops. That can work, but it adds geometry, complicates edits, and may still leave uneven highlights where topology density changes. Face weighted normals attack the cause instead. They let important broad faces contribute more strongly to the averaged normal than the little faces around them.
This is not a detail button or a substitute for modeling. It is a controlled way to decide which surfaces own the lighting at shared corners.
Weighted normals change light, not silhouette
A rendered triangle has a geometric face normal. Smooth shading interpolates vertex normals across that triangle, producing a continuous lighting field even though the geometry remains faceted. At a shared vertex, a basic average can give every adjacent face equal influence. One huge panel and three tiny bevel faces then receive equal votes. Democratic, yes. Geometrically sensible, no.
Weighted vertex normals assign unequal votes. Area weighted normals give a larger face more influence. Angle weighted normals weight each face by the corner angle it occupies at that vertex. A combined method multiplies both signals, which often suits hard-surface props where broad panels should look flat and bevels should carry a controlled rolloff.
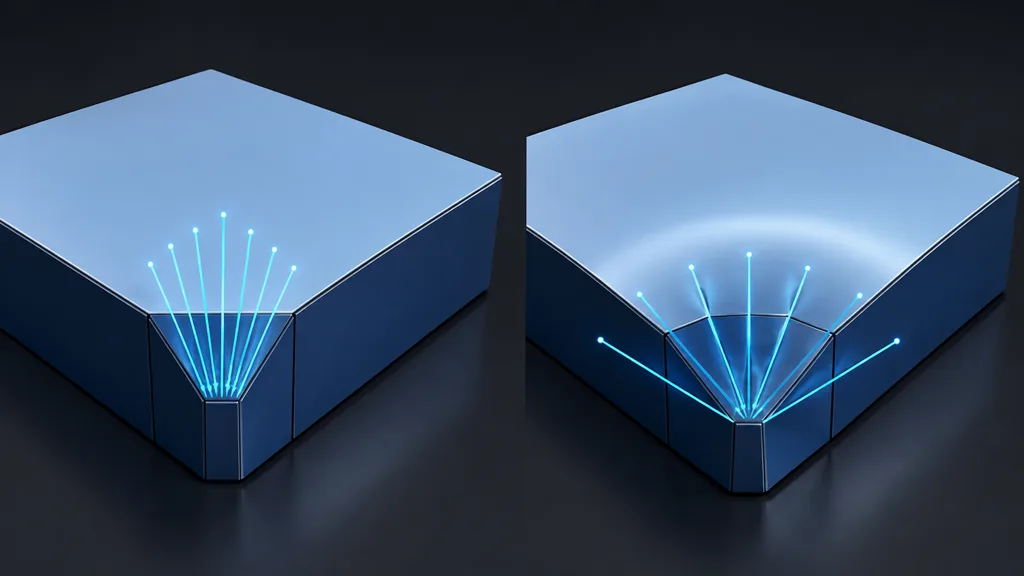
The result lives in vertex data, often as custom split normals per face corner. “Split” matters: one topological vertex can carry different normal values on different faces when a hard edge or smoothing boundary divides them. The renderer may therefore store more render vertices than the modeling tool's vertex counter suggests.
Weighted normals vs smooth shading is an ownership question
For weighted normals vs smooth shading, smooth shading describes interpolation across a region; weighting describes how corner normals inside that region are calculated. They are not mutually exclusive. Weighted normals normally operate within smooth regions while respecting chosen hard boundaries.
Use a hard edge when two surfaces should not share a lighting direction. Use smoothing across a bevel when the highlight should flow over it. Use weighting when a broad face should remain visually dominant inside that smooth neighborhood. If every edge is hard, weighting has nowhere useful to interpolate. If every edge is smooth, a 90-degree corner can smear lighting across a boundary that should read as sharp.
Topology still owns silhouette, shadow shape, deformation, and ray intersections. A normal can make a plane appear calmer, but it cannot round an outline or stop a paper-thin edge from vanishing. When the profile matters, model it. Shading data is persuasive, not licensed to alter the witness statement.
Weighted normals and bevel modifier belong together
The productive weighted normals and bevel modifier pairing has a clear division of labor. The bevel creates a real strip of geometry for the edge highlight. The weighted-normal pass keeps the adjacent large faces flat and pushes most of the interpolation into that strip.
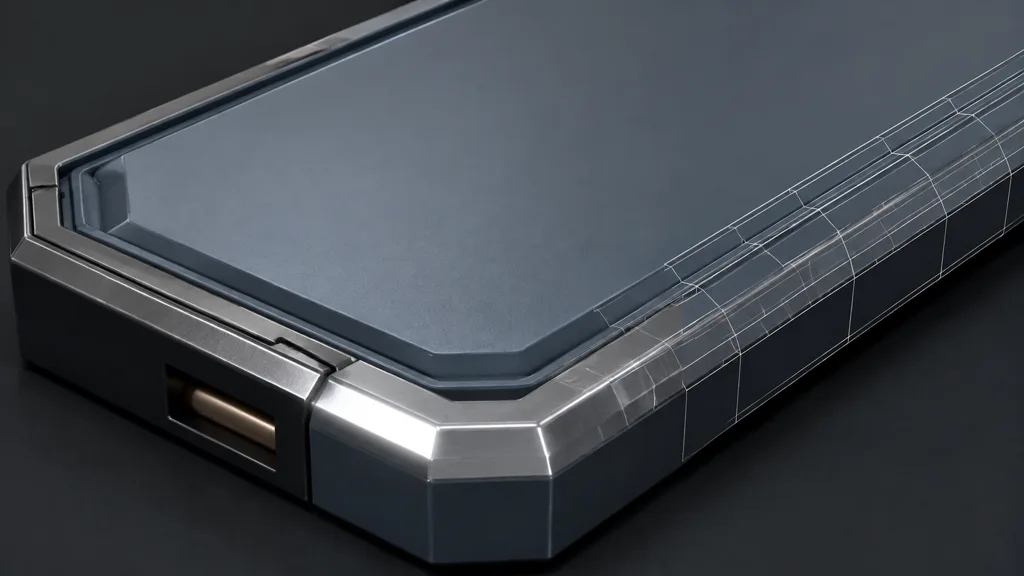
Set bevel width from object scale and camera distance, not from habit. A bevel below a pixel cannot carry a stable highlight. A huge bevel changes the design. Two or three segments can be enough for a small prop, while a hero asset may need more. Then calculate weighted normals after the bevel exists so the new faces participate in the intended average.
Modifier order is part of the asset contract. Mirroring, beveling, triangulating, and editing normals in different orders can change corner membership and the result. In Blender, the current normal-editing documentation describes area and corner-angle weighting plus face strength. Keep Sharp preserves selected boundaries; Face Influence lets faces marked strong dominate weaker neighbors.
Do not use weighting to hide broken topology. Non-manifold edges, overlapping faces, accidental doubles, inverted winding, zero-area triangles, and long thin triangles can all produce nonsense with excellent confidence. Clean those first.
Normals, hard edges, UV seams, and bakes share one contract
A tangent-space normal map stores a correction relative to the low-poly mesh's tangent frame. Change the low-poly normals after baking and the correction is now applied to a different basis. That can create gradients, dark seams, or highlights that twist around corners even when the texture itself looks ordinary.
Choose final triangulation, smoothing boundaries, UV splits, and weighted normals before the bake. Send that exact low-poly mesh to the baker. Export the same data to the engine. If the destination recomputes normals or tangents with different rules, the contract breaks.
Hard edges often belong at UV seams because both split vertex attributes. The rule is not “every UV seam must be hard”; the point is to budget splits deliberately and pad the bake correctly. Read the UV padding guide for mip-safe island borders and the MikkTSpace guide for tangent-basis matching.
Weighted normals can reduce broad baked gradients on hard-surface faces, but they do not remove the need for a normal map. The map still carries high-poly bevel profiles, dents, panels, welds, and authored micro detail. Mesh normals establish the low-frequency lighting foundation; the texture adds local change.
Build a weighted normal workflow in eight checks
Use this weighted normal workflow for how do weighted normals work in production, not only in a clean viewport:
- Finish the silhouette. Lock large forms and any edge that must change the outline.
- Mark real boundaries. Set hard edges or smoothing groups where surface direction should break.
- Add a measured bevel. Give important edges enough width and segments to catch light at final scale.
- Calculate the normals. Test area, angle, or combined weighting; keep only the method that improves controlled reflections.
- Inspect one hard light. Rotate it around the object and look for bowed planes, pinching, or broken bevel flow.
- Bake against final data. Freeze triangulation, normal splits, and UVs before generating tangent-space maps.
- Export, do not improvise. Include custom normals and configure the engine to preserve them.
- Check every LOD. Recalculate or transfer normals intentionally per LOD, then compare transitions in motion.
The best weighted normal workflow 2026 is reproducible. Store tool version, modifier order, weighting mode, hard-edge policy, exporter preset, and engine import settings. “Looks right on my machine” is not a format.
Weighted normals in Blender, Unity, and Unreal Engine
For weighted normals Blender, use the Weighted Normal modifier or the mesh normal tools after topology-changing modifiers. Face Area, Corner Angle, and combined weighting produce different results; Keep Sharp and Face Influence provide local control. Inspect the normal overlay and apply transforms before judging area-based results, because object scale and modifier order can make an apparently simple test less simple.
For weighted normals Unity, decide whether the source DCC or Unity owns calculation. Unity's current Model Importer documentation exposes Unweighted, Area Weighted, Angle Weighted, and Area and Angle Weighted modes when normals are calculated. If a baked asset relies on DCC-authored custom normals, import those normals rather than asking Unity to produce a new answer. Tangents remain a separate choice.
For weighted normals Unreal Engine, the Interchange build setting can compute normals using both triangle surface area and corner angle. Epic's Interchange mesh properties document that behavior. Import authored normals when they were part of the bake, or let Unreal recompute them before baking against Unreal's result; do not mix ownership halfway through.
glTF stores normalized `NORMAL` vertex attributes and a tangent handedness sign when tangents are present. The glTF 2.0 specification defines those attributes, but it does not preserve a Blender modifier or your intent. Apply or export the evaluated normals, then inspect the destination mesh.
Know when weighted normals make the asset worse
Do not default every model to weighted normals. Smooth organic surfaces normally want a continuous normal field driven by shape, not large polygon dominance. Deforming characters can expose odd weighting as joints bend. Very dense curved meshes already approximate the surface well. Stylized faceting may need equal or flat normals by design.
Warning signs include gradients that jump at triangulation diagonals, pinching near poles, bevels that lose their highlight, and broad faces that look flat while nearby curves become lumpy. Extreme weighting can force normals so close to a large face that small adjacent surfaces shade poorly. Face Influence can solve a local priority problem, but too many hand-marked exceptions turn calculation into archaeology.
Also inspect mirrored meshes. Negative scale, unapplied transforms, winding changes, and tangent handedness can produce one clean side and one cursed twin. Apply or bake transforms according to the exporter's rules, then compare both halves under a moving light.
Validate weighted normals at distance and across LODs
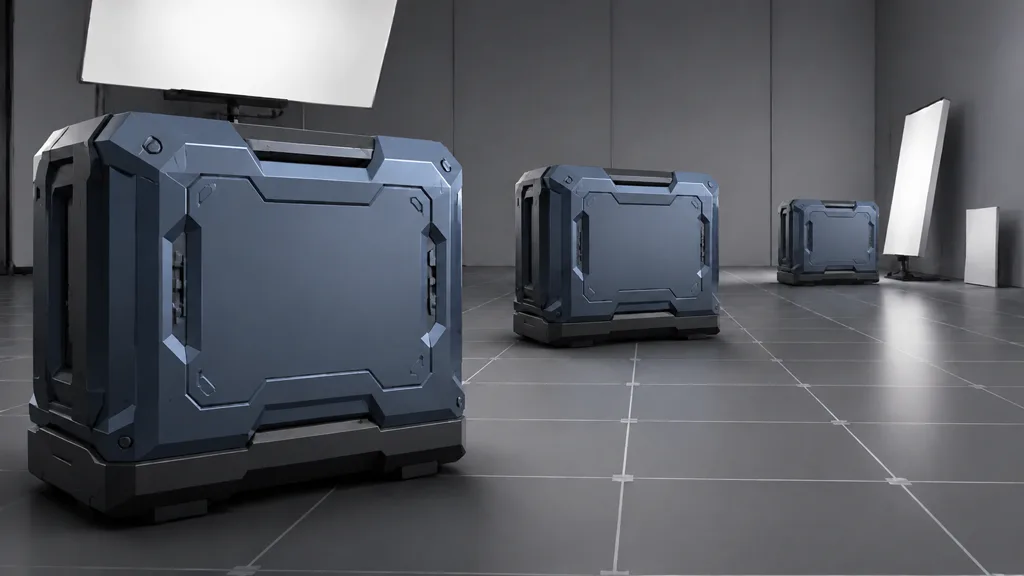
Test one neutral environment, one long reflection card, and one small hard light at fixed exposure. Rotate the light and camera. A flat face should keep a stable broad reflection; the bevel should carry a continuous moving band; hard boundaries should not leak light across the corner.
Then check the render mesh statistics. Hard edges, UV seams, material boundaries, and differing corner attributes can split vertices. Removing support loops may lower geometric complexity, but a careless split policy can return some of that cost. The win is cleaner control, not a guaranteed percentage.
Build every LOD as its own shading asset. Simplification changes face areas and corner angles, so blindly recalculating can make highlights pop even when the silhouette transition is quiet. Transfer normals, recalculate with a consistent method, or author the LOD separately—then record which approach passed. The PBR material validation guide provides a neutral-light test pattern for final review.
Try CraftPBR
CraftPBR supplies coherent surface data after weighted normals have established a clean low-frequency lighting base:
- Text-to-PBR generates aligned base color, normal, roughness, height, AO, and metalness from a material brief.
- Photo-to-PBR turns controlled surface photos into a coordinated map set.
- Node workspace lets you tune map relationships while keeping the material readable.
- Engine export prepares normal orientation, channel packing, color-space intent, and useful filenames.
- Free tier lets you test one complete hard-surface material before committing a pipeline.
- CC0 output lets you edit, bake, render, and ship generated textures without attribution.
Let geometry define the form. Let normals explain it cleanly.
Generate a coherent PBR texture set →