Normal Map vs Bump Map — What's the Difference?

7 min read · Last updated May 2026

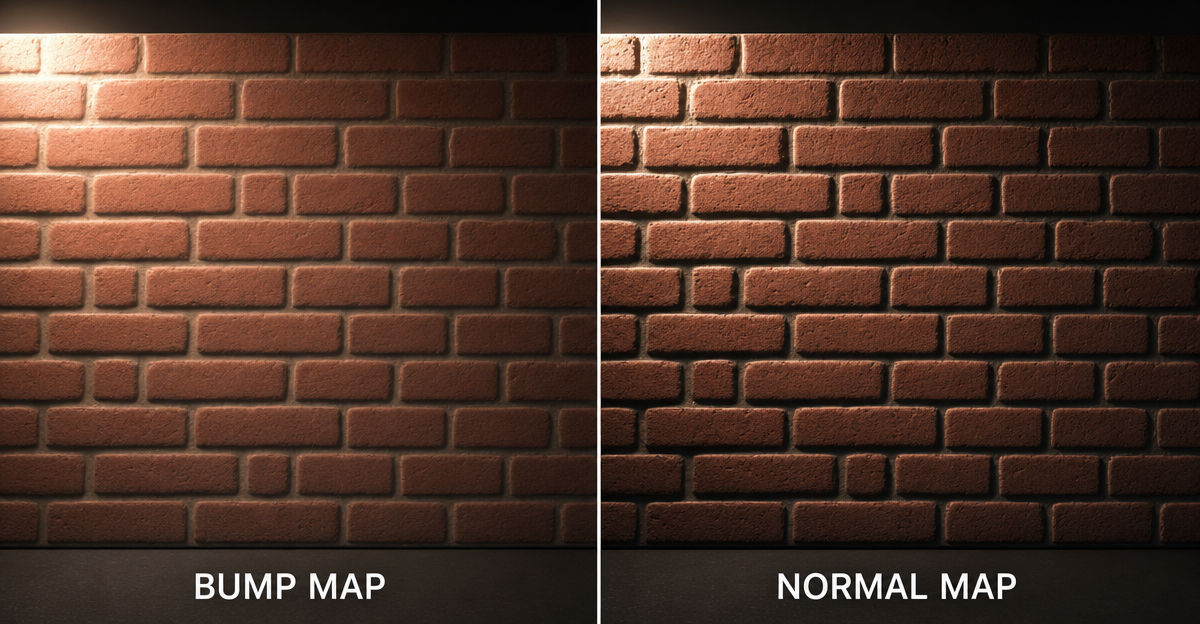
Split-screen 3D render — same brick wall lit with a grayscale bump map on the left and an RGB tangent-space normal map on the right
Same wall, same light, two maps. Bump on the left (a guess from brightness). Normal on the right (a direction at every pixel).

Bump maps and normal maps do the same job — fake fine surface detail without geometry — and they look almost identical when you’re facing the surface head-on. Turn the camera 60 degrees and the difference becomes obvious: the bump map flattens out and the normal map keeps its detail. That’s the whole story in one sentence. The rest is the why.

The one-line difference

  • Bump map — a greyscale image. Each pixel stores one number: height. The renderer infers light response from luminance differences between pixels.
  • Normal map — an RGB image. Each pixel stores three numbers: an (X, Y, Z) surface direction. The renderer computes light response directly from the vector.

Three times the data per pixel, and that’s exactly where the quality comes from.
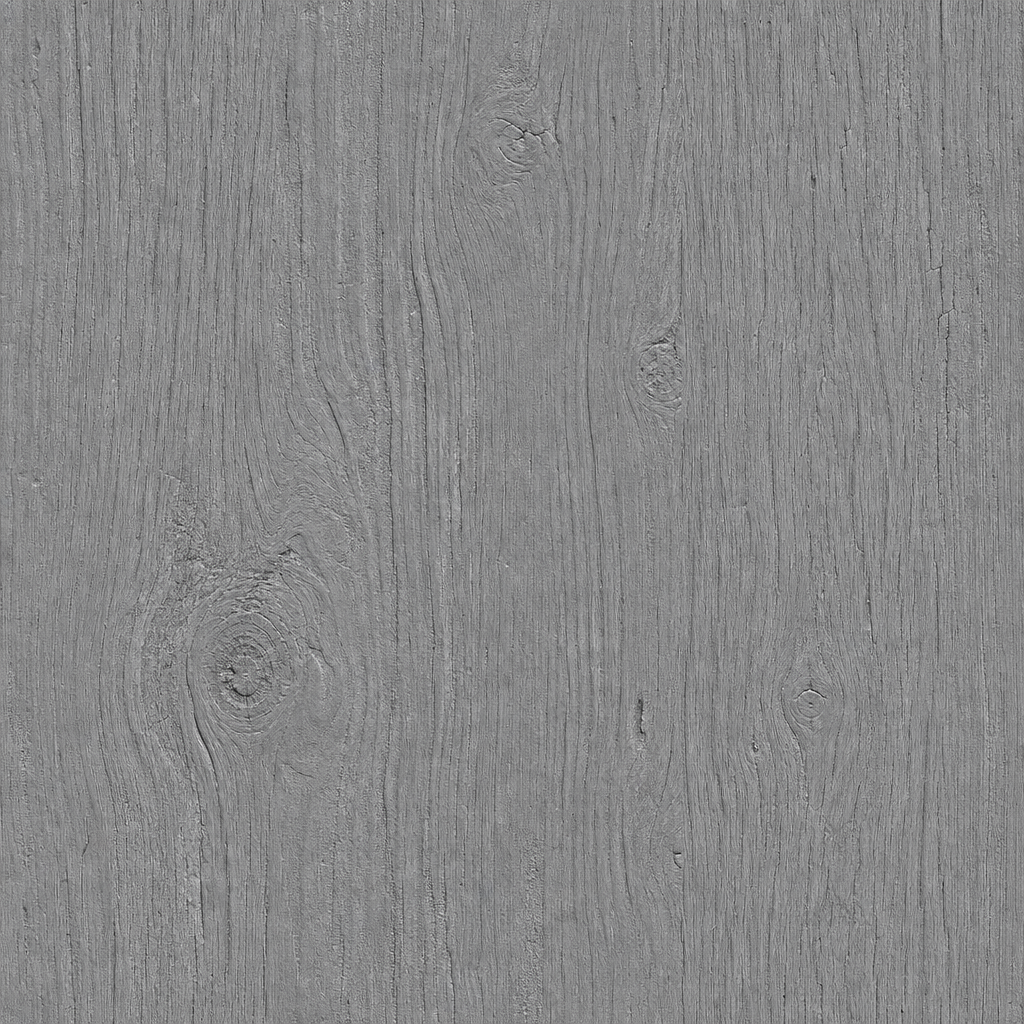
Grayscale bump map texture for a weathered wood plank — light wood grain on a mid-grey base, no colour information
A bump map. Greyscale. Lighter = raised, darker = recessed. One number per pixel.
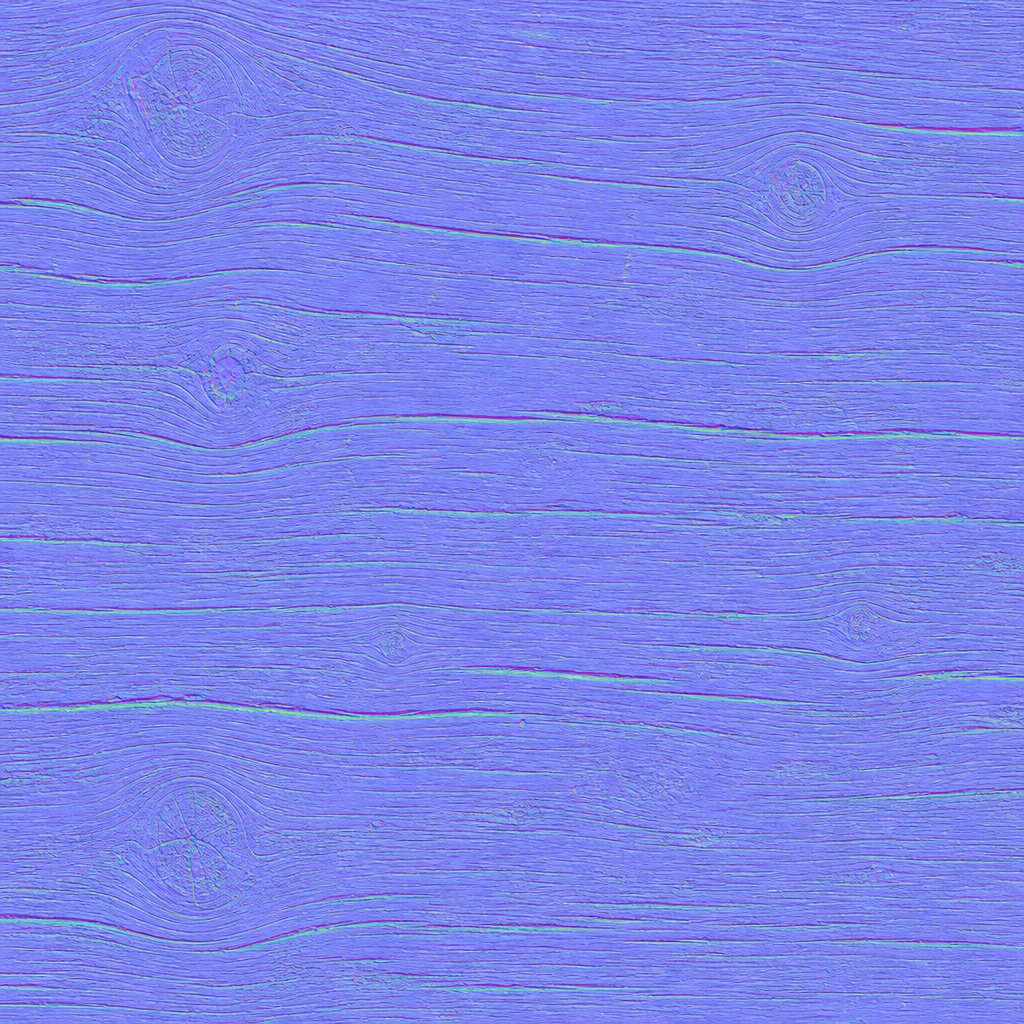
Tangent-space normal map texture for the same wood plank — predominantly light purple with subtle red and green shifts along the grain
A tangent-space normal map of the same plank. The purple wash is "point straight out". The colour shifts are the grain.

Why bump maps break at glancing angles

A bump map only knows how high each pixel is, not which way it’s facing. The shader infers a direction from the height difference between neighbouring pixels (basically a gradient). That works when you’re looking straight down at the surface — the inferred direction is close enough.

Tilt the camera and the inference falls apart. The shader is reading a tiny vertical slice of the height map and trying to guess a 3D direction from it. The surface looks like it’s been ironed flat. Normal maps carry the direction information directly, so glancing angles look correct.
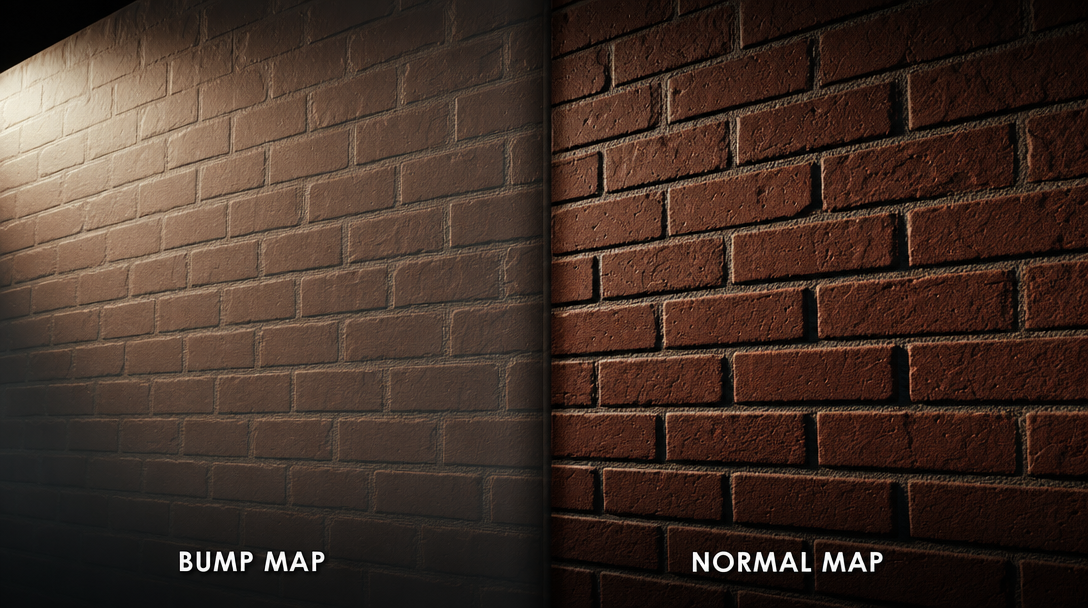
3D render comparison of the same brick wall lit identically with a bump map versus a normal map — the bump version looks soft and painted on, the normal version has crisp shadows in the brick grooves
Same wall, same light. Bump version (left) goes soft on the brick edges. Normal version (right) keeps the shadow lines crisp.

Memory and performance

A normal map costs about three times more storage uncompressed because it’s RGB instead of greyscale. After GPU compression the gap closes: BC5 compresses normals at about 1 byte per pixel; BC4 compresses bumps at about 0.5 bytes per pixel. So a 2048×2048 normal map weighs ~4 MB on the GPU, a bump map ~2 MB. On modern hardware this is rounding error.

When to use each

Use a normal map when:

  • You’re shipping a PBR material to Unity, Unreal, Blender, Godot, or Three.js
  • The camera will see the surface from varied angles
  • You have the budget to bake or craft one (which, with AI, is “always”)

Use a bump map when:

  • You’re prototyping and just need a stand-in
  • You already have a clean height map you don’t want to re-bake
  • You’re layering fine grain (pores, hairline scratches) on top of an existing normal

Combining them — the layering trick

You can stack a bump map on top of a normal map for very fine grain. The normal handles the main surface shape; the bump adds dust-and-pores detail that would be wasted at normal-map resolution. Implementations:

  • Blender — the Bump node has a Normal input; chain them.
  • Unreal Engine — use the BlendAngleCorrectedNormals material function.
  • Unity — sample a normal from a bump (via NormalFromHeight) and add it to your main normal.
  • Three.js — use both normalMap and bumpMap on a MeshStandardMaterial; the shader blends them.

Bump → normal: every modern engine does the conversion

Plug a bump map into Unity, Unreal, or Blender and internally it gets converted to a normal map at shader time. You’re paying the cost of the conversion every frame instead of paying it once at bake. For a single material it’s negligible; across a scene with hundreds of bump-only materials it adds up.

Bake it once with the right tool and you ship a normal map. CraftPBR’s normal map crafter does this in the browser — drop a photo or height map, get back a tangent-space normal map with proper Y convention for your engine.

Convert any image to a normal map
Craft normals, AO, roughness from a photo or text prompt. Free. In the browser.
Open Studio →

The OpenGL vs DirectX gotcha (applies to both)

Whichever map you ship, the green channel convention applies. OpenGL expects Y up; DirectX expects Y down. Blender and Substance Painter default to OpenGL; Unreal expects DirectX; Unity lets you pick. If your surface looks lit from the inside out, flip the green channel. (See the full normal map guide for the long version.)
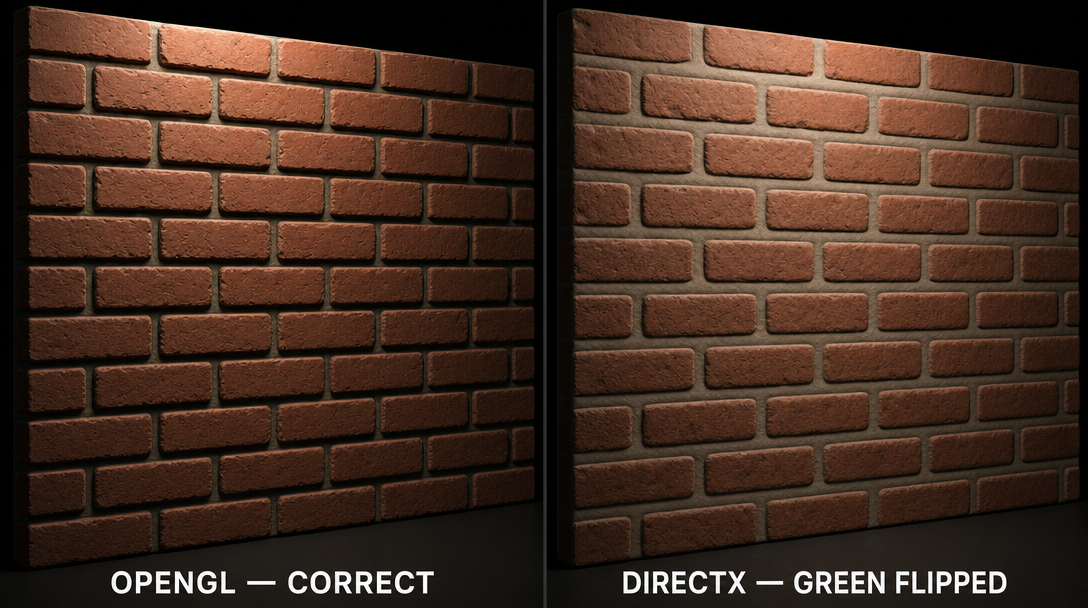
Same brick wall normal map rendered under OpenGL convention with raised bricks and under DirectX convention with dented bricks — illustrating the green channel flip
Identical normal map, two conventions. Left: bricks raised correctly (OpenGL). Right: same map read as DirectX — bricks dented inward.

Key takeaways

  • Bump = greyscale height; normal = RGB direction
  • Normal maps look right at every angle; bump maps flatten at glancing angles
  • After compression the memory difference is rounding error
  • Use bumps for fine grain on top of a normal — they layer beautifully
  • Every modern engine converts bumps to normals at shader time, so you may as well bake the normal once

Frequently asked questions

What is the difference between a normal map and a bump map?

A bump map is a single-channel greyscale image — every pixel stores one number for height. A normal map is an RGB image where every pixel stores three numbers that point a direction in 3D space. Same job, but a normal map carries three times the information per pixel and lights correctly at glancing angles where a bump map breaks down.

Is a normal map better than a bump map?

For modern PBR work, yes. Normal maps look more accurate at every angle, plug into every PBR pipeline, and are the default in Unity, Unreal, Blender, Godot, and Three.js. Bump maps are still useful as a quick stand-in or for very fine detail when you don't have a normal map handy, but if you're shipping a PBR material today, you want a normal map.

Can you use a bump map and a normal map at the same time?

Yes, and it's a common trick. Use the normal map for the main surface detail and stack a low-strength bump map on top for very fine grain — skin pores, hairline scratches, brushed-metal striations. In Blender's Principled BSDF, the Bump node has a Normal input that mixes them. In Unreal, plug both into a BlendAngleCorrectedNormals function.

Do bump maps work in Unity, Unreal, and Blender?

Sort of. All three accept a greyscale height/bump map, but internally they convert it to a normal map at shader time. Unity's Standard Shader has a "Height Map" slot that's effectively a parallax bump. Unreal converts bumps via a Bump Offset or NormalFromHeightmap node. Blender's Bump node does the conversion live in the shader graph. The renderer always ends up doing the maths on a normal map.

What is a tangent space normal map?

A tangent-space normal map stores its directions relative to the surface, not the world. That's why it works on any model — the renderer transforms each pixel's vector at runtime using the surface's tangent and bitangent. It's also why most normal maps look purple: a pixel that points "straight out" encodes as (0.5, 0.5, 1.0), which is light purple.

Does a normal map use more memory than a bump map?

At the same resolution, yes — about three times as much, because it's RGB instead of single-channel. A 2048×2048 normal map is around 12 MB uncompressed; a bump map of the same size is around 4 MB. After GPU compression (BC5 for normals, BC4 for bumps), the gap closes — roughly 4 MB vs 2 MB. On a modern card the difference is rounding error.

Can I convert a bump map to a normal map?

Yes, and it's the most common way to make a normal map without sculpting. Tools like NormalMap Online, Substance Designer's height-to-normal node, the Photoshop NVIDIA filter, or Blender's Bump node all read greyscale luminance and approximate the surface direction. The result is good for rough, matte surfaces; less good for anything shiny.

When should I use a bump map instead of a normal map?

Three cases. One, you're prototyping fast and just need a stand-in. Two, you have a high-quality height map already and don't want to re-bake. Three, you're layering very fine grain detail on top of a normal map — pores, hairline scratches — where the simpler greyscale is easier to edit. For everything else, normal map.